How to Print Screen on a Mac, 6 different ways to capture screenshot on a Mac
If you Googled “How to do Print Screen on a Mac,” you recently switched from Windows to a shiny Mac and have no idea where to find the “Print Screen” button, which is present on most keywords designed for Windows. There are some exceptions, but almost all Windows keyboards have the “Print screen” button somewhere. Unfortunately, there is no such button on your Mac, but it doesn’t mean that you can’t take a screenshot; you can, but the process is a bit more complicated harder to memorize but is much more flexible when it comes to output and what you are specifically looking to capture in a screenshot.
There are 6 (!) different ways to capture a screenshot on your Mac, 3 different approaches with 2 separate outputs for each, but I use only two. I call myself a heavy Mac user, and I have taken thousands of screenshots in the last year alone that are all published on these WordPress theme collections. I have no idea how many are there, but I am sure that at least tens of thousands of screenshots are all captured using macOS Monterey.
I originally decided to write this tutorial because dozens of people have asked how I have created all those screenshots on this website. I will leave this blog post as a reference to anyone asking the same question again.
Table of contents
How to Capture Print Screen on a Mac
1. Method (Capture Entire Screen)
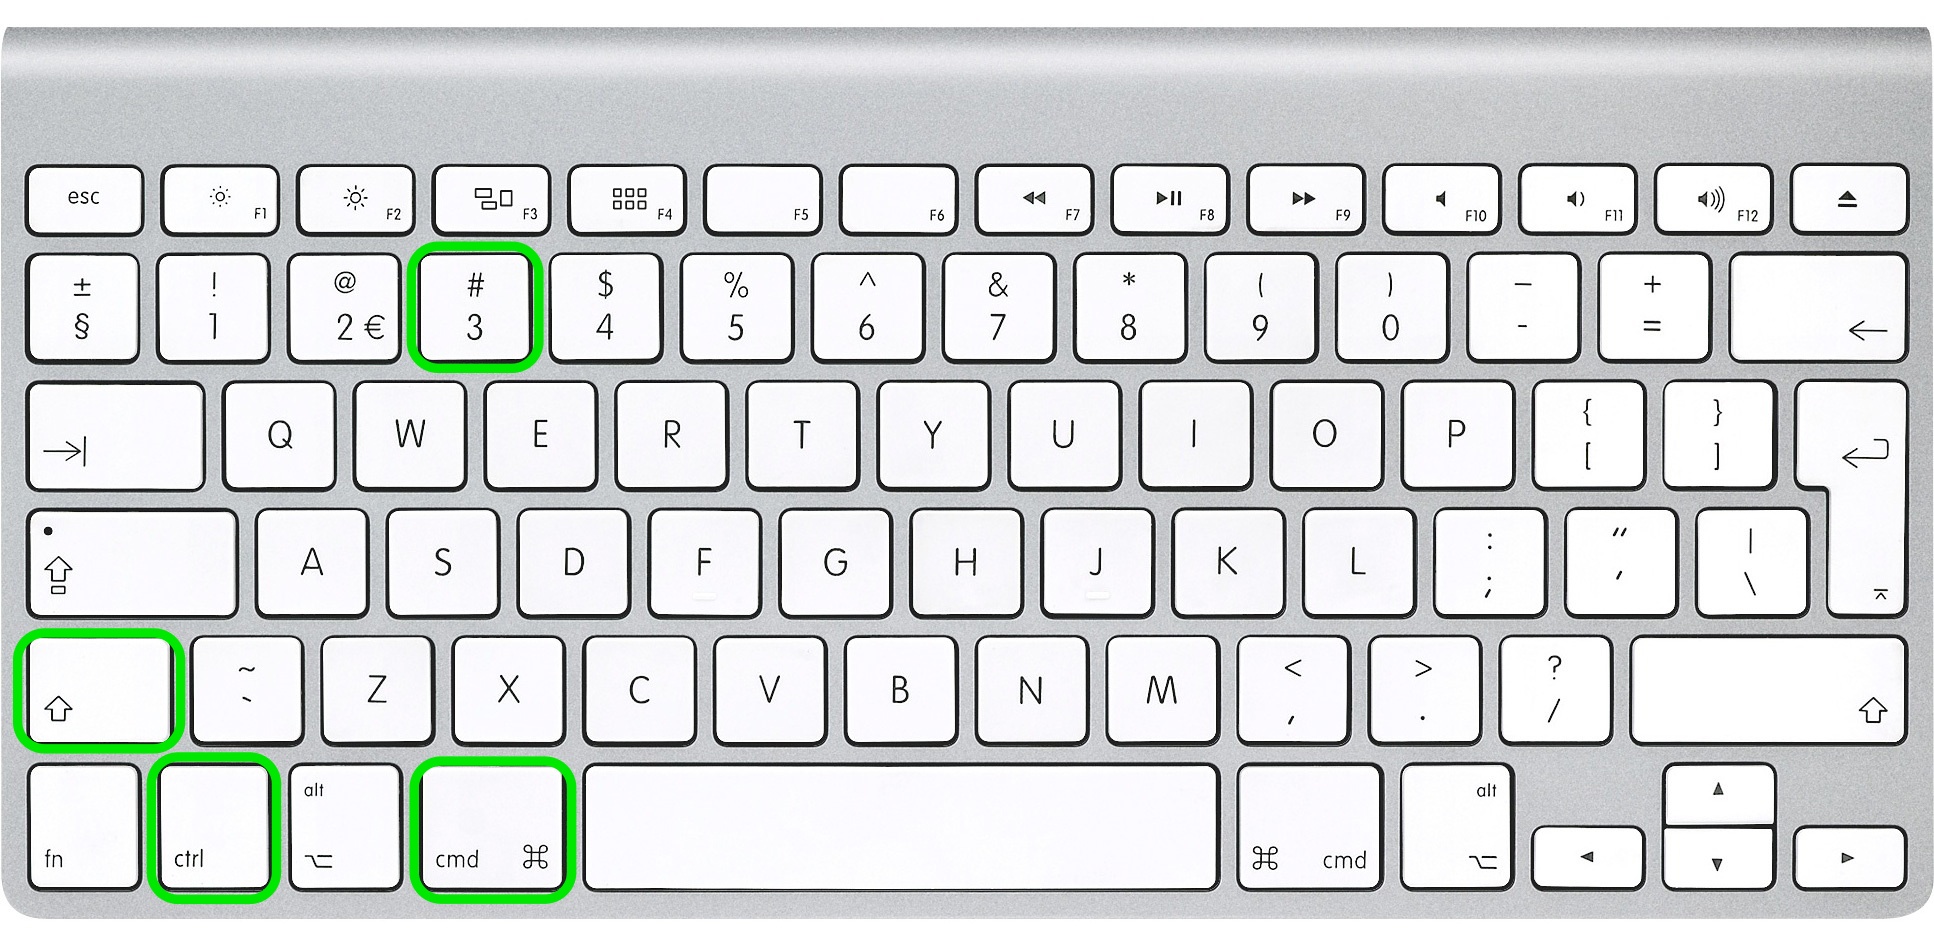
1.1 Capture the entire screen area and save it to the clipboard
Command ⌘ + Control + Shift + 3
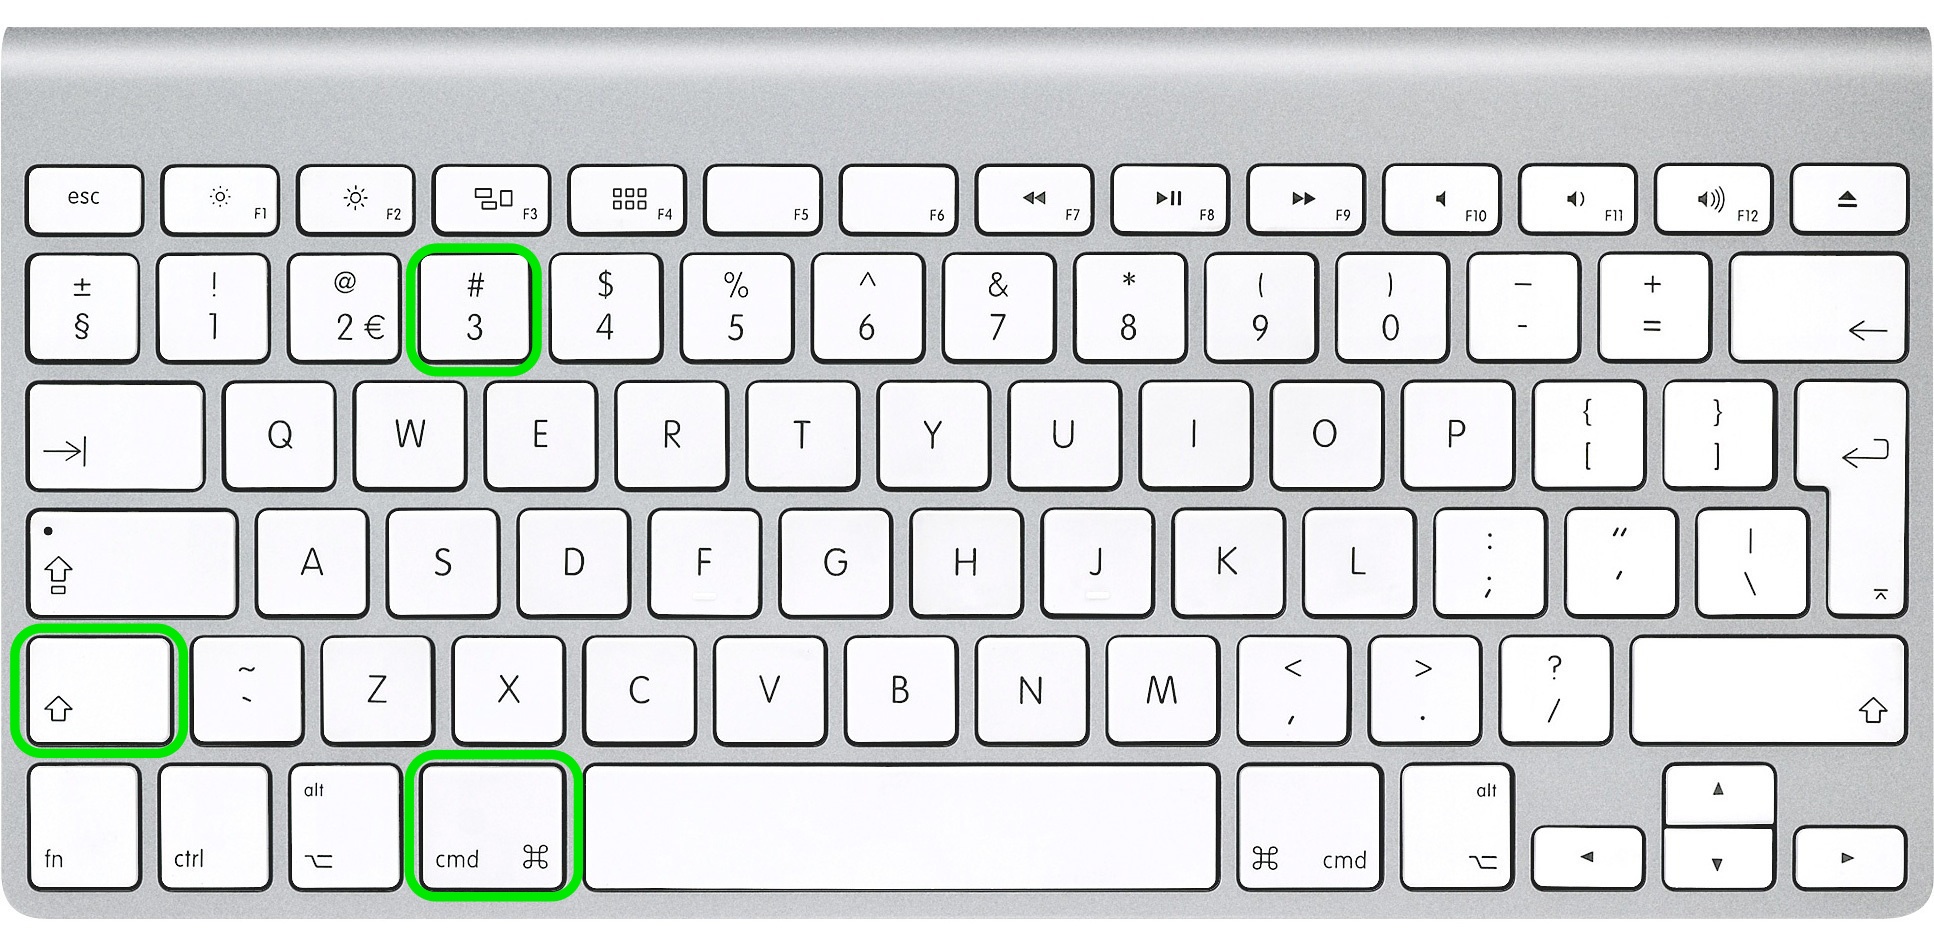
1.2 Capture entire screen area and save it to a file on your desktop
Command ⌘ + Shift + 3
2. Method (Capture Selected Screen Area)
This method will help you capture a selected area of our screen such as the menu bar, opened applications, some part of the desktop, some application window, or anything else. This is a slightly more “advanced” method, but it is beneficial to get used to it. I use this method a lot, but you have to repeat it to memorize and learn how to use it properly on your Mac.
2.1 Capture the selected screen area and save it to the clipboard for further use in apps
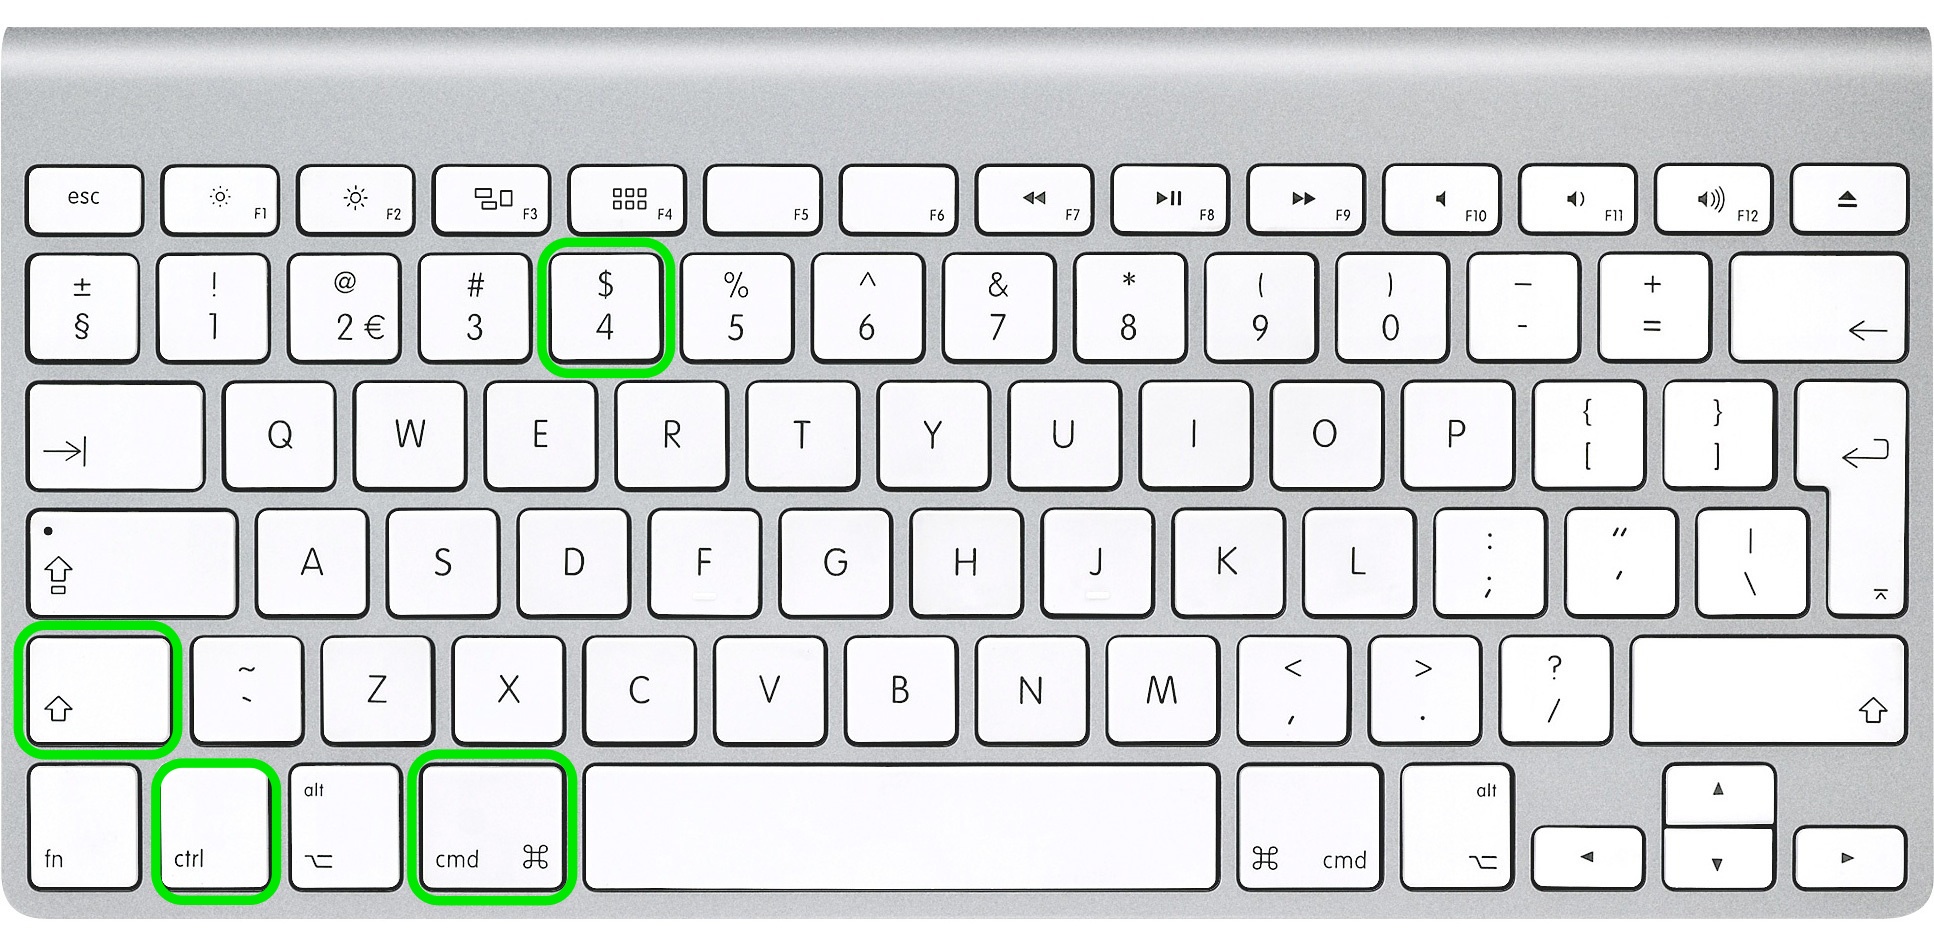
- Press the Command ⌘ + Control + Shift + 4 (for older Mac versions use Apple key ⌘+ Control + Shift + 4) all at the same time.
- You will notice that your mouse cursor changes to “+” with pixel coordinates on the right side
- Now click and drag a box around the section that you want to capture and release the mouse button when you are done
- Now screen capture is saved on the clipboard for further use in apps
2.2 Capture the selected screen area and save it to a file on your desktop

- Press the Command ⌘ + Shift + 4 (for older Mac versions use Apple key ⌘ + Shift + 4) simultaneously.
- You will notice that your mouse cursor changes to “+” with pixel coordinates on the right side
- Now click and drag a box around the section that you want to capture and release the mouse button when you are done
- Now screen capture is saved on a PNG file on your desktop (if not otherwise specified)
3. Method (Capture Particular App Window)
This method will help you save a print screen of a particular application window such as a web browser, Keynote, Pages, Numbers, or others.
3.1 Capture a screenshot of a particular app window and save it to the clipboard
- Command ⌘ + Control + Shift + 4
- You will notice that your mouse cursor changes to “+” with pixel coordinates on the right side
- Now with spacebar (that very wide button on your keyboard )
- Now click on the window you would like to capture in a screenshot
- The screenshot is now saved on your clipboard for further use in apps
3.2 Capture a screenshot of a particular app window and save it to a file on your desktop

- Command ⌘ + Shift + 4
- You will notice that your mouse cursor changes to “+” with pixel coordinates on the right side
- Now, with a space bar (that wide button on your keyboard )
- Now click on the window you would like to capture in a screenshot
- The screenshot is now saved on a PNG file on your desktop (if not otherwise specified)
As I said, there are 3 methods with 2 different outputs, and we have covered them all. Please let us know if you have trouble with these methods in the comments below.
You don’t need to memorize all these methods and the best solution here is to find the one or two that you like the most and practice for a while to memorize the theme. If you think that you will forget, make sure to bookmark this page for further reference.
Change the File Format Your Mac Uses to Save Screenshots
If you did try to use some of the methods mentioned above, you might have noticed that screenshots are saved as PNG files. Using this file format is usually okay because you will get the best image quality. Still, if you use a MacBook Pro Retina or some other 4K monitor, you will notice that screenshots can be as large as 5-8MB, which is unacceptable for sending several such files via email.
There is a solution for this: You can change the default file type for screen captures using a simple terminal command. Every installation of Mac OS X includes the Terminal, which you can find in Applications -> Utilities. Or use search to find “Terminal” faster.
This OS X function supports most major image formats, including PNG, PDF, GIF, TIFF, and JPG. We’ll go with JPG since that is common and will output a smaller image size than the default PNG.
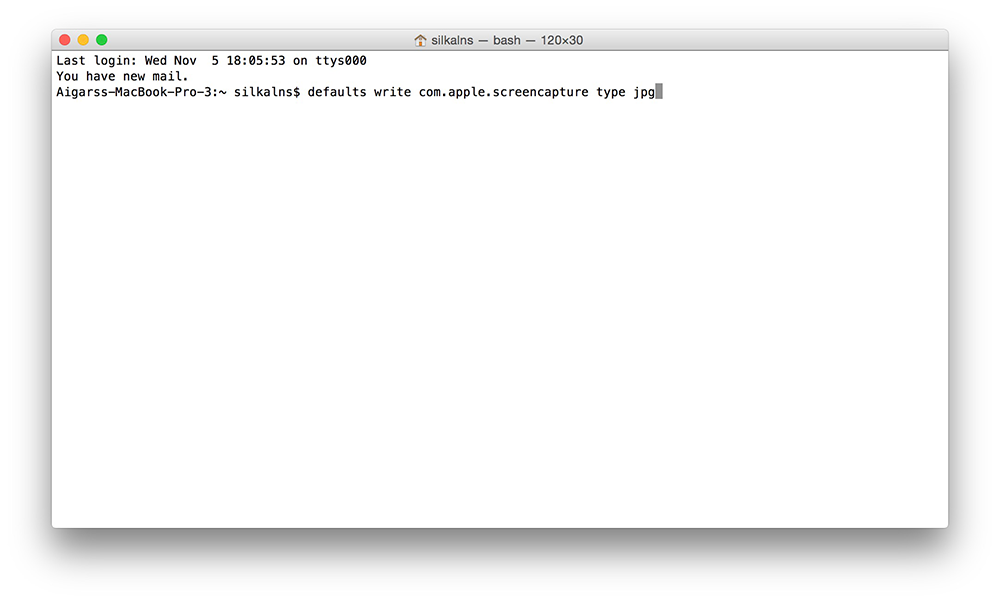
Now that you have Terminal opened copy/paste this command and hit enter (return):
defaults write com.apple.screencapture type jpg
You might have to input your Mac user password; if so, do it.
These changes will take effect after the next restart, but you can use this command to make these changes instant. Again copy/paste this command in the Terminal window and hit enter (return).
killall SystemUIServer
Screen captures will now be saved as JPG files. To change back to PNG or any other file format, repeat the process, setting ‘png’ or different as you type in the first Terminal command.
If you are looking for the original image of the Mac keyboard we used for this tutorial, you can download it from here.
More information
It has been ten years since we first published this tutorial, and over time, it has been viewed by several million users. We are glad you found it helpful and have shared it many times on social media. This tutorial is still up to date, and nothing has changed since.
Since then, we have grown a lot and now offer mockups that might be useful if you are a designer and want to combine them with screenshots you have taken using the above methods. Since there are too many mockups to list them in a single line, we are presenting them in a beautiful list:
Why do we even mention mockups here? Because we combine mockups with Mac screenshots to make product presentations such as these.
Related Posts


for entry: 3.2 Capture a screenshot of a particular app window and save it to a file on your desktop
this appears to cut off at the currently visible screen. So it doesn’t take a screen dump of the off-screen part of an app.
Joris,
Yes, that’s how it works. There is no other combination in Mac that would help you with process and you have to look for some 3rd party apps. For screen capture I use browser extension called Awesome Screenshot and it is available for Chrome, Firefox and Safari. It works only in web browser but I believe there might be some other app specific solutions available for other apps as well.
To capture contents that are off the screen, you can use Snagit. It has a scrolling window screenshot mode which enables you to capture all the contents in a scrollable window.
Shift+Command+4 and Spacebar
My MAC has lost its ability to capture print screens. Any troubleshooting tips you can offer? I updated to El Capitan, but this did not correct the problem. I used to be able to print screen with no problem.
Teri,
Make sure that all necessary keys on your keyboard are working fine and try to use different print screen methods to see if others methods does anything. Also make sure that print screens aren’t saved elsewhere because it is one of few things that you can tweak for Mac. For example all my screenshots are saved directly on Dropbox inside Screenshots folder as I have defined it.
This information is great, but what do I do when none of these will work — no print screen saved anywhere?
Please help. I’m running El Capitan on a 27″ iMac.
Brad,
Does your screen flashes and makes this print screen specific sound? Or it doesn’t do anything?
There haven’t been any changes in EL Capitan or even the latest 5K iMac in this process and it works just fine. In fact I have the same setup.
I have the Imac and this is not working for me either.
Ruth,
I am using an 5k iMac and it does work for me. 🙂 Also on 15″ Retina MacBook Pro and on 12″ Macbook using various keyboard including Apple Magic Keyboard and Logitech K810 and K760.
What keyboard layout, language and what exact keyboard do you use?
CTRL + Shift + F14
Hmmm, I’ll risk being called a luddite, but I DO miss the super simple single “Print Screen” key. Still.
Monika,
You are definitely not alone 🙂
I am not sure why Apple decided to go this route but I believe that this must be something with “Think Different”, mantra or Microsoft holds some patent of some sort for this functionality. I have no proof for that but I see no logical explanation why we should use so complex keyboard shortcuts.
I have stopped an image from a dvd e followed your advice, but the result is a gray screen. Please help.
Anabela,
I have never tried to capture a print screen from a DVD and don’t have an option to test it since I have no DVD’s anymore. However, it should work exactly like on any other app or service.
I have the Imac and this is not working. Please share usefull posts.
Luke,
I am more than certain that these methods works. Maybe you have a different kw layout or different language for your keyword but it is more than unlikely to make a difference.
Sometimes I found some reasons to hate mac for their shortcuts, I just use it for my designing works.
Here’s a different twist on the need for a “PrintScreen” key. On a Windows PC, I use a vintage program called Printkey2000. It’s a RAM resident program that’s triggered to capture by pressing PrintScreen. I used MAC’s Bootcamp to install Windows 7, then 10, on my MacBook Pro. Printkey can be made to work in a kludgy way on this MAC “maverick” but a simple keystroke would be great to use instead. Any suggestions?
Any idea how to take a screenshot of the keyboard viewer, which shows the layout of the current keyboard? When you press the command key, the keyboard viewer reverts to showing the QWERTY layout for some reason, which defeats any attempt to capture an image of the keyboard layout. All the screenshot keyboard shortcuts I’ve heard of use the command key.
super way to guide and take the print screen from mac thanks for sharing amazing information
I also have a 27″ Mac Pro, 2009, updated to Sierra,10.12.4. When I first got it, it indefatigably copied or printed each and any. Since I started updating not only have I lost the prt / copy scr feature, I have also lost an App dedicated to various kinds of scr copy / print, usw.
Any help would be appreciated. Steve 5/13/17
I’ve got a screenshot now if I want to edit it what should I do
Stella,
You can use any image editing software. My personal favorite is Photoshop but any other will do just as well.
Awesome and very helpful. I found the article useful for taking print screen on Mac.
Is it possible to change the graphic format of a Shift+Control+Command+4 screen grab? I find the file size of the images too large.
Thank for the wonderful post information, very useful guide helped me a lot.
I have installed windows 10 on my MACbook pro, and there is no print screen button, kindly help how to print screen
Shift + fn + F11
or
Shift + fn + option + F11 and then paste it in Paint or other photo editor and save it.
After reading the article I find out the few more steps two capture screenshot helpful for increasing the knowledge. if any of them is not working then what?
It just can’t be. Either you have broken your keyword or have changed keyboard layout somehow via some software.
The Pint Screen command key in Windows was always useful and its a shame it has not been ported into macOS
For many years I have been using macOS and have used a little app called SnapNGrab which is very useful to have but I do long always for a simple Print Screen specific key.
I have been investigating to see if a key on my international Mac keyboard that I dont use could be re-mapped to produce the standard Print Screen shortcut but as of yet I have not been able to do that.
Does anyone else have any ideas on this please as I even after 30 years of using macOS still can not remember all the shortcuts needed. I literally fly around the internet and want to hit one key instead of having to use both hands to replicate one of the most simplest methods of grabbing a screen
Thank you.
Neil.