How to Setup a WordPress Newsletter with MailChimp
MailChimp is one of the very best newsletter software on the planet. MailChimp enables you to create highly engaging newsletters with stunning visuals, launch various campaigns, track them effectively, split test, and measure ROI. It’s straightforward to use and has tons of customization features.
I’ve used several other newsletter services before, but MailChimp has one of the most intuitive user interfaces. Most importantly, MailChimp is free for email lists with less than 2000 subscribers.
In the previous article, we discussed the benefits of a newsletter and today, we will learn how to set up and configure a newsletter service in WordPress using MailChimp. Before we begin, look at a few best practices for this (and most) tutorials.
- Avoid using a live WordPress installation. By that, we mean don’t use the actual WordPress site online with incoming visitors, experimenting with a tutorial. Managed WordPress hosting companies like WPEngine offer a staging area, essentially replicating your live WordPress site, designed to run experiments and try out tutorials.
- Similarly, don’t use unsolicited emails to execute experimental/dummy email marketing campaigns. Why? Because unsolicited emails tend to end up in the receiver’s Spam/Junk mailbox. If you mention you brand name in the mix, you lose reputation. Therefore, it is recommended to use email addresses that are owned or operated by you.
How to Create a New Email Newsletter Campaign in MailChimp?
We need to create a new MailChimp account to get started.
- First we will create a new email list for people to subscribe. When a visitor subscribes to the list, their email address will be added.
- Next we’ll create a subscription form, or “newsletter box” using which people can subscribe to the email list.
- Once you have one or more list subscribers, you can compose your email and send it across. MailChimp will give you details insights into your email campaign, including email open rates, link click rate, etc.
- Finally, we will integrate the email subscription form into our WordPress site.
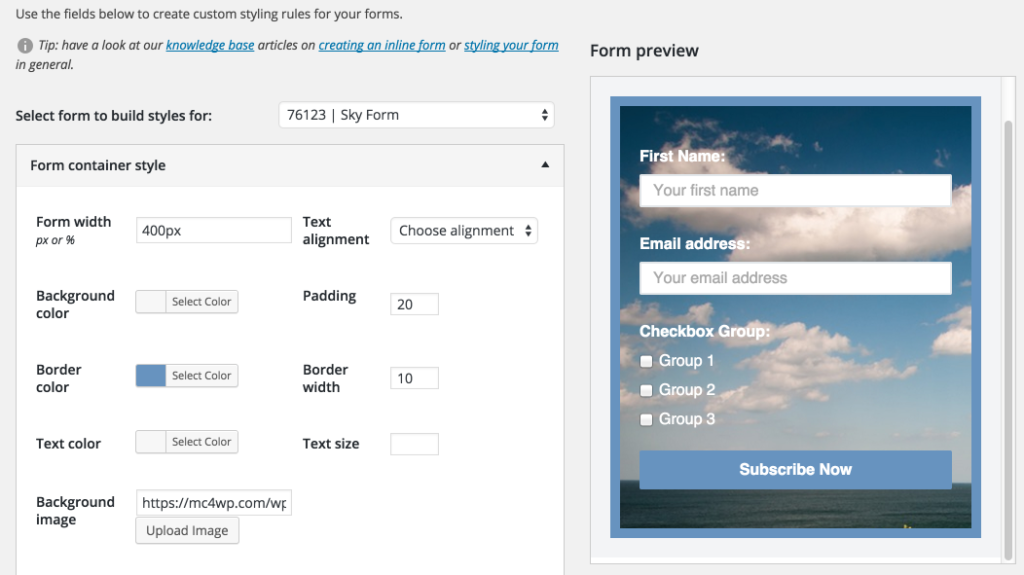
I’ve used a few screenshots to explain all the processes quickly.
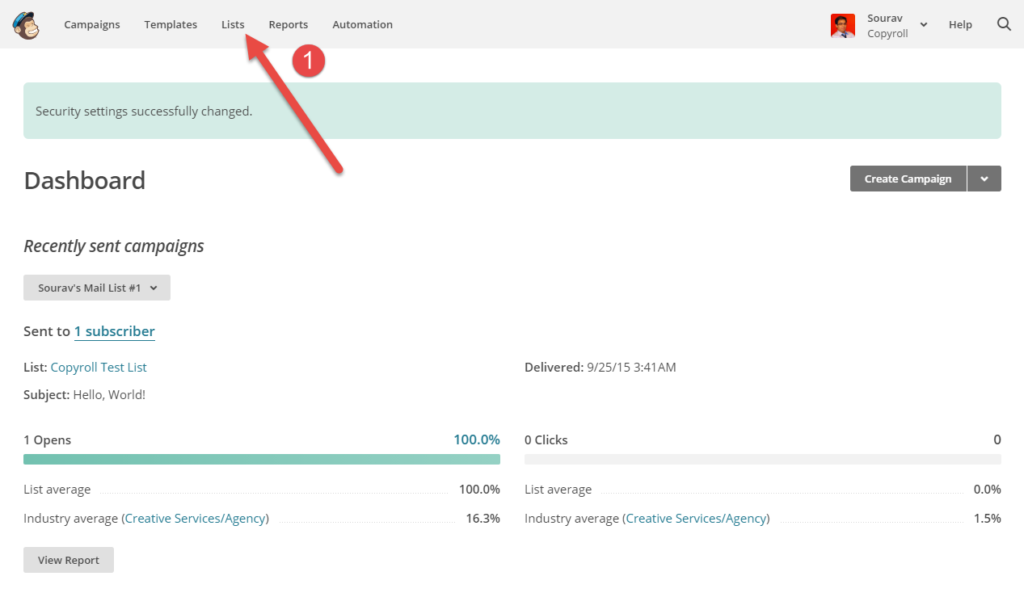
Screenshot 1: This is your MailChimp dashboard. As you can see, I already have a list created. We will begin by creating a new list. Select List option from the top menu bar.
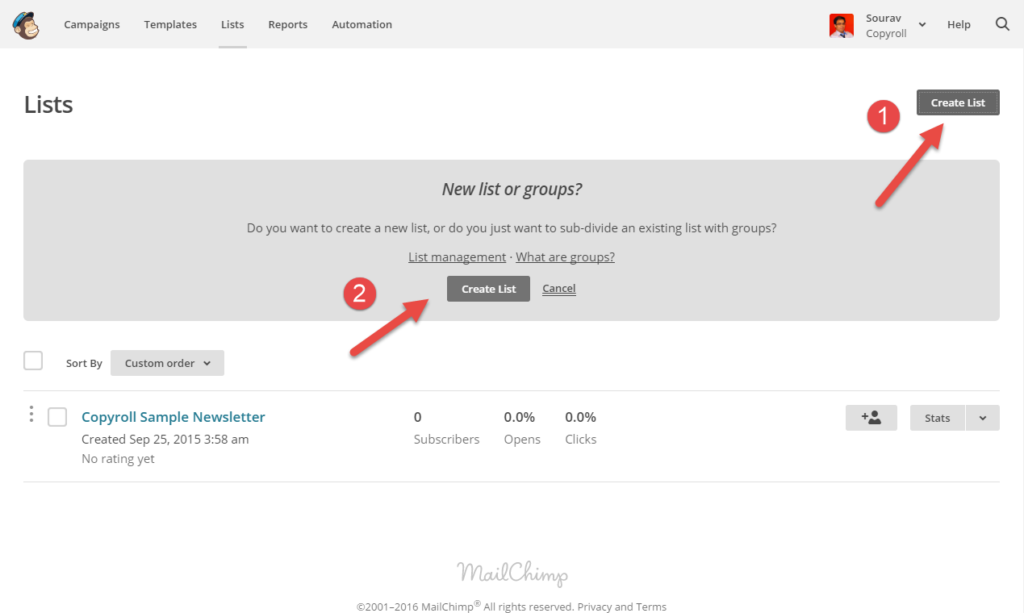
Screenshot 2: The Email Lists page shows all the lists you’ve created in your MailChimp account. You can create a new list from options 1 or 2, as shown in the screenshot.
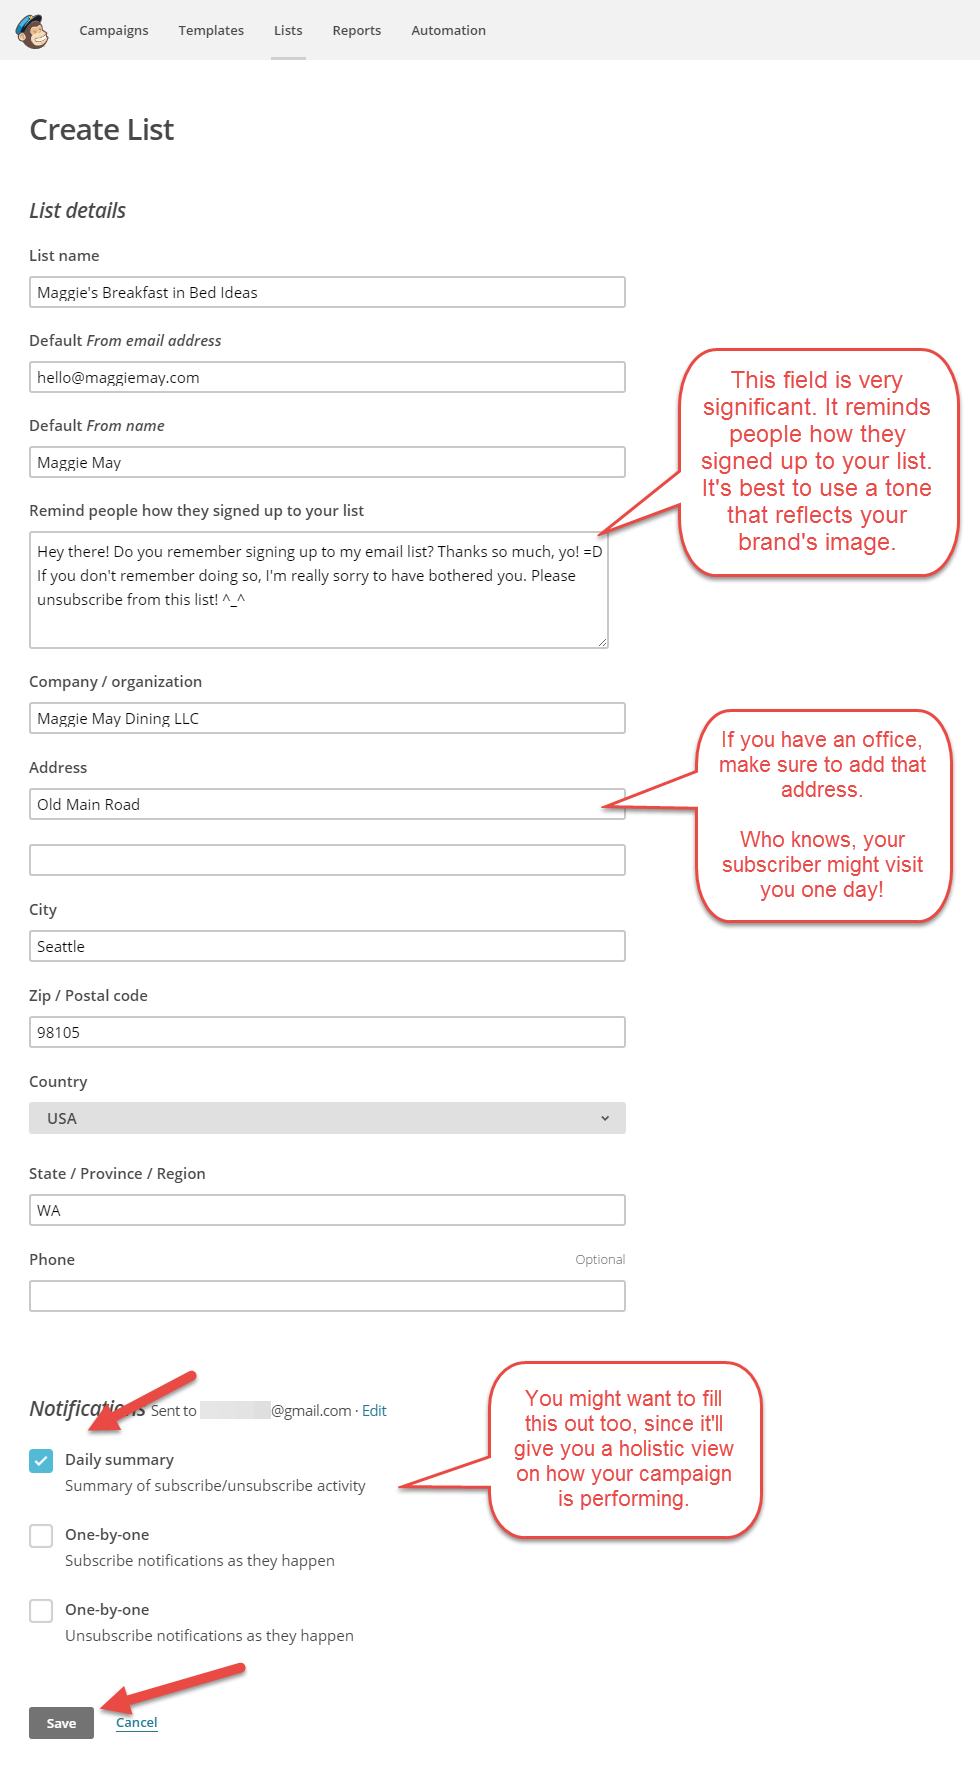
Screenshot 3: This page contains the basic information about your list, such as sender’s name, email address, address, etc.
An essential piece of info that deserves your attention is the one that reminds the subscriber why they are receiving the email. The copy used in that section must reflect your brand’s message. You can also configure the notification options for individual lists.
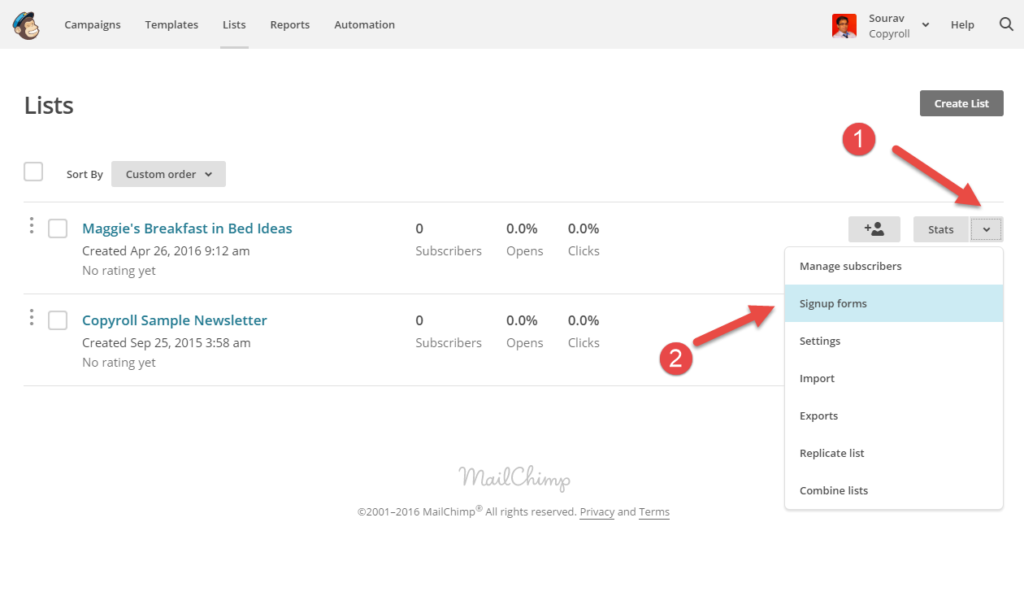
We’ve created a list called Maggie’s Breakfast in Bed Ideas (apologies for the silly name). Screenshot 4: Once you’ve created the list, it’s time to create a signup form for the same. Navigate to Signup forms as shown in the screenshot.
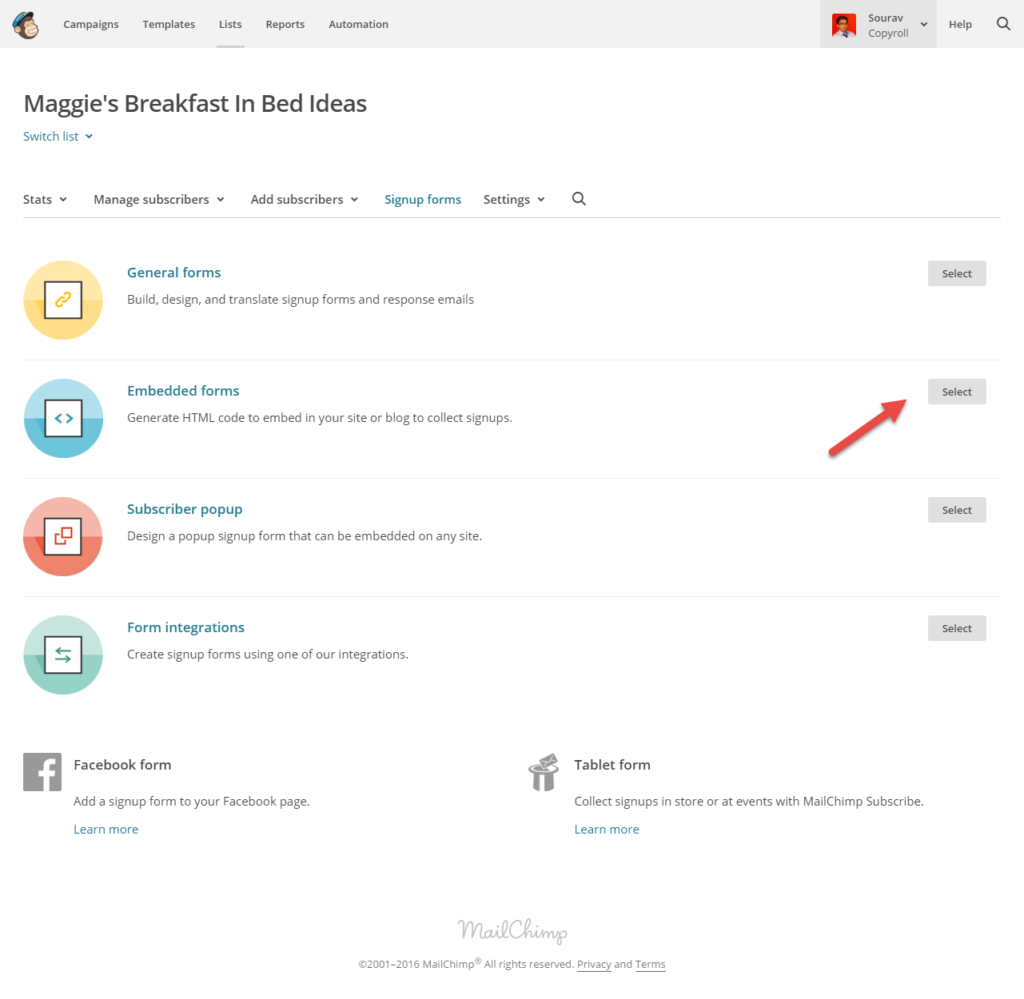
Screenshot 5: This page lists the various types of forms that can be created for the list. As we’ve mentioned, we’ll complete an embedded form and integrate it into a WordPress text/HTML widget.
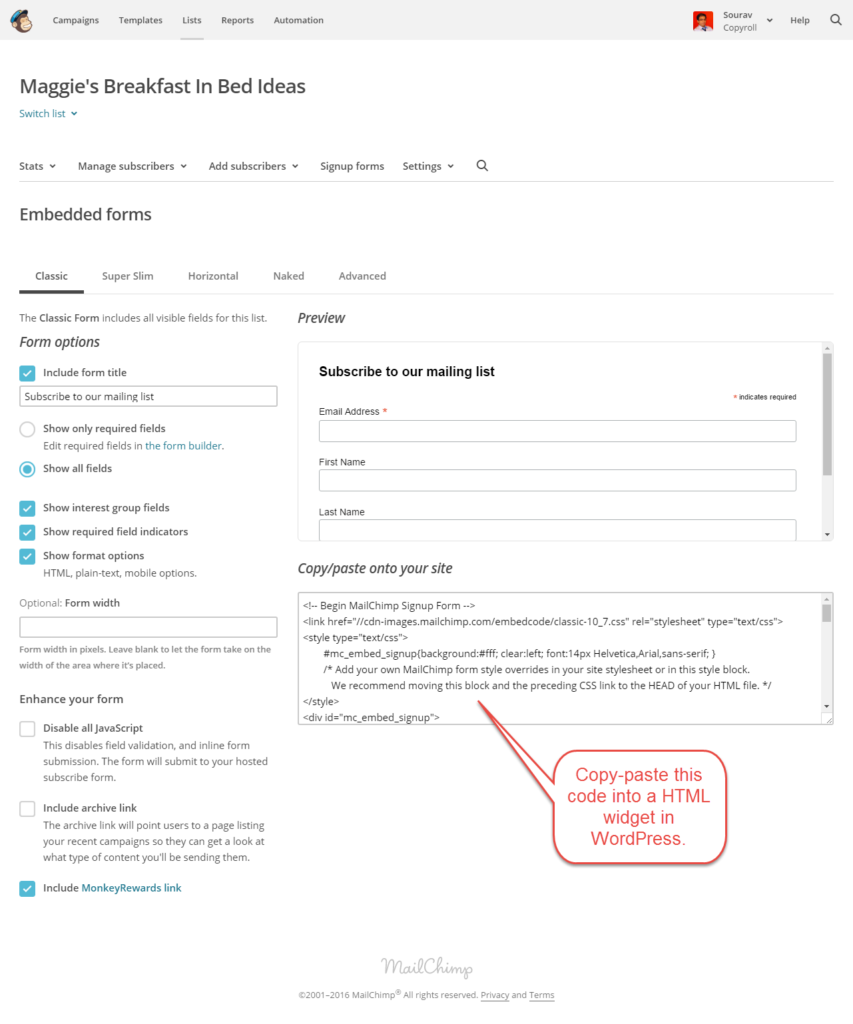
Screenshot 6: You can customize the fields of the signup form and include details like the subscriber’s name, contact number, etc. Once done, we are ready to copy-paste the HTML code into our WordPress site.
Karma Tip: If you notice, I’ve selected the Include MonkeyRewards link checkbox. This places a small “Powered by MailChimp” message at the footer of your emails. Since we’re getting such an amazing service for free, it is good karma to return the favor.
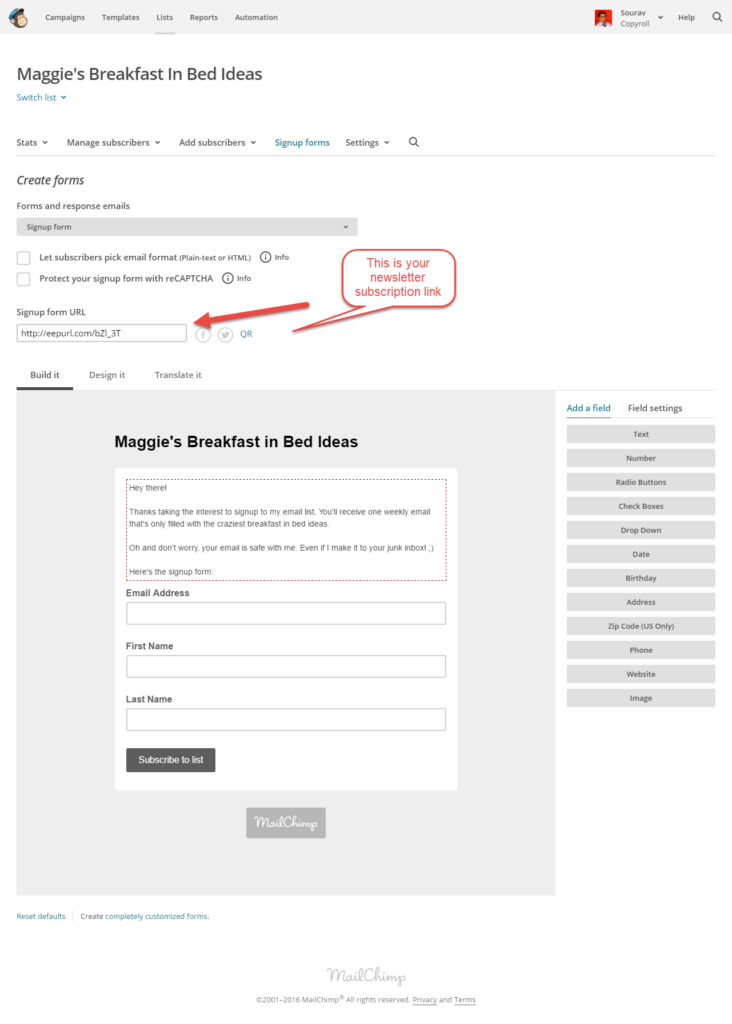
Bonus: MailChimp also allows you to create HTML forms where people can visit the link to subscriber to your newsletter. Once the form is designed, save the changes and use the signup form URL to allow visitors to subscribe to your newsletter.
Add MailChimp Newsletter to WordPress Widget
Log into your WordPress dashboard and navigate to Appearance > Widget. In this tutorial, we’ll place the widget in the sidebar. You can place it anywhere you like.
Pro tip: if you theme supports in-post or after-post widgets, place the signup forms accordingly to increase your newsletter signups.
- Select a Text/HTML widget and drag-drop it in a widget holder, which is our case is the default WordPress sidebar.
- Copy-paste the HTML code in the widget, add a name to it and hit Save.
That’s it. Your MailChimp newsletter subscription box is now ready.
Setting up MailChimp in WordPress using Plugins
So far, we’ve done things the old fashioned way. However, we almost forgot about the power of WordPress plugins. You can do all the steps described earlier and much more using the MailChimp WordPress plugin.

Here are some features of the plugin:
- Connect with your MailChimp account in just one click.
- User friendly & mobile optimized sign-up forms.
- After subscribing to your newsletter, redirect users to a “thank you” page.
- Built-in integration with Contact Form 7, WooCommerce and many other plugins.
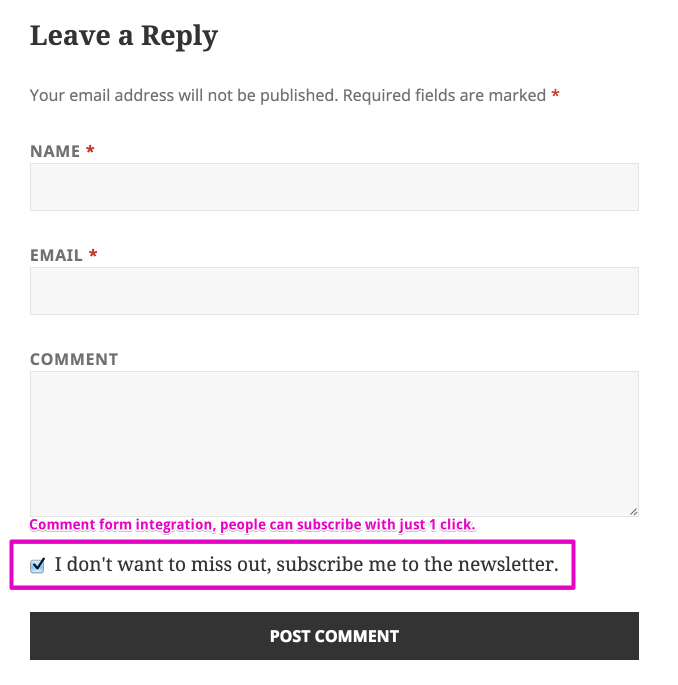
Using the plugin, you can also add the newsletter sign-up option in a comment and registration forms, posts, pages, sidebar, and footer. Oh, and did I mention that the plugin is free?
The paid version of the plugin includes a detailed CSS editor and form designer (something you can do at the MailChimp portal) and detailed analytics (also available at the MailChimp portal). However, with this plugin, you get the consolidated data in your WordPress dashboard.
Conclusion
Here’s a summary of what we’ve covered so far:
- Why is MailChimp the best option for new businesses?
- How to setup a MailChimp marketing campaign?
- Add a newsletter signup service to WordPress using a simple widget
- Features of the MailChimp for WordPress plugin
Creating an email list right from day one is important for your online venture. Ensuring that you have a content marketing strategy to execute email marketing effectively is equally important. It’s all about delivering value to your user.
Related Posts


The website is under development as a WordPress site.
How can the Newsletter be written and user selected wordpress blogposts be inserted into the ‘Mailchimp’ newsletter ?
Regards Robert