How to Fix the Internal Server Error in WordPress 2023
If you’ve ever encountered sporadic errors in your WordPress site, you’ve come to the right place. WordPress errors can be quite infuriating, but there’s always a way to overcome them – and in most cases, a several different solutions exist.
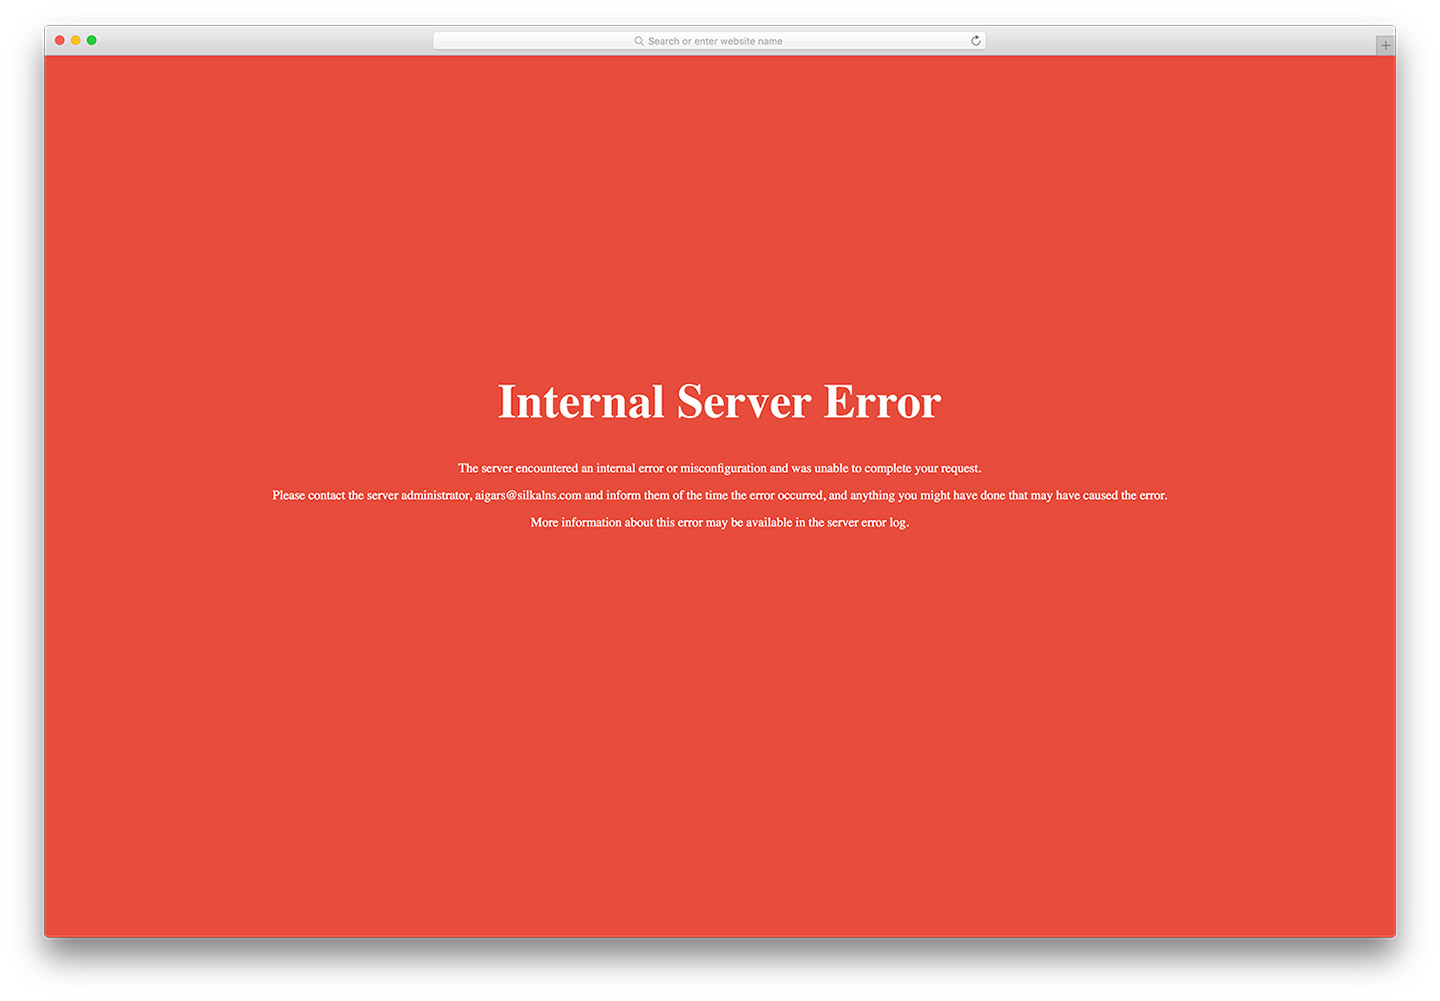
Some users find that on trying to access their WordPress admin panel, they’re presented with an internal server error that goes something like this:
The server encountered an internal error or misconfiguration and was unable to complete your request.
This particular error has people racking their brains to figure out what’s wrong with their site and how to fix it. In this article, I’ll go over a few simple solutions you can try to diagnose and resolve the error.
Let’s get right to it!
How Does This Error Occur?
As the name suggests, internal server errors aren’t WordPress-specific errors. They can occur due to a fault with other services and software running on the same server as your WordPress site. Assuming you’re hosting on a shared server, internal server error in WordPress is more common than you might think.
The error itself and the message it displays is not specified at the very least. There’s practically no way of discovering exactly how the error came from reading the internal server error message. However, when this error occurs on a WordPress site, we can narrow down its causes to:
- Functions of themes.
- Functions of plugins.
- Corrupted .htaccess files.
- PHP memory limit reached.
More often than not, users will be trying to access their WordPress admin area when they encounter an internal server error. In such cases, it’s common for the rest of the website to work as usual while access to the site’s admin area is restricted.
Now let’s look at a few ways we can fix this issue.
How to Fix the Internal Server Error
As discussed above, there’s no real way of finding out exactly what’s wrong with your WordPress site and why it’s giving an internal server error every time you try to login to the WordPress admin area.
It is common sense to take a method and try it. If it fails, admit it frankly and try another. But above all, try something. – Franklin D. Roosevelt
As Mr. Roosevelt delicately puts it, we’ll apply the trial and error approach step-by-step to resolve this issue. If one method doesn’t fix it, move on to the next!
1. Ensure .htaccess File Works Properly
The first thing we’re going to do is ensure our WordPress site’s .htaccess file isn’t corrupt and is doing what it intended. Follow these simple steps to check for your .htaccess file’s status:
- Login to your WordPress site’s FTP client.
- Navigate to the File Manager under the Files
- Find your site’s
.htaccessfile and rename it e.g..htaccess_original - Try accessing your website and the WordPress admin area.
- If everything works fine now, navigate to Settings > Permalinks from your site’s Dashboard.
- Click the Save button.
By saving these settings, you’ll generate a new .htaccess file that contains the correct rewrite rules. These new rules guarantee that your site’s post pages don’t return errors when accessed.
If your .htaccess file was causing the internal server error, it should be fixed now. However, if you found the error was still in place on re-loading your site and WordPress admin area, move on to the next step in which we’ll show you how to increase your site’s PHP memory limit.
2. Increase PHP Memory Limit
If the internal server error persists after you’ve checked your .htaccess file, it could be because you’re hitting the memory limit. Often when this is the case, you’ll also come across an error that reads:
The uploaded file exceeds the upload_max_filesize directive in php.ini
when you’re trying to upload a file to your Media Library. Or perhaps it could be something more like this:
Fatal error: Allowed memory size of 1234567 bytes exhausted (tried to allocate 87654321 bytes) in /home/your-username/public_html/wp-includes/plugin.php on line 1234
Those who encounter this error every time you try logging into your site’s admin panel or uploading a file/image to your WordPress site can follow any of the following methods to increase the PHP memory limit. (Don’t let the codes scare you, I promise it’s not that hard!)
Editing Your wp-config.php File
By adding this one line of code to your WordPress site’s wp-config.php file, you can increase the memory limit to a more suitable value. I’ve increased it to 64M (M stands for megabytes) in the following steps.
- Login to your WordPress site’s FTP client.
- Navigate to your site’s root directory and find the
wp-config.phpfile. - Inside the
<?phptag, add the following line of code:
define(‘WP_MEMORY_LIMIT’, ‘64M’);This simple, one-liner is my go-to method whenever I have to increase the memory limit — it works every time!
Updating the php.ini File
If you have trouble finding the wp-config.php file, try looking for the php.ini file instead! This method goes a bit deeper into the memory limit by allowing you to increase several different values at the same time. Let’s take a look.
- Login to your cPanel and navigate to Files > File Manager.
- Find the wp-admin folder and locate your
php.inifile. (If the file doesn’t exist, create one by clicking on the New File button.) - Once you’ve found/created the file, open it and edit/add the following lines of code:
upload_max_filesize = 1500M
post_max_size = 2000M
memory_limit = 2500M
file_uploads = On
max_execution_time = 120- Save the updated file and clear your browser’s cache.
Editing the .htaccess File
Assuming you were unable to locate the wp-config.php file or the php.ini file you can always alter the old .htaccess file by adding a few lines of code at the bottom. This method always works for me!
- Login to your WordPress site’s FTP client.
- Navigate to the File Manager under the Files
- Find your site’s
.htaccessfile and edit/add the following code at the end of the file:
php_value upload_max_filesize 1500M
php_value post_max_size 2000M
php_value memory_limit 2500M
php_value max_execution_time 120
php_value max_input_time 120- Save the updated file and clear your browser’s cache.
If you’re still unsure about getting into your site’s core files and updating them for whatever reason, you can install the Increase Max Upload Filesize plugin to get the job done.
These changes are easy to incorporate and will hopefully solve the internal server error you’re experiencing. Once you’re done increasing the PHP memory limit using any one of the three steps outlined above, try re-loading your WordPress site and accessing the admin area.
If you’re still prompted with the error screen, get ready for the next step — things are about to get serious now.
3. Deactivate Your Plugins
At this stage, assuming you’re in for a lot of work is safe. There’s a high chance that the error is caused by a plugin installed on your WordPress site. Even plugins with great reviews and five-star ratings can be the root cause in this scenario. Here’s how:
- Scenario 1: The plugin isn’t compatible with your version of WordPress.
- Scenario 2: The plugin isn’t compatible with your theme.
- Scenario 3: The plugin isn’t compatible with another plugin you have installed.
Plugins extend and add to the functionality of your WordPress site. They’re fun to install, they save you a ton of time and make work super easy. The only problem is that they might end up causing errors — no matter how well they score. There is no pragmatic approach or a carefully laid out formula you can follow to avoid running into an internal server error with plugins. Ironically enough, finding such an error caused by a faulty plugin or plugin-theme combination is a trial and error technique!
To resolve this issue, you’ll have to deactivate all the plugins you installed on your site and then activate them repeatedly. Let’s simplify the process and give it some logical structure so it doesn’t seem as chaotic:
Using the WordPress Dashboard
The easiest way to deactivate all of your plugins is through your WordPress Dashboard.

- Login to your WordPress site’s Dashboard.
- Navigate to Plugins > Installed Plugins.
- Click the Deactivate link below each plugin.
However, if you can’t access your WordPress Dashboard, you can deactivate the plugins through an FTP client. Here’s how:
Using the FTP Client
Deactivating plugins using the FTP client isn’t as easy as through the Dashboard but it’s entirely possible.
- Login to your site’s FTP client or cPanel.
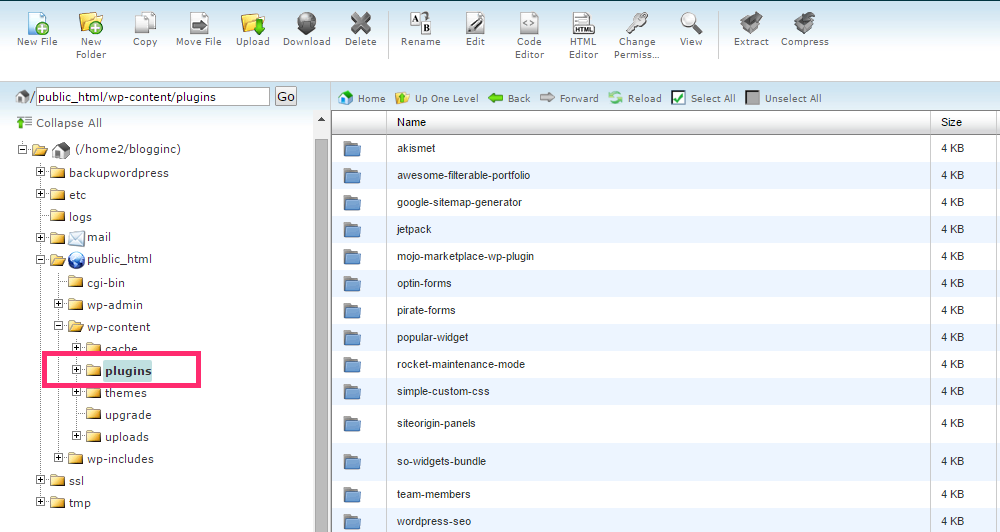
- Navigate to the
/wp-content/folder. - Find the plugins folder and rename it to deactivated-plugins.
Once you do this, all of your site’s plugins will be deactivate. This approach is much faster but requires you logging into an FTP client or the file manager provided by your hosting service.
Once you’ve deactivated all of the plugins using either of the above-mentioned methods, it’s time to go back to your WordPress Dashboard and activate them again.
- Login to your WordPress site’s Dashboard.
- Navigate to Plugins > Installed Plugins.
- Starting from the top, click the Activate link below the first plugin.
- Reload your site and admin area to ensure it still works.
- If your site and admin area work i.e. they don’t give an internal server error, continue to activate the next plugin.
- If your site or admin area crashes, you’ll know that the last activated plugin is causing the internal server error.
Once you find the faulty plugin, deactivate it again and report it to the plugin’s author, if possible, along with a list of plugins you have installed, the theme you’re currently running and your WordPress site’s version.
Note: It’s important that you re-activate all of your plugins one by one even after you’ve found the faulty plugin. It’s possible that more than one plugin caused the error due to incompatibility issues.
3. Contact Your Hosting Provider
Here you are seemingly all out of options to fix your WordPress site’s dreadful internal server error. What do you do when you can’t do something about it yourself?
If you recall, we started out by explaining what an internal server error is and stated that it occurs on the server level. At this stage, the best thing to do is contact your hosting provider and report the issue to them. Your hosting providers can access the server error logs on your WordPress site. They can go through the logs, identify when and how the issue occurred and hopefully do something about it.
There are a few things you should mention in your email to the hosting provider:
- Your website’s URL.
- When you first came across the internal server error.
- What you were trying to access when you encountered the error e.g. the website, the admin area, etc.
- The list of plugins you have installed on your site.
- The theme you’re currently running.
- The version of your WordPress site.
- How you’ve tried to rectify the problem yourself.
Between the information you give and whatever they find in the server error logs, you can rest assured that your site will be up and running without any errors in no time.
In the worst case, if they are unable to solve the problem, they’ll, at least, be able to offer you advice and suggest appropriate measures you can take to resolve the issue altogether.
Wrapping It Up
There you have it — three simple, sequential techniques you can adopt to solve the internal server error on your WordPress site. The internal server error is common in WordPress sites, especially if your site is hosted on a shared platform.
We provided three quick solutions to fix the error and depending upon the root cause, one of them should work for you. Hopefully, you’re better positioned to take things further and try the techniques explained in this article.
Have you ever encountered an internal server error? How did you fix it? Did any of the techniques we detailed above help you resolve the issue? Let us know in the comments section below!
A similar error you might cafe in WordPress is “error establishing a database connection” you can read more about this error on how ti fix it here.
Related Posts


Find the wp-admin folder and locate your php.ini file. <——– this line solved my issue
UPLOAD PHP.INI IN WP-ADMIN
Thank you!
I was having this issue all the time. It hasn’t happened again since I deleted any unactivated plugins & optimized my images using the EWWW Image Optimizer plugin. In fact, everything on my site is running much faster after optimizing.
Can you make a tutorial on how to become a
game hosting provider?
Riki,
It is a fairly simple thing to do but our website has a completely different focus and we have no plans on moving to game hosting related topics.
Thanks for this post , i did and fixed successfully for my site and it run again . Thank again and have a nice day , this is great post and saved my life !
Our server was down on the launching day of a massive survey. The error occurred following a WordPress update. Your step by step procedure saved the day! Updating the .htaccess file solved the problem.
For those that are using the bluehost server file manager, follow these steps:
1. Select “hosting” and “cpanel” menus on the top menubars once you have logged in (https://my.bluehost.com/hosting/cpanel).
2. Move down to the “files” section, four sections down, and click on the second icon called “File Manager”.
3. A “file manager setting” will pop up. Select the third option “Document root for” and the website you are looking to fix AND make sure to check the “Preferences” option “Show hidden files”. If this is not checked, you will not be able to find the .htaccess file.
4. Select the .htaccess file and click on “Rename” in the top menu. Give the file a new name such as .htaccess_backup.
5. Reload your WordPress admin page (usually the following URL: http://www.YOURSITENAME.ext/wp-admin).
6. On the left menu bar, select “Settings” and “Permalink” and then click on the blue button “Save changes”. This will generate a new .htaccess file.
7. Check your URL to see if your site works again. If it does, you can erase the .htaccess_backup file and you have solved your problem!
Wow, thank you. This really helped. I am moving live website backups to my computer to run in MAMP Pro. Each one has different issues. I had to do a lot of work to even get to the point of needing your help here. I couldn’t get to any page other than the first page and I couldn’t access the admin login page.
First, I moved .htaccess to .htaccess_original. Then, the part of deactivating plugins by moving plugins to deactivated-plugins did it. I had to remake the plugins directory and move one called w3-total-cache back in. Then it worked. I was able to login as admin and get to all of the settings. I first went to permalinks and saved. Then, I went to plugins. To make them accessible, I had to move them all back from deactivated-plugins to plugins. Now, I am going one by one to see what I can use.
Thanks again!