
How to build a directory website with WordPress – a step by step guide
Some so many tutorials and plugins promise to help you build a directory website with WordPress that it can be difficult to decide where to begin.
That’s why we created this step by step guide on building a directory website with WordPress. It is written by web developers who have helped thousands of others build their own.
We aim to make sure you can add all of the features a directory website needs as simple as possible.
In this blog, we used Toolset Directory to build our website. Check out our review of Toolset for more information about the plugins.
Step by step guide to building a directory website with WordPress
Here are the steps to building a directory website, which we will outline below:
- Decide on the niche for your directory website
- How to monetize your directory website
- Choose the best CMS
- Get a domain and hosting
- Choose a directory theme
- Choose the best plugins
- Create the features
Before you start building the features, we outline below, download your free WordPress test directory website, where you can practice adding everything as you read.

1. Choose the niche for your directory website
Before you start adding any features, picking the theme or web host you will need to decide exactly what you will list on your directory website.
There are a few things to consider here:
What would you be interested in listing:
Before you conduct any research, you must decide exactly what you would be interested in selling.
It’s one thing realizing that there is a market for a directory website that lists pets for sale but what if you are no animal fan and lack the basic knowledge in what people are willing to buy?
Of course, you can spend time researching and becoming an expert but this will take time which your directory website might not have.
A better approach will be to list areas that interest you and then narrow those down until you find a niche with a market that matches your interests.
What is there a demand for:
Now that you have your list of what you would be interested in selling, you can identify exactly what will sell.
The first thing to do is conduct keyword research and identify what users are searching for online. The best way to do this is by using keyword research tools such as Google Keyword Planner or Ahrefs.
Once you know which tool you want to use you can start researching the best longtail keywords you can target on your directory website. You will want search terms that will be fairly easy to rank for but will still have many people searching for them.
For example, imagine that after some research you have decided that you want to list restaurants in Chicago on your directory website.
The search term “Best pizza in Chicago” has around 13,000 monthly searches and has a low keyword difficulty – meaning it will be fairly easy to rank highly for it.
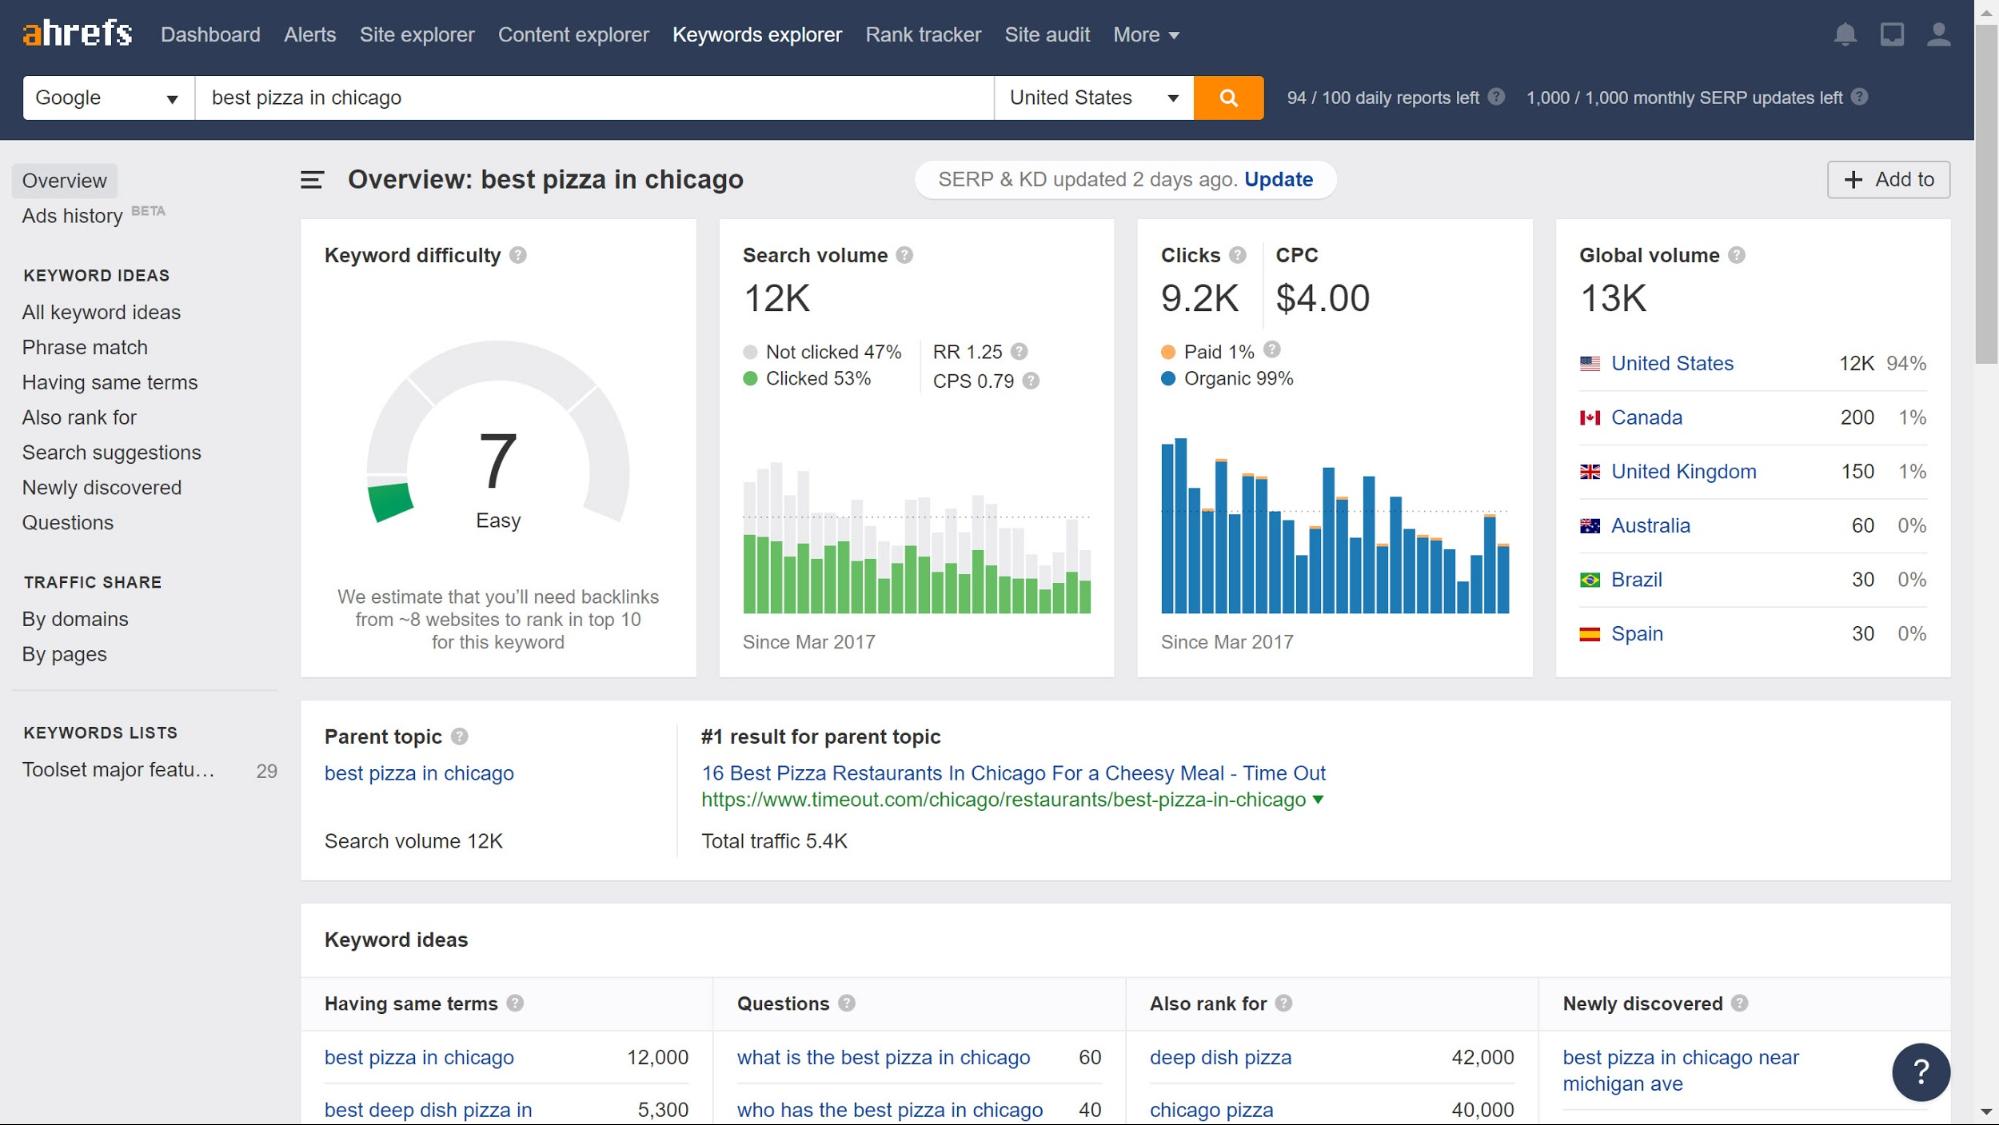
Once you have a list of similar long-tail keywords to this one on the same subject you know that there is a market for your type of directory website.
Check if there are already other directory websites in your area
While you might have a list of longtail keywords that you can target, you still want to research the competition.
If there are many popular directory websites already in your target market, it might be worth choosing another theme for your directory website.
Using our example for “Best pizza in Chicago” using Ahrefs, we can see which websites already rank highly for the search.
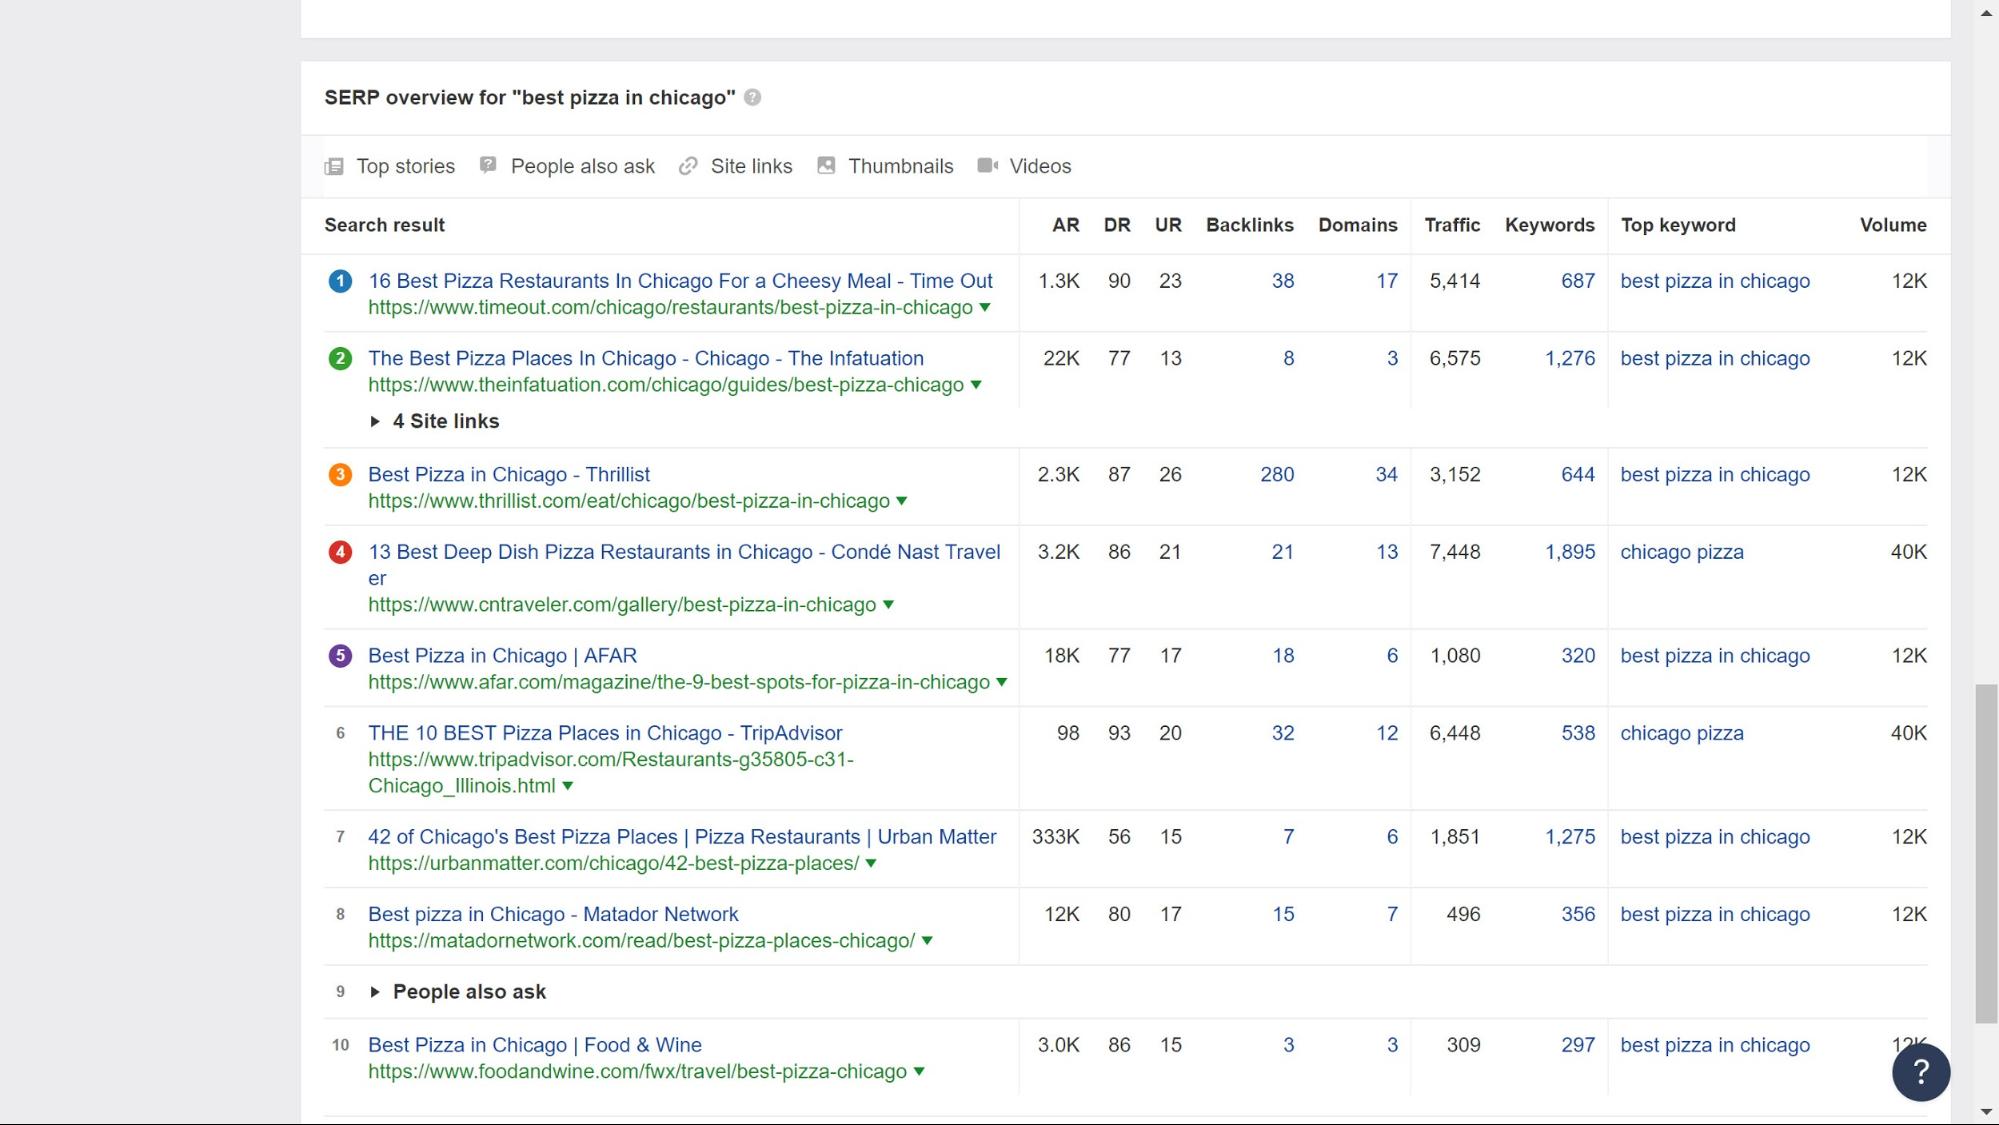
You can use Ahrefs’ rankings system to see how popular the websites are at the top of searches.
2. How to monetize your website
Now that you have decided what type of directory website you will be building comes an arguably even more important question. How will you make money from it?
Here are the three most common ways to do so:
1. Sell space for advertisers
As people start to regularly use your directory website you will be able to sell advertising space on there.
One of the best ways to ensure you get the most relevant ads for your clients is Google AdSense. To maximize your revenue, it will identify the best adverts and the highest paying.
2. Charge for listings
When sellers realize that your directory website is an effective place to list their products they will be more willing to pay for that valuable ad space.
As such, you can start charging for the right for users to sell their items.
There are many incentives which you can offer to make this a more attractive option:
- Create expiration dates for free listings – this will allow you to charge for premium users who will want their listings to be up indefinitely.
- Charge for featured listings – allow sellers to pay to see their listings at the top of searches.
- Allow affiliate listings – a number of items might have complementary products that users will want to buy. For example, if you’re selling shoes then your customers might want to buy shoe polish. You can find affiliate offers where you receive a commission if people buy products from your website.
3. Create a membership
As your traffic grows and you notice a steady stream of loyal customers you can create a membership system.
Your membership system can encourage users to sign up to access the full details of your listings or you can also hide the premium listings to guests.
Now that you have identified your directory website’s niche and how to monetize it we can get started with building the website.
3. Choose the CMS
There are many great platforms, but we recommend you build your directory website with WordPress.
WordPress is incredibly adaptive and works for websites with low traffic to websites that see millions of visitors each month, such as Colorlib.
WordPress has several other advantages:
- It’s the most popular platform with around one in three websites powered by WordPress.
- It boasts a strong community – WordPress has one of the largest Open Source communities of developers, designers and other website experts.
- It is a lot cheaper to build and run a website on WordPress than on the likes of Drupal.
- WordPress offers thousands of beautiful and responsive themes to choose from.
- WordPress also has a huge list of plugins to enhance your website.
- Without complex PHP coding, you can create nearly all the features you need for a directory website.
4. Choose a reliable web host
A good web host will be important, especially as your website’s traffic grows, further straining your web infrastructure.
Whatever web host you choose will have to handle sudden spikes in traffic, be reliable so you don’t suffer any issues with your site, and be able to ensure your website runs quickly for your customers.
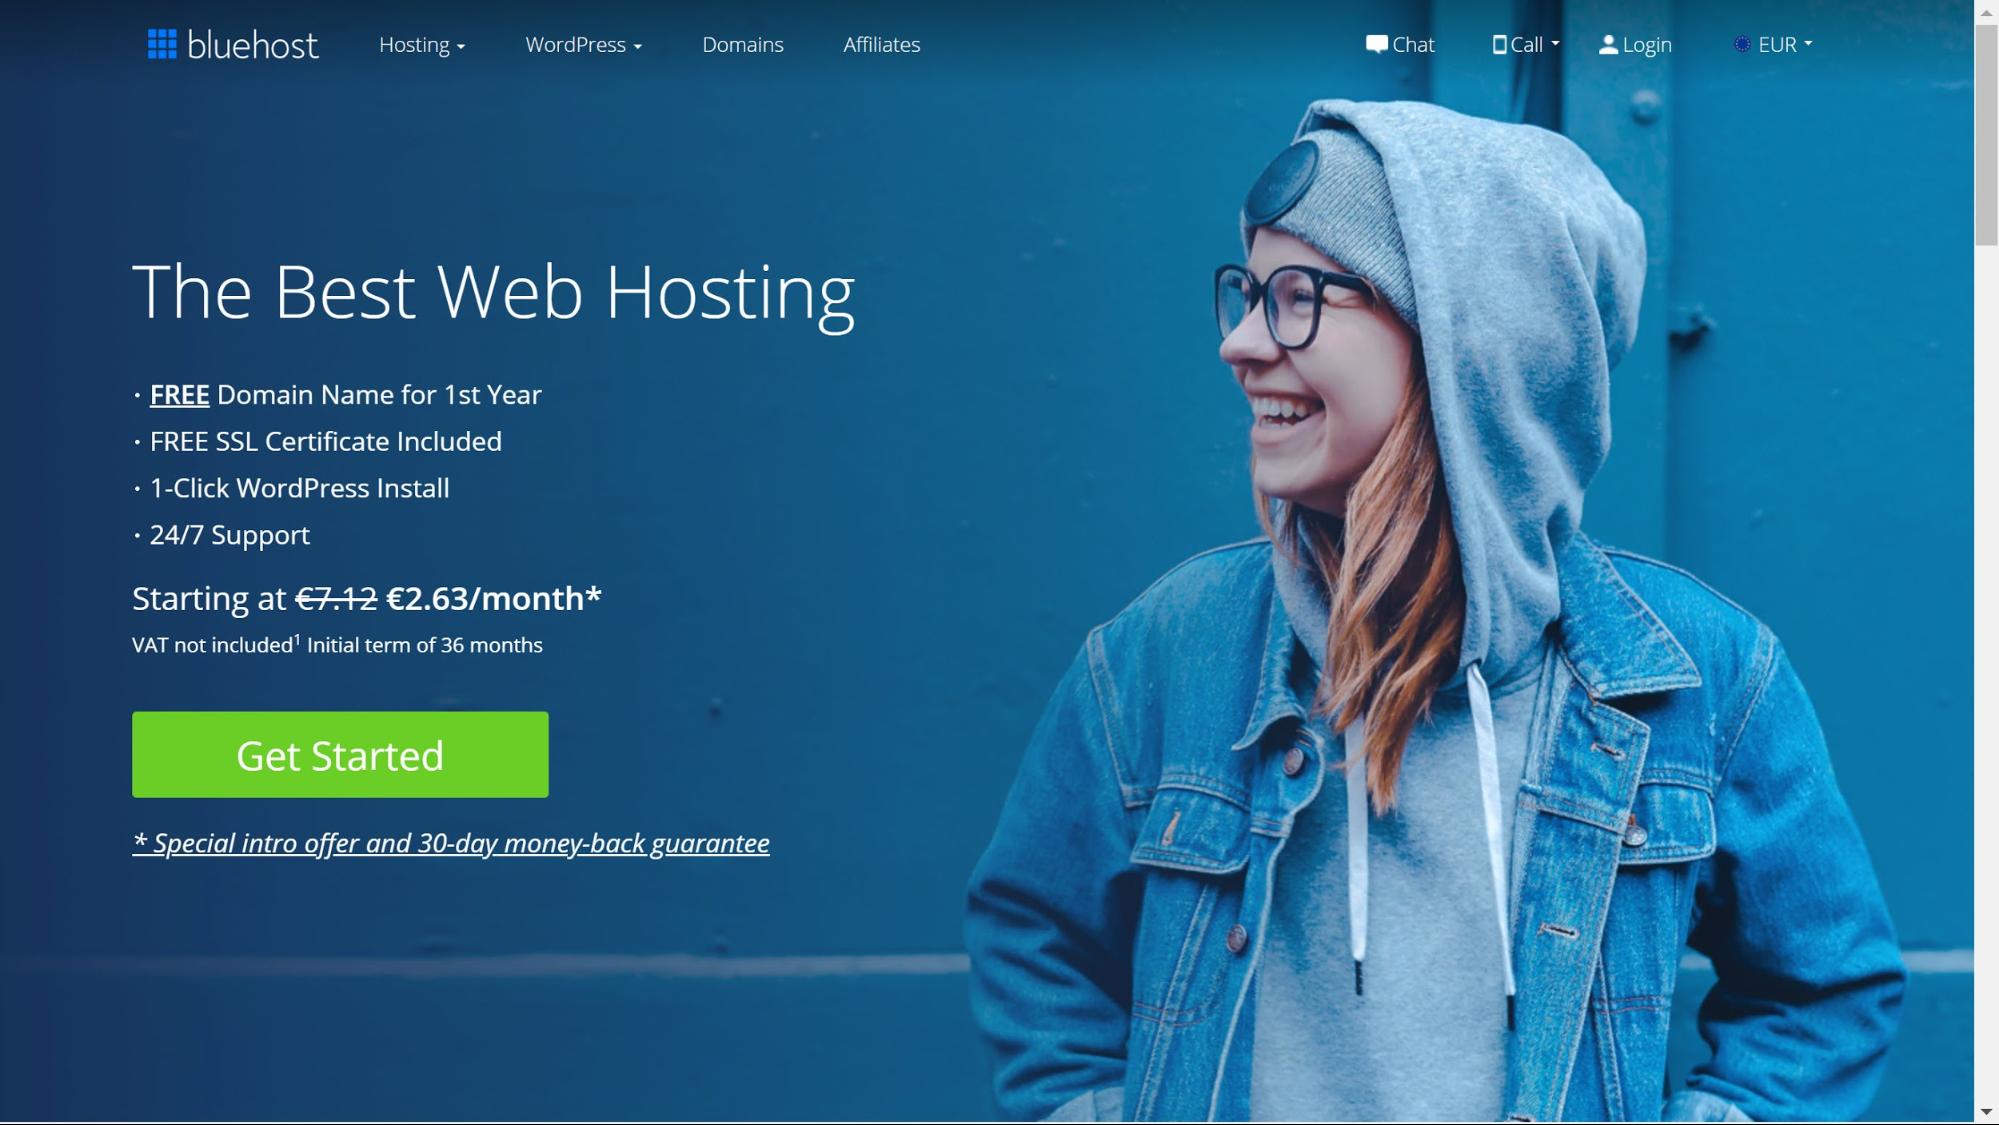
One of the best web hosts is Bluehost, which has 20 years of WordPress experience, offers free one-year domain registration and free ad credits among other perks.
There are also many other great hosting options. Check out Colorlib’s guide to the best web hosting services to see which one fits your requirements.
5. Make your website stand out with a great directory theme
Now that you have your WordPress website installed you can begin to think about how it will look by choosing your directory theme.
You would be forgiven for thinking a theme is all about looks, but there are other factors to consider. Here is a quick list of requirements for your theme:
- Does it support the most popular plugins?
- How often is it updated?
- Does it support SEO?
- Is it multilingual ready?
- How responsive are the layouts to different screen sizes?
Check out Colorlib’s list of the best directory WordPress themes for inspiration.
6. Choose the plugin to build your directory website
You could be forgiven for assuming you would need multiple plugins to build the features for a website as complex as a directory website but in fact, we will use just one.
Toolset Directory provides all of the features we will need to build a directory website with WordPress. I am using Toolset because:
- You do not need to overload your website with other plugins. All you need is Toolset Directory.
- These features can be added without any complex PHP coding.
- It works with all themes.
- It is compatible with other important plugins for a directory website such as WooCommerce, WPML and Elementor.
- It is regularly updated with new features being added all the time.
7. Create the directory website’s features
These are the features we will add as we build our directory website on WordPress:
- Custom post types
- Custom fields
- Custom taxonomies
- A template to display your items
- A search
- A front-end form for users to submit their listings
I will show you how I created my website directory for classic cars. If you want to see how it looks and try and add the features yourself, you can do so by downloading your free WordPress directory test sit.
1. How to create custom post types
We need custom post types to create the different sections for our directory website.
WordPress on its own only provides “Posts” and “Pages.” Of course, we’ll need more sections for our listings, blog and “Contact Us” posts.
Here’s how I created my “Listings” custom post type:
- Head to Toolset -> Post Types, click Add New.
- Name your custom post type.
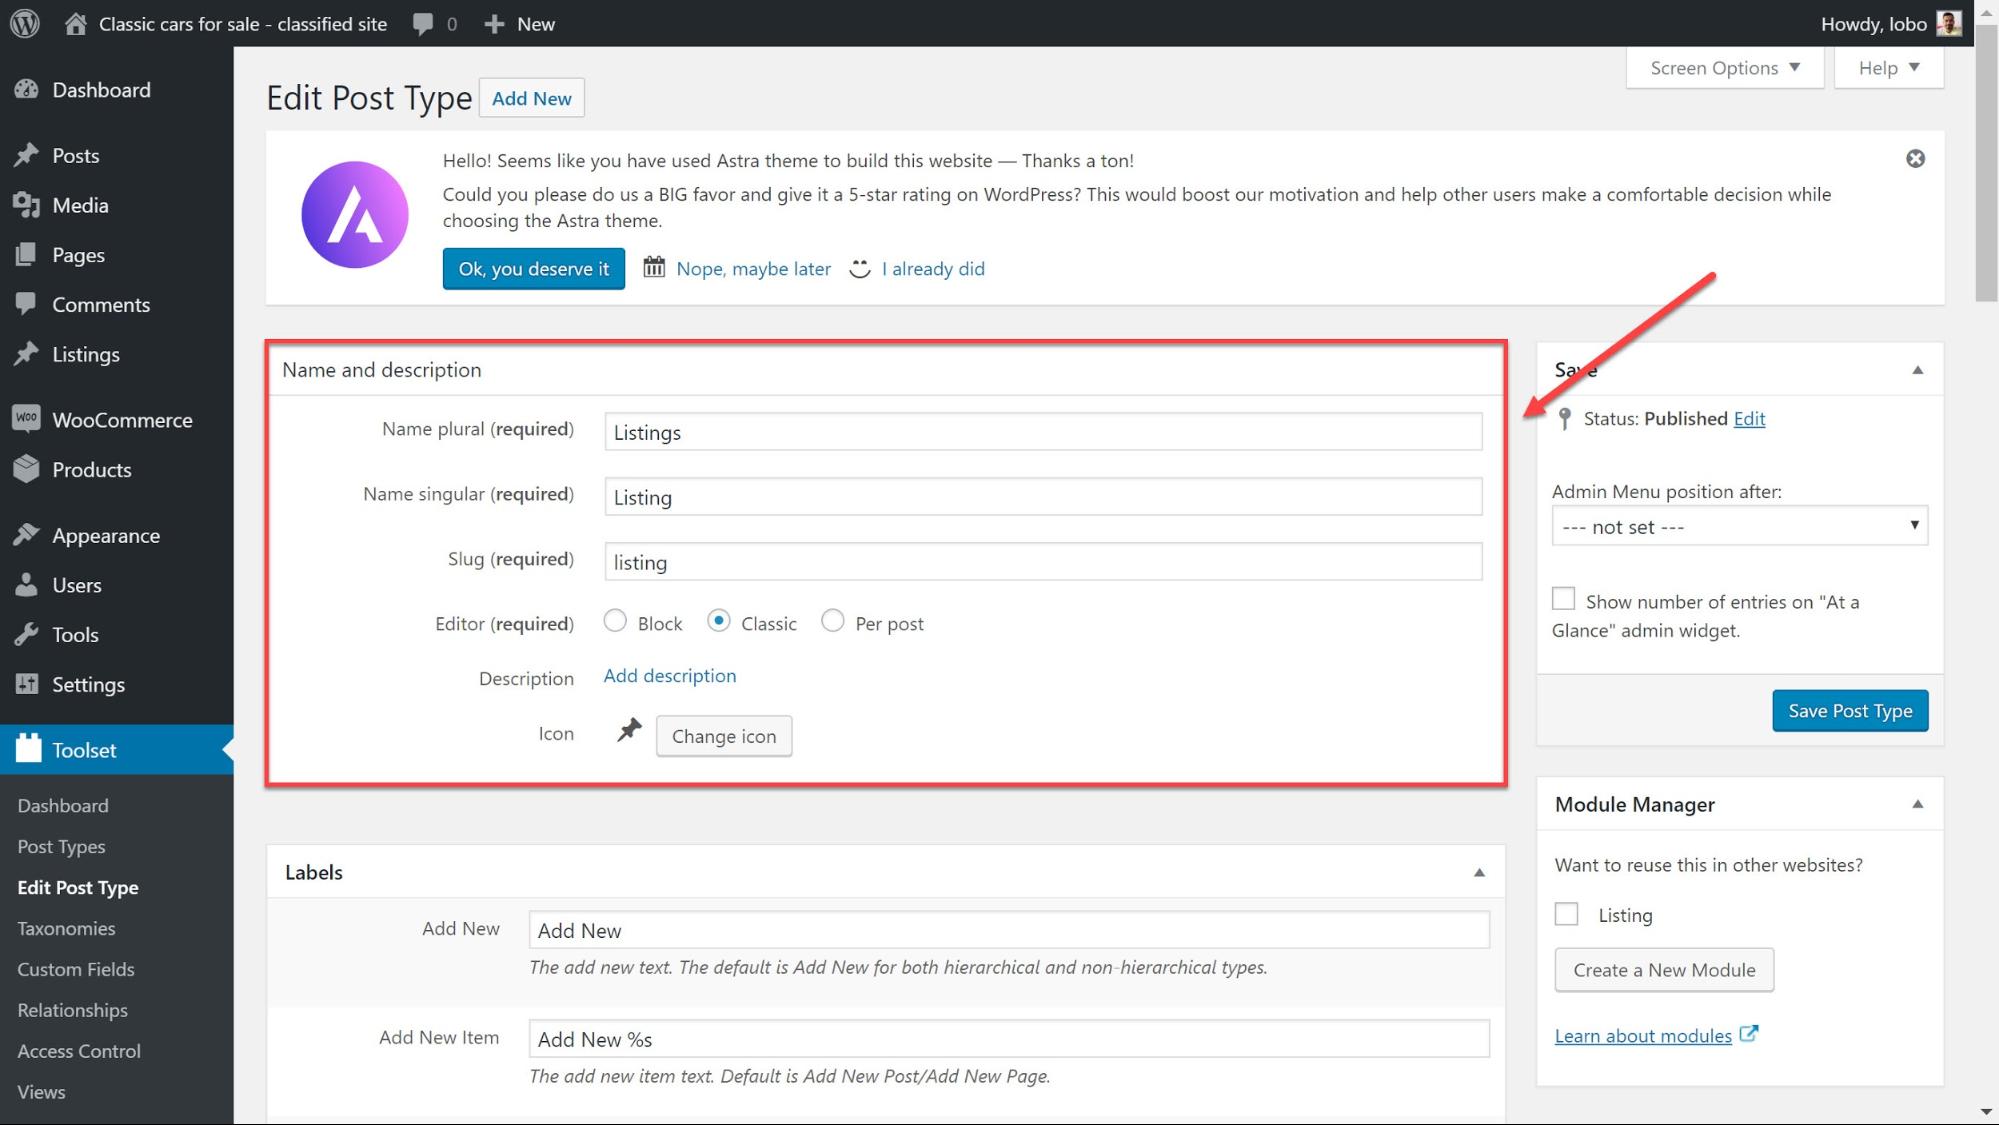
3. Click Save Post Type and your custom post type is ready.
4. You will now see a new menu appear on the sidebar with your “Listings” post type.
2. How to create custom fields
Custom fields are the values for each piece of information we want each post to display.
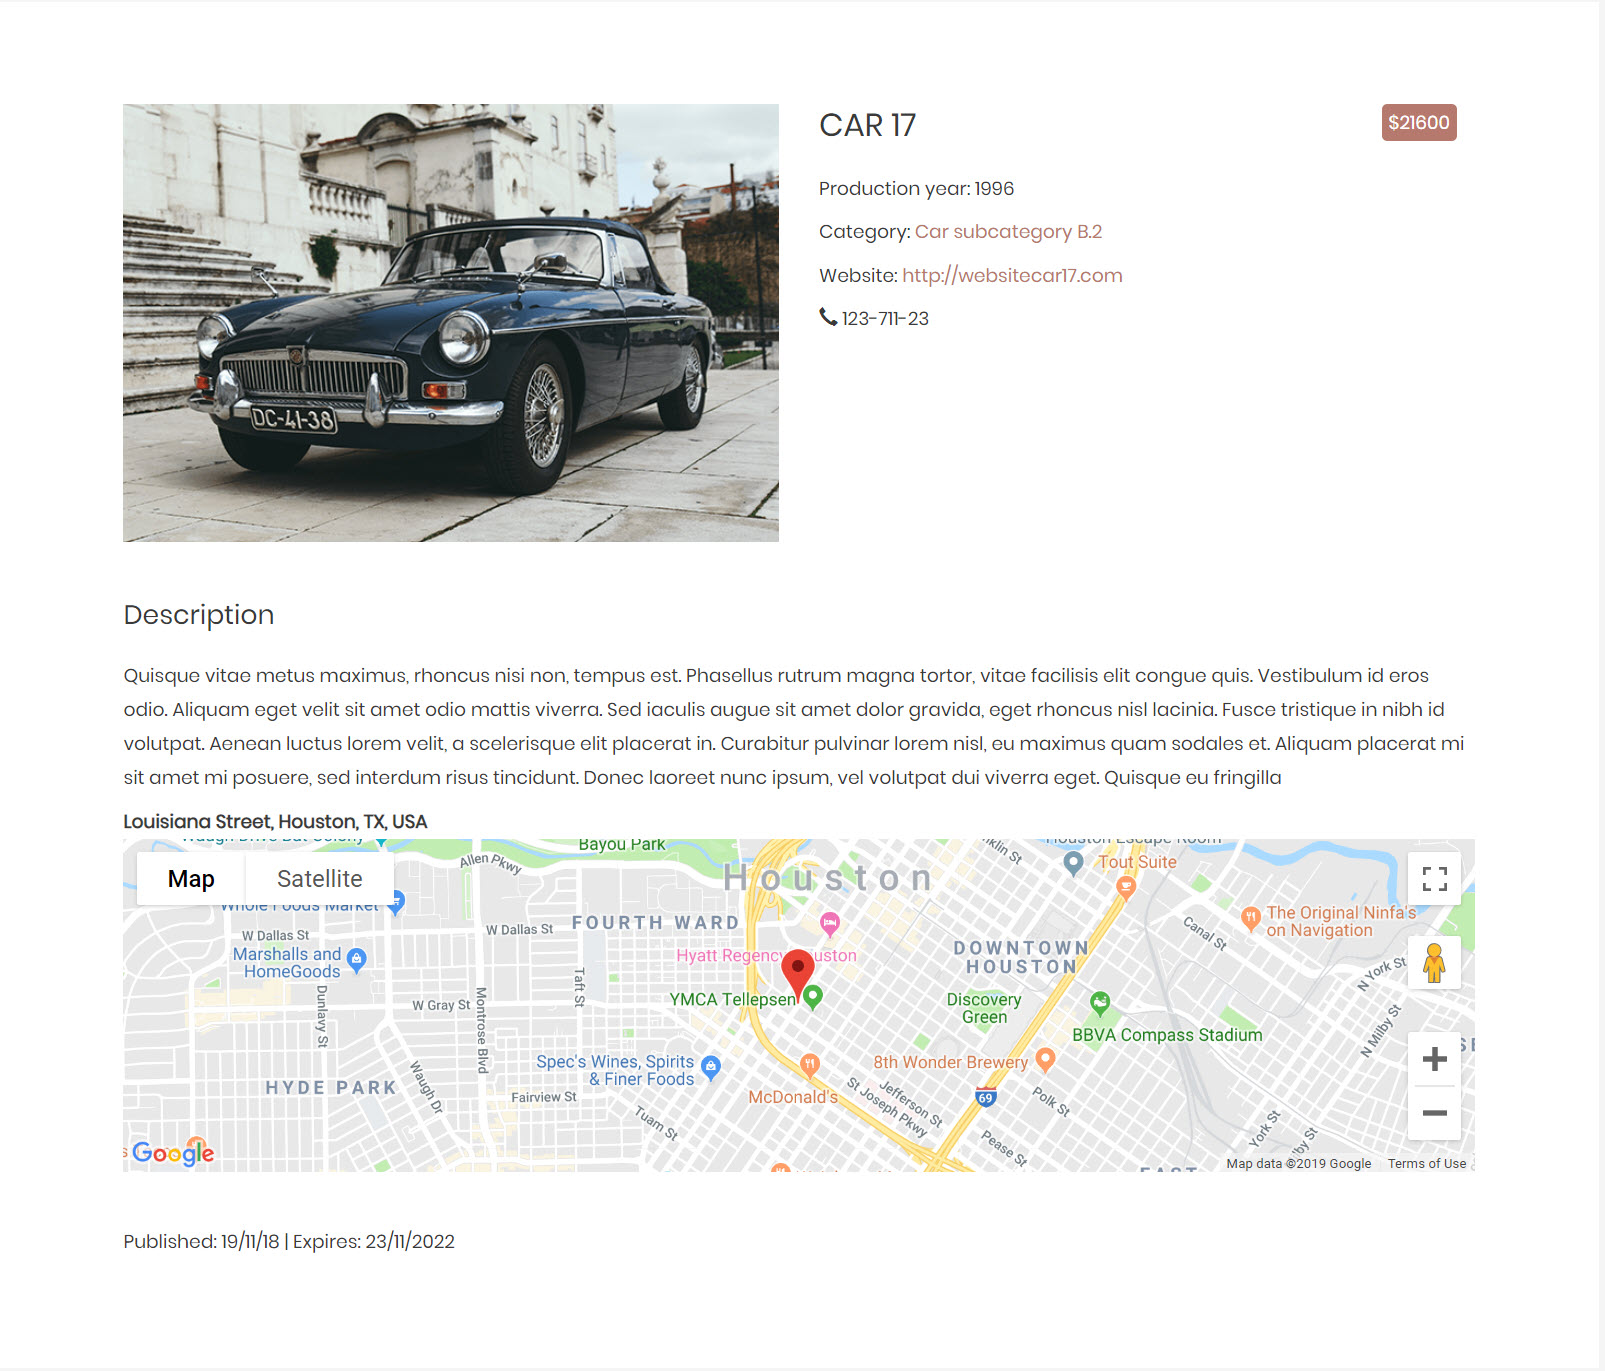
For example, you would expect a classic car’s post to display information about the price, the mileage, the car make and much more. Here’s how I added these custom fields:
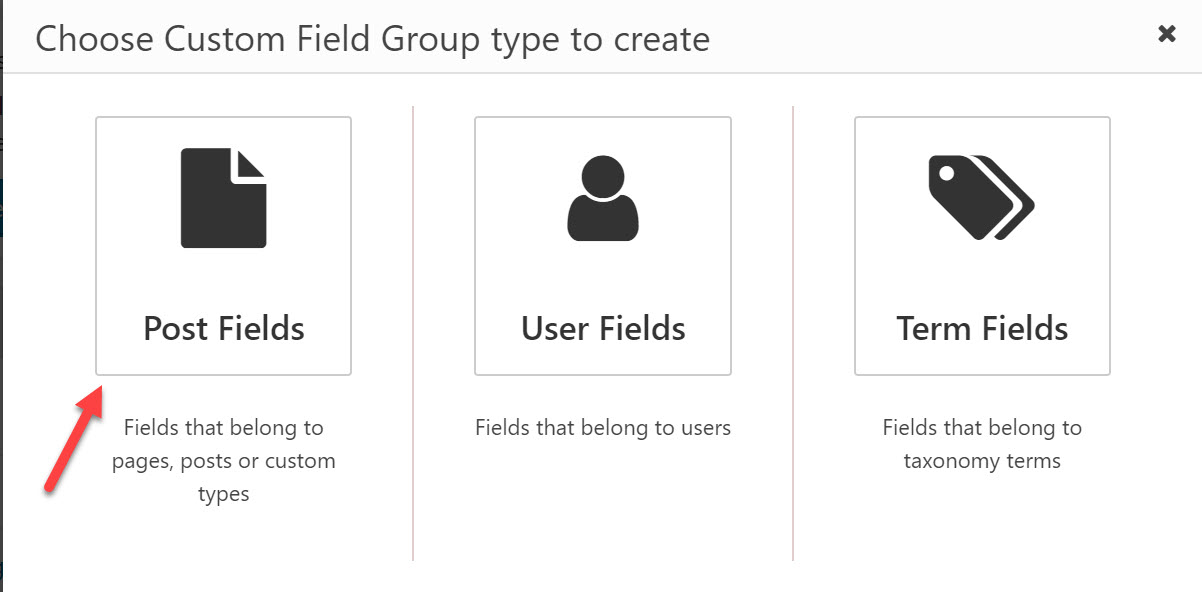
- Head to Toolset -> Custom Fields and click Add New.
- Select Post Fields.
3. Name your field group.
4. Save your field group and select for which posts you want to use the fields. In my case, I chose the Listings option.
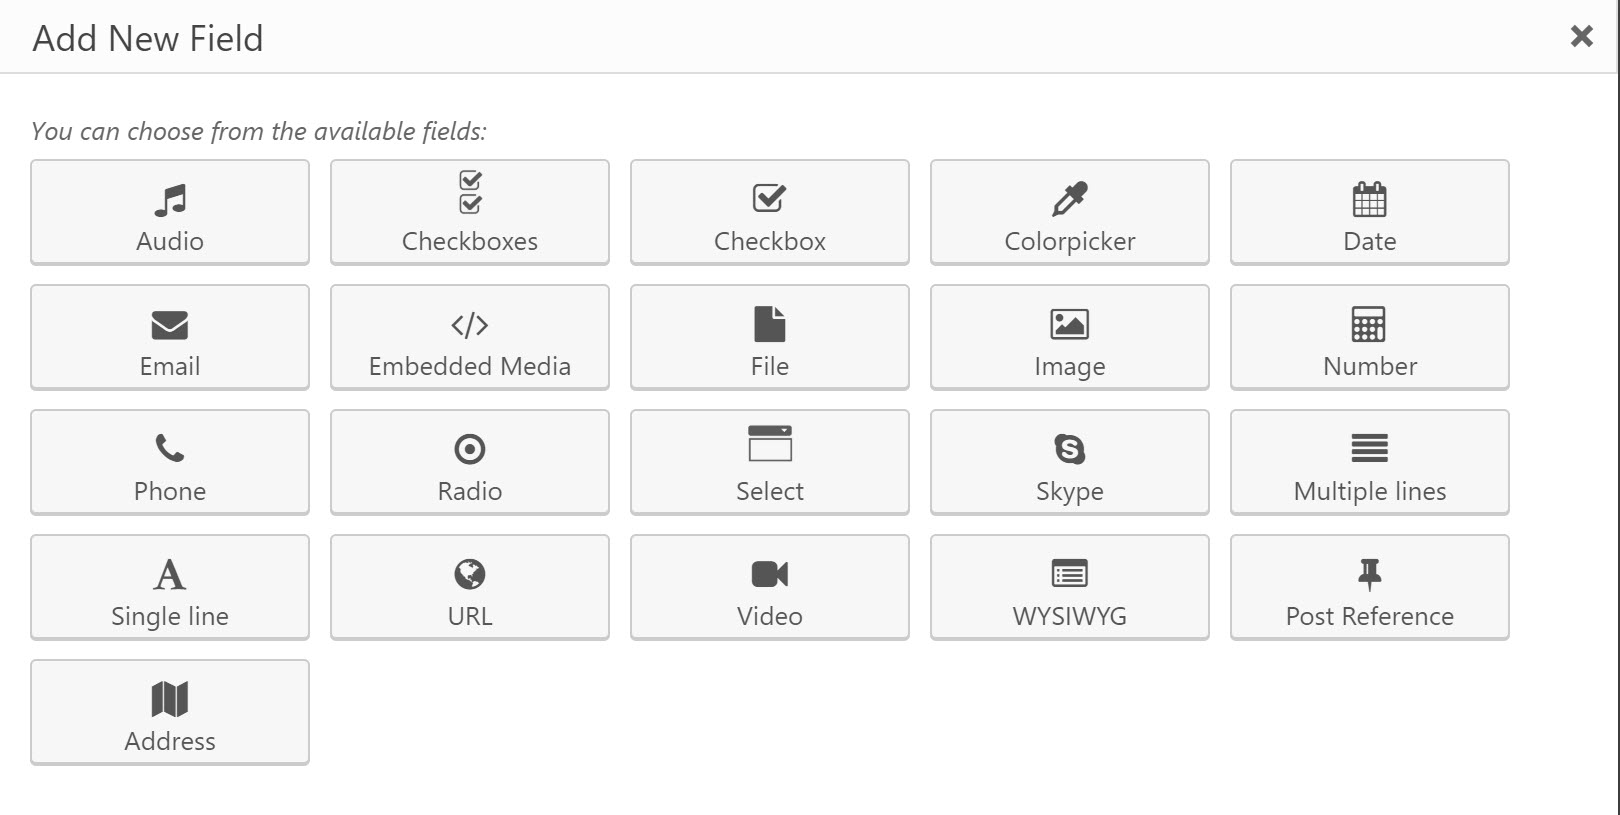
5. Select Add New Field to add each of your fields.
6. Choose which type of field you want to add. For example, I used the Number field for the Production Year field.
7. You can add other settings to your fields whether you want to make the field compulsory, allow multiple instances of it or add a placeholder.
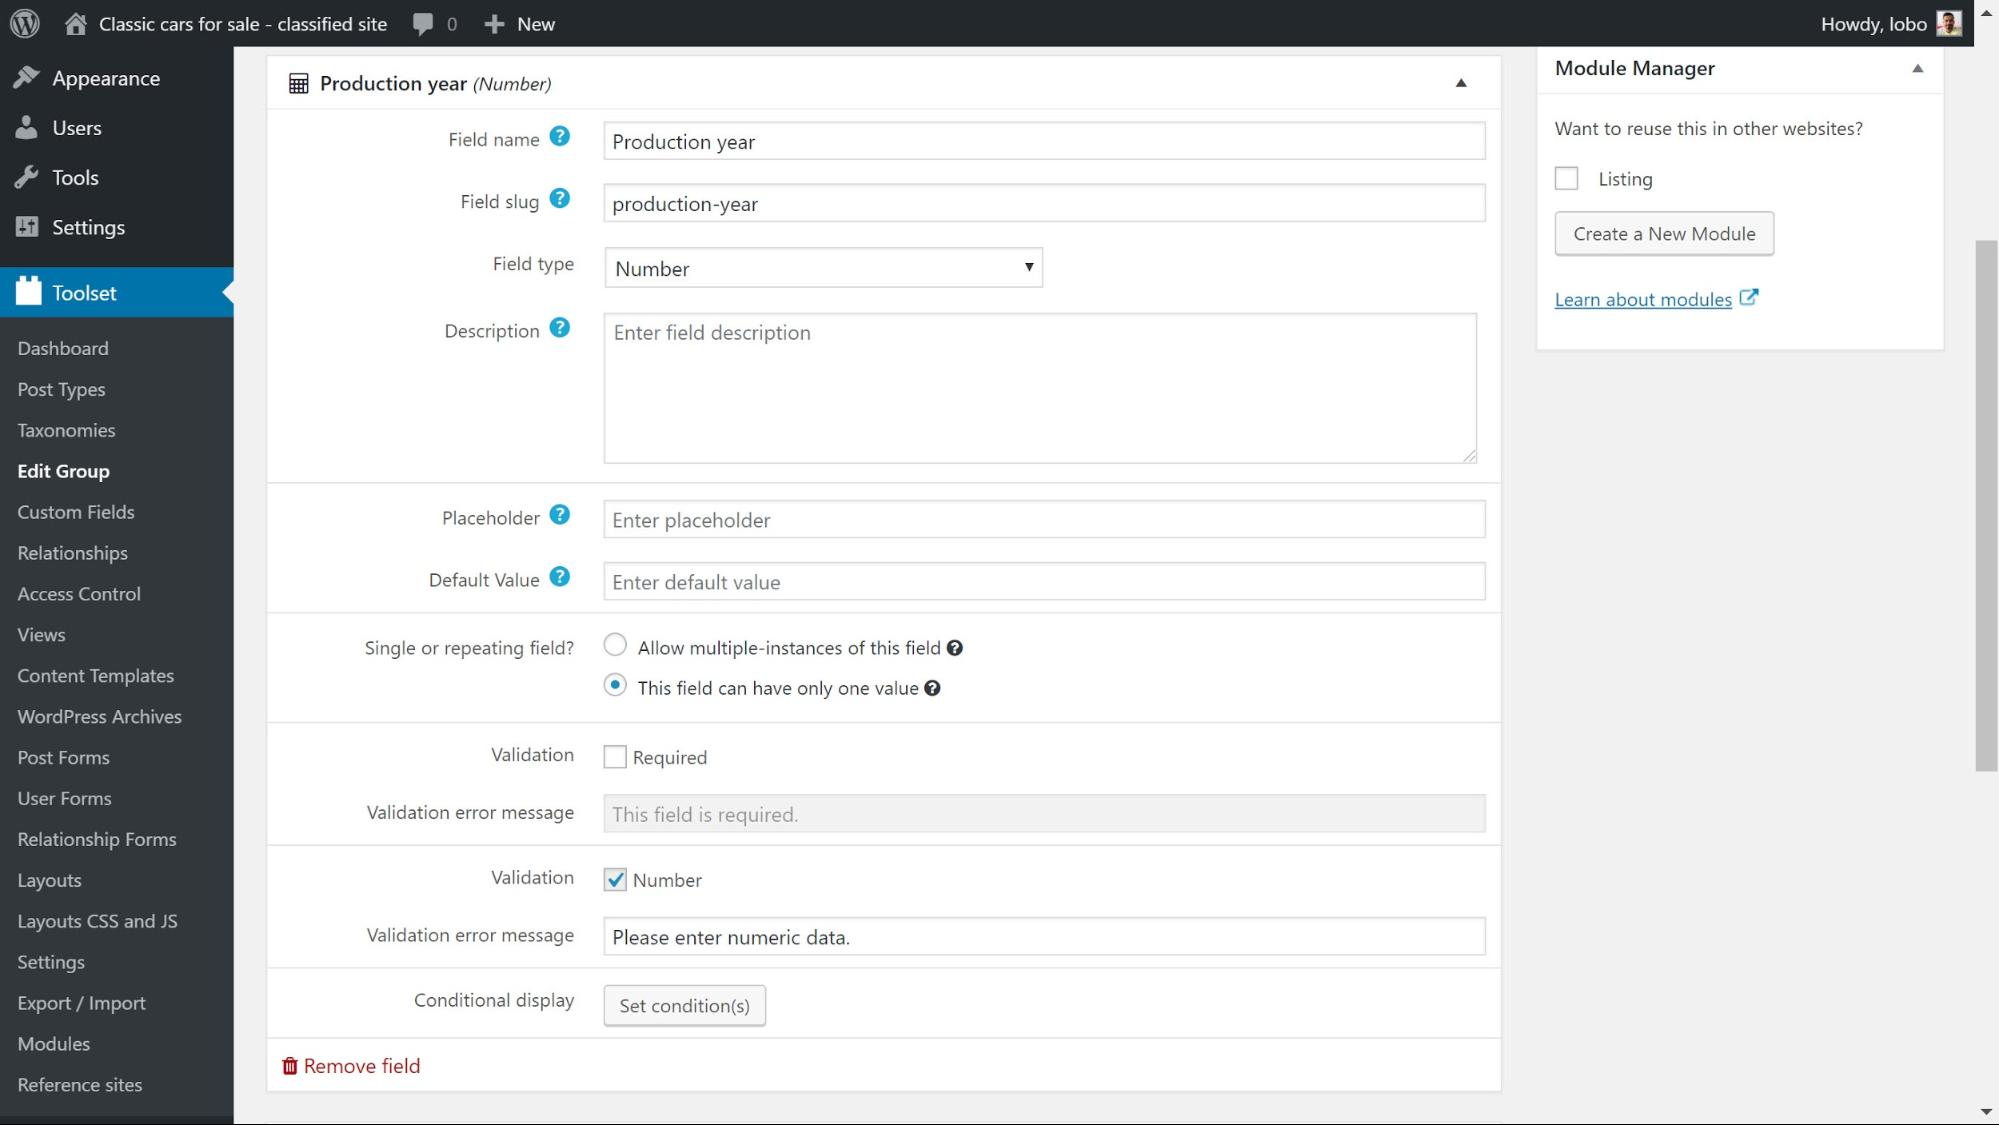
8. Once you have added all of the fields click Save Field Group and your custom fields will be added to the post editor.
3. How to add custom taxonomies
Custom taxonomies are an important part of a directory website because they let you split up your posts depending on their features.
For example, when a user is browsing your website, they will probably be looking for a specific product. On a classic cars directory website, they might want a car with a convertible roof. You can create custom taxonomies so users can easily find all the cars with this feature.
Here’s how you can make custom taxonomies.
- Head to Toolset -> Dashboard and under Taxonomies click Add Custom Taxonomy.
- Name your custom taxonomy.
- Under the Taxonomy Type section, you can choose whether you want a Hierarchical or Flat taxonomy. A hierarchical taxonomy is great if you want to create subcategories of taxonomies.
- Select the post type which you want to assign the taxonomies to. I chose my Listings post type.
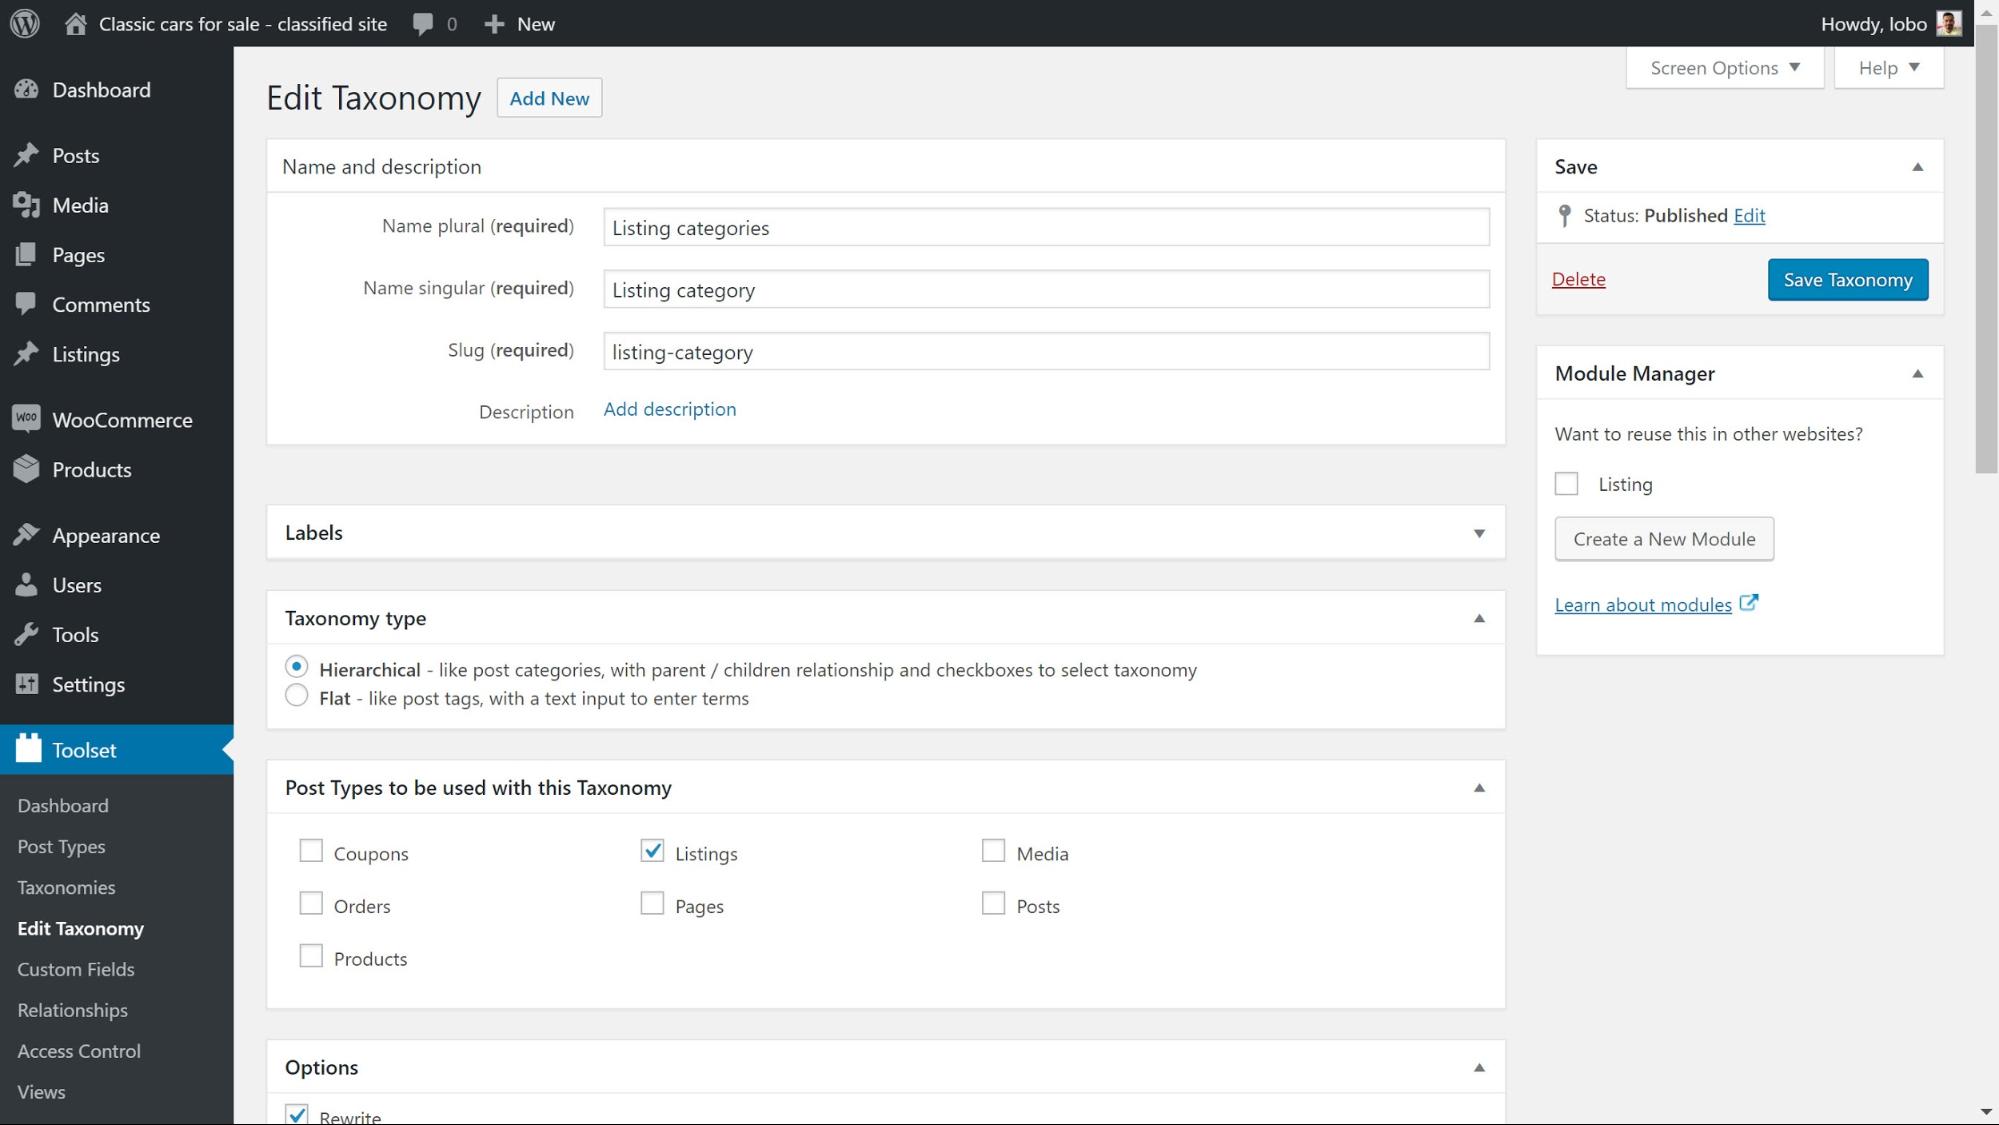
5. Click Save Taxonomy.
Now, when I edit one of the Listings posts, I will see a new section where I can add my taxonomies.

4. How to create a template to display your content
We have created our custom content but as of yet, we are not displaying anything on the front-end.
We need to create a template that will automatically display all of our custom content in the structure we want.
I used Toolset Layouts to create the template. Toolset Layouts is based on a Bootstrap grid that displays your page in rows of 12 columns which you can use to design your page.
To create the sections which will display our content we need to add cells. There are two types of cells which we will use for this template:
- The visual editor – a general purpose cell to add static text and insert shortcode for dynamic content such as custom fields and custom taxonomy terms.
- The post content – to render the contents of the post body.
Below is how I used these cells to make the template for the classic cars on my directory website.
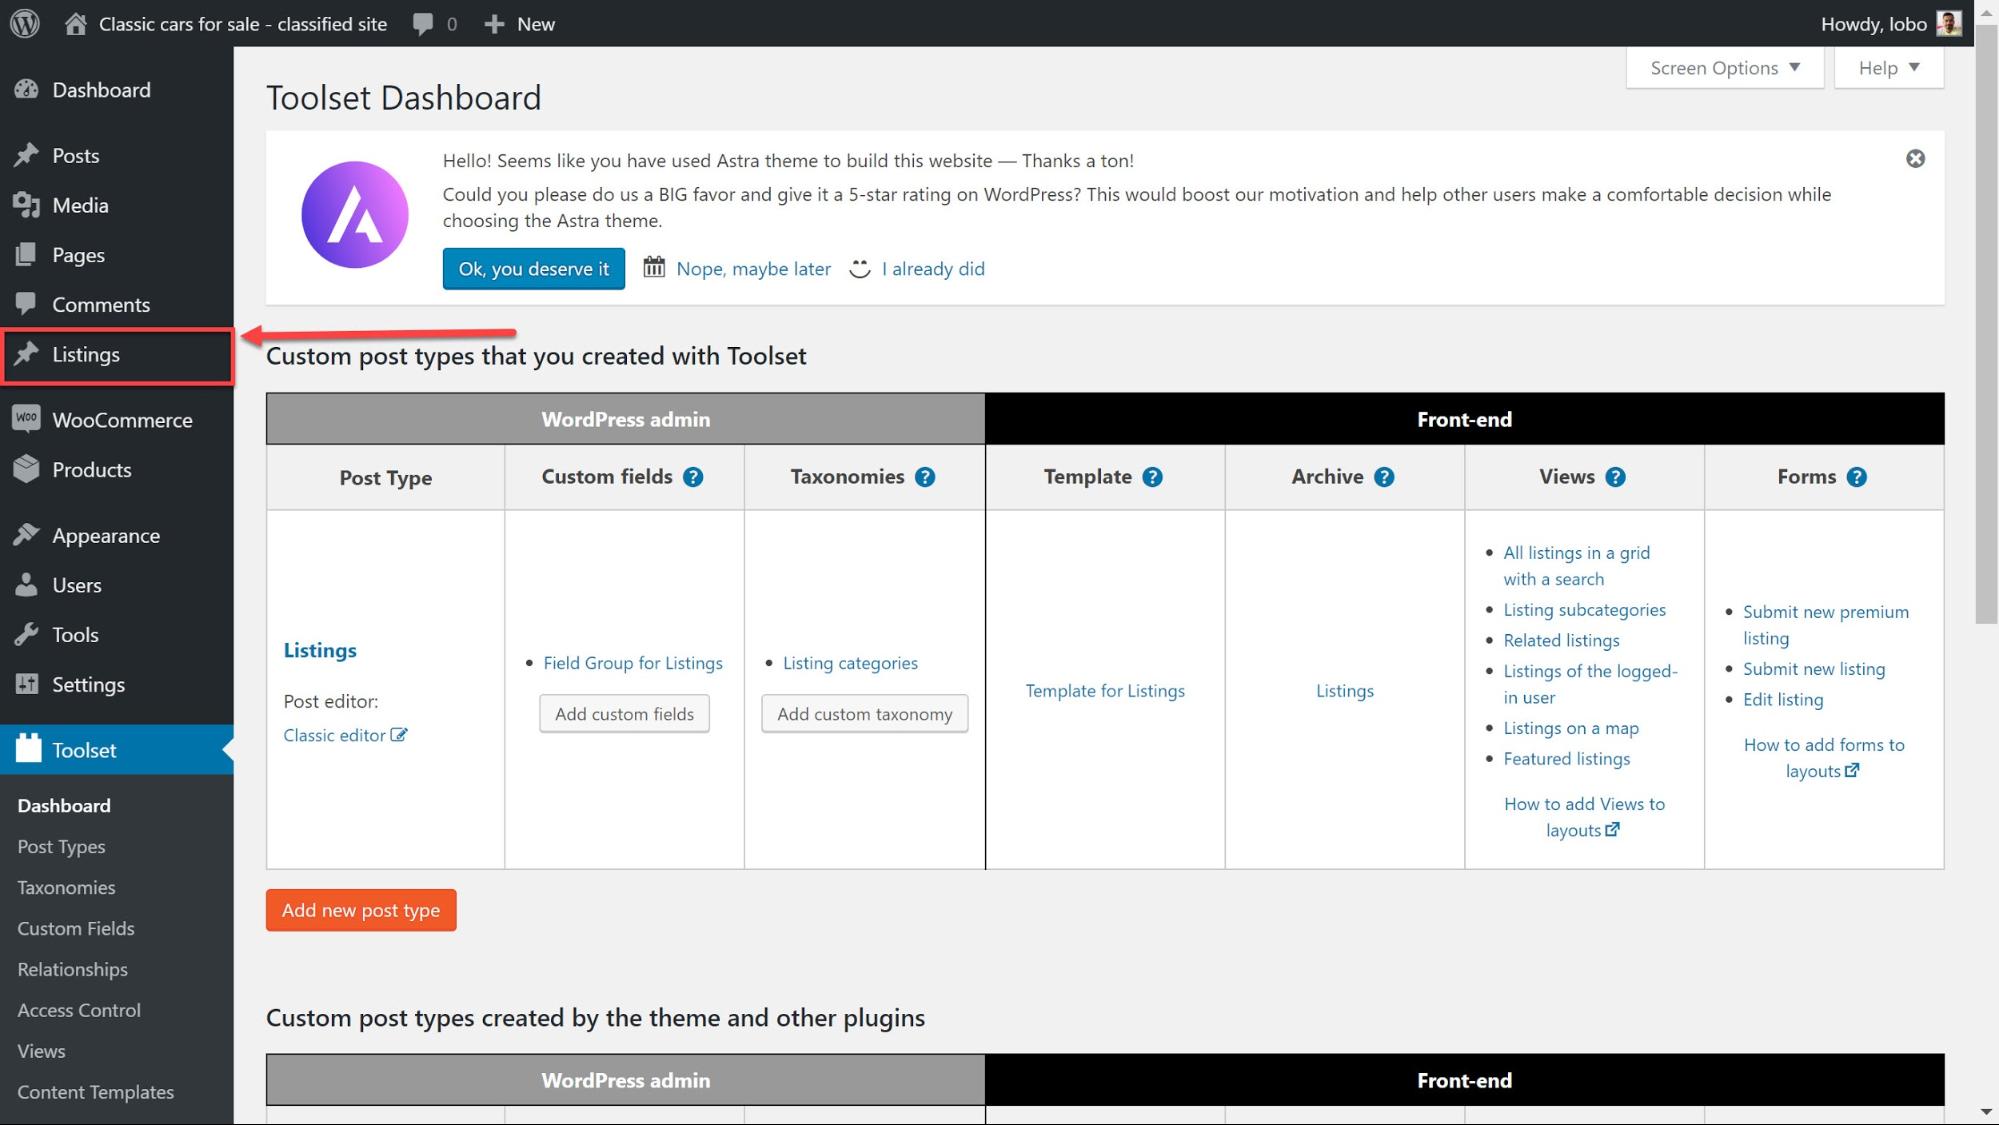
- Head to Toolset -> Dashboard and click Create Template next to your custom post type. You will now be taken to Toolset Layouts.
- Choose how many columns you want each cell to take up and select to open up the editor.

3. Select which cell you want. For this example, I will choose the Visual editor.
4. Click on Fields and Views to see a list of shortcodes to add. For this example, I want to add my custom fields. Each one has its shortcode. To demonstrate, I will add the custom field Production Year.
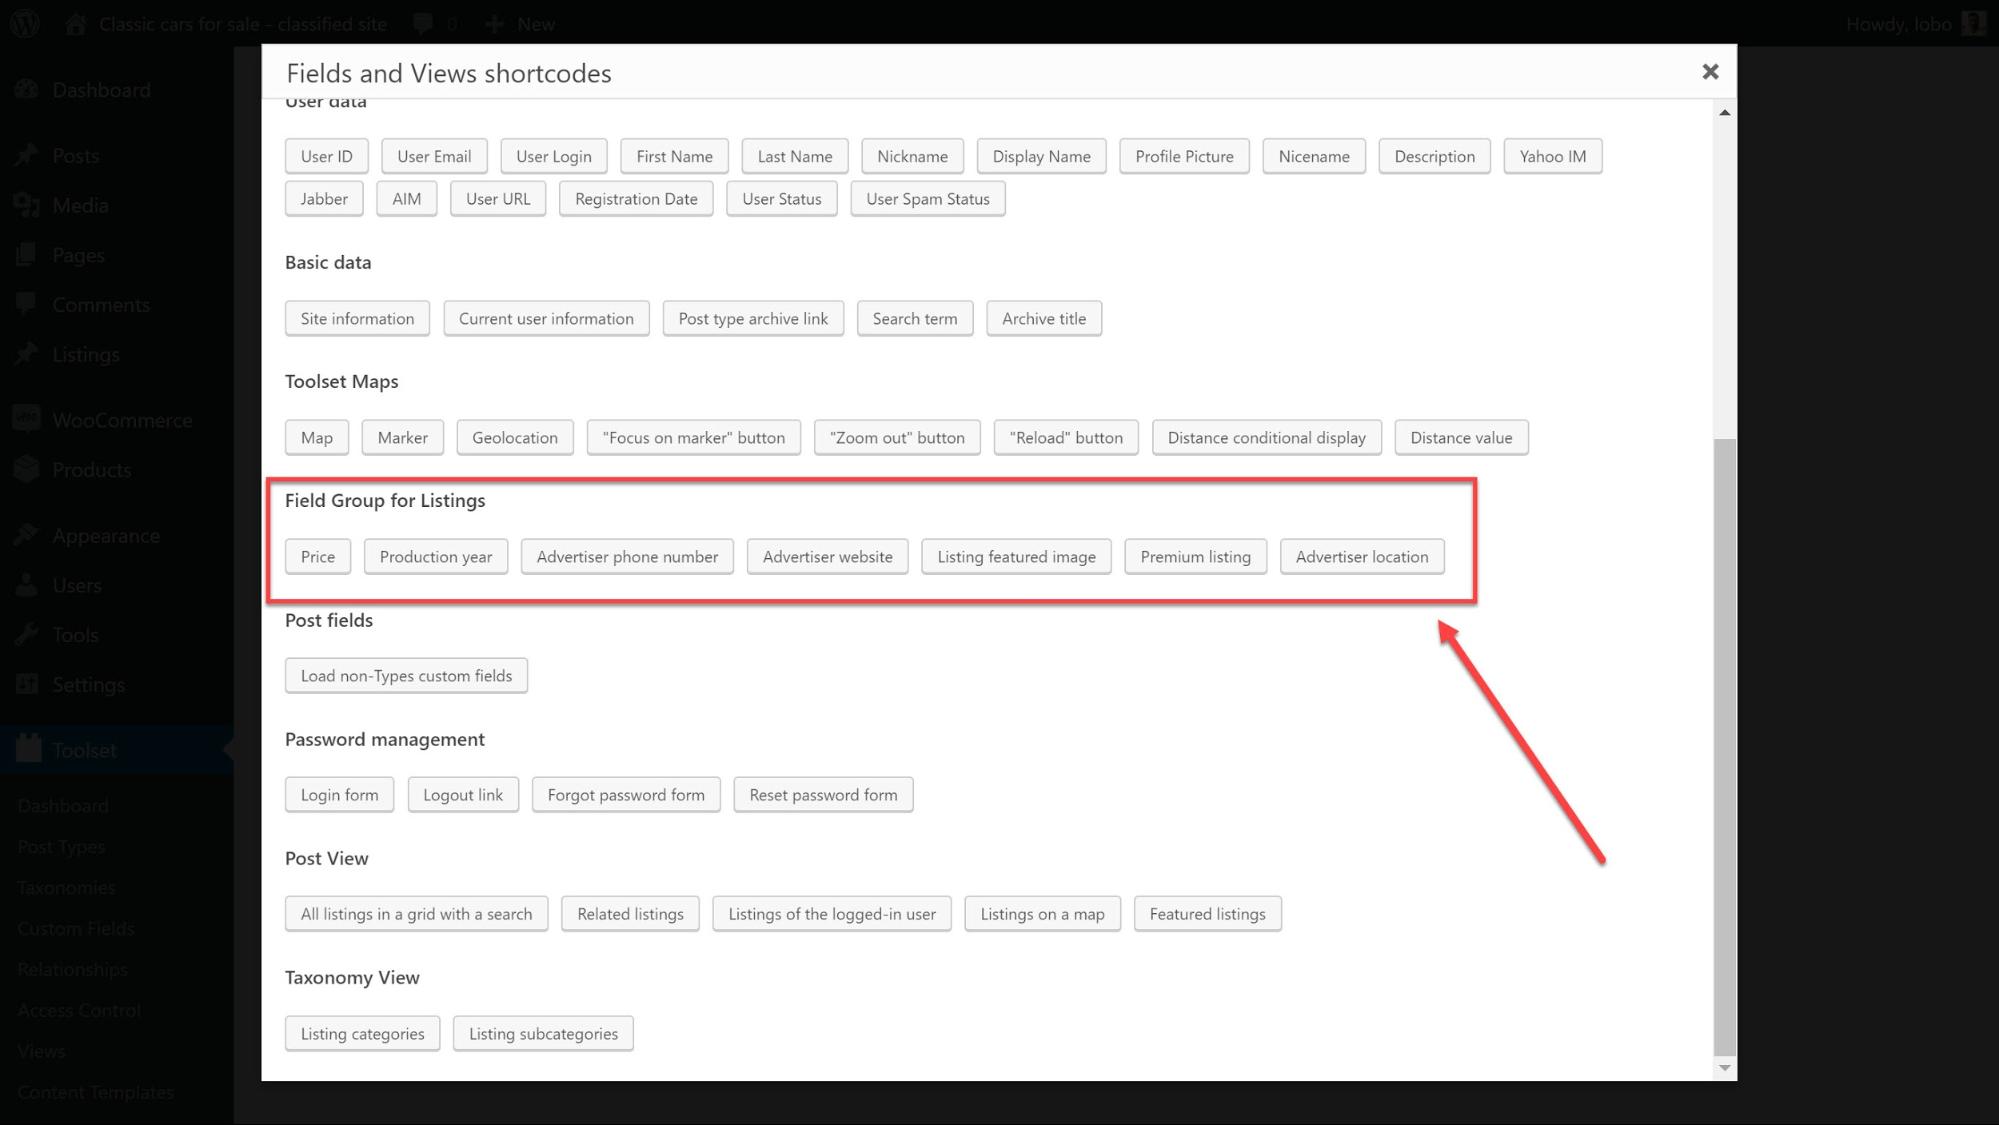
5. Click Insert Shortcode.
6. Now we can see the shortcode in the editor cell. We can add additional text which will appear on the front-end so users can see what the field is about. As I have below:

7. Click Apply once you’ve added your fields and text and the cell will be ready.
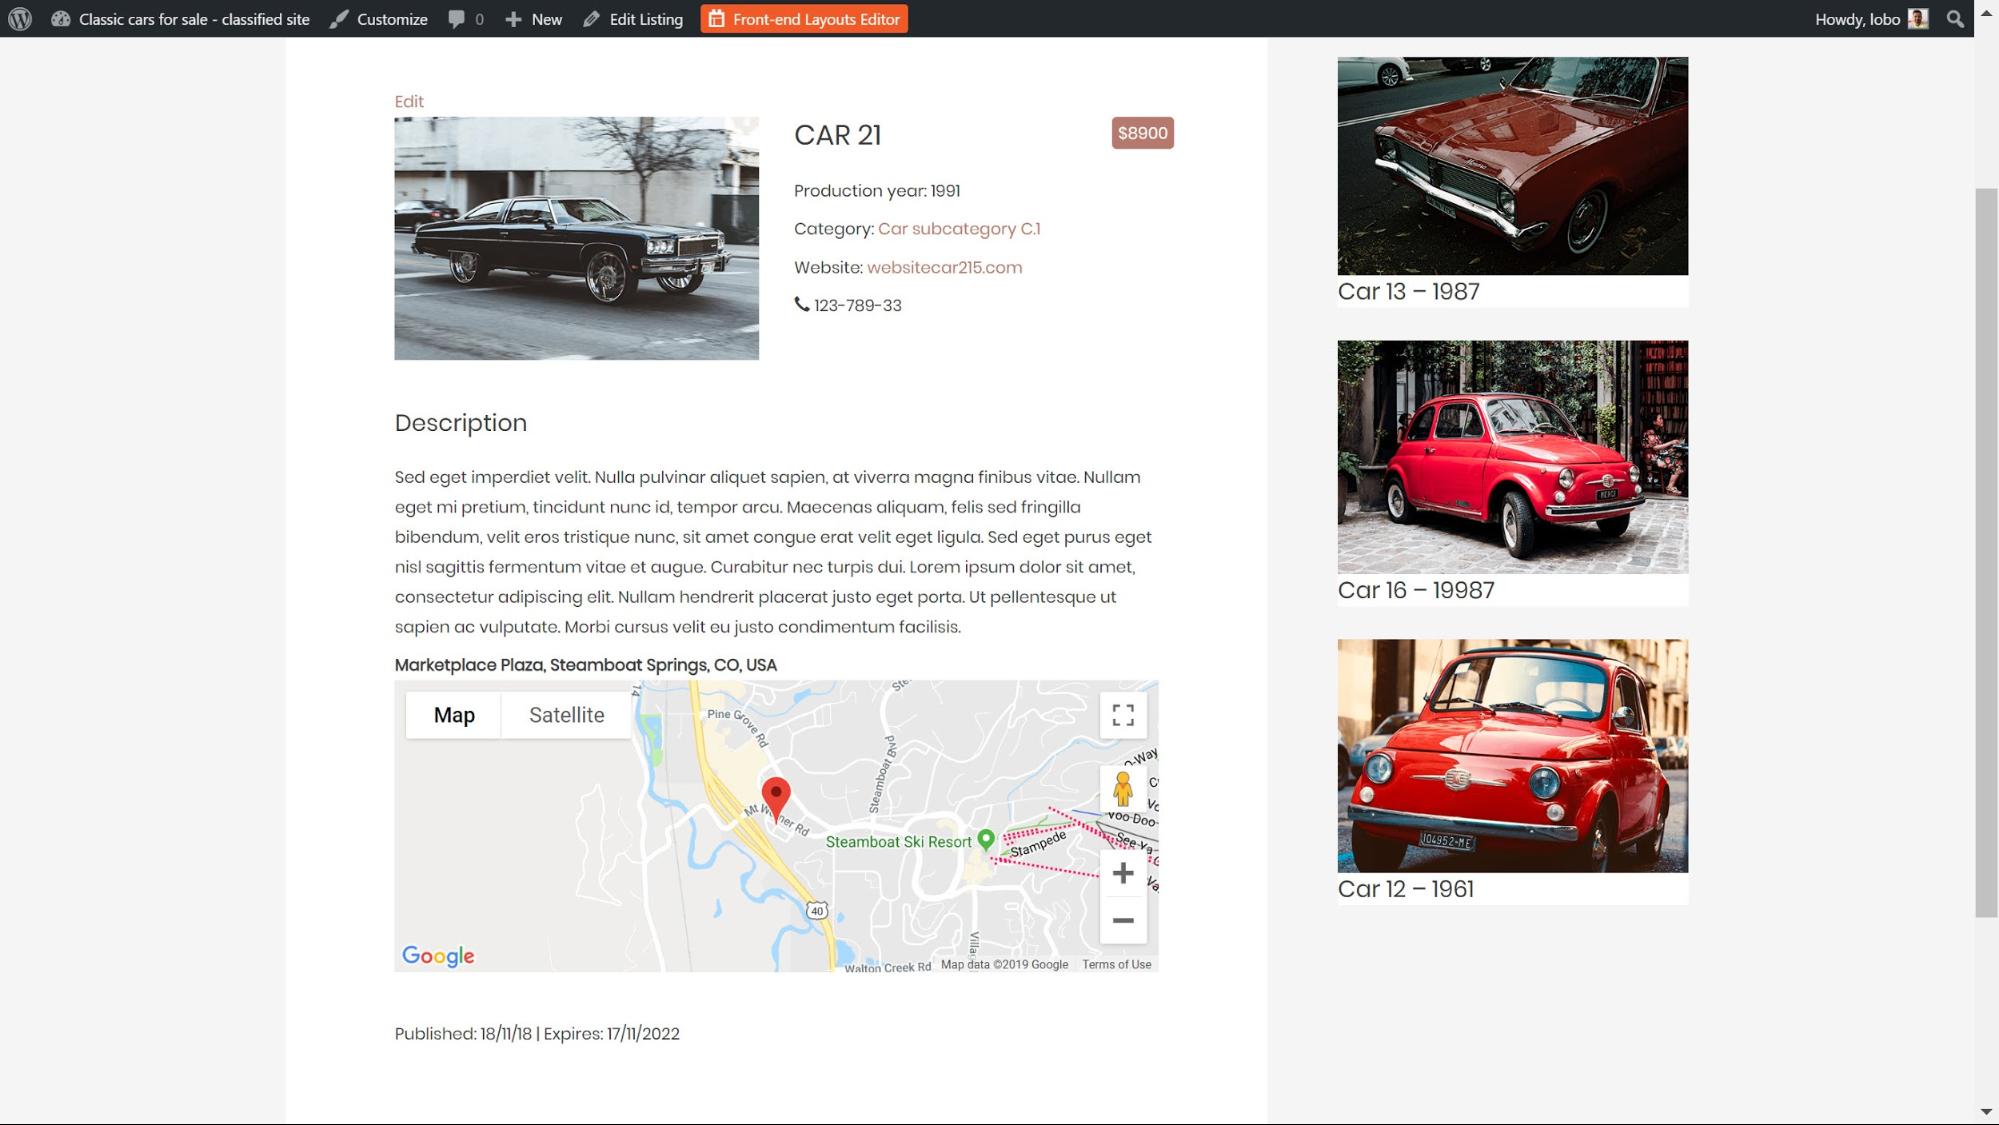
This is how my template looks on the back-end.

And here it is on the front-end:
5. How to create a custom search
A search tool is the easiest way for users to find the exact car they want.
You can add multiple filters, a search bar to type in terms, and other features such as AJAX updates to get live results on-the-fly with a custom search.
The first thing to decide is where you want your search to appear. Below I added mine to the homepage.
Step 1: Create the search
- Go to Toolset -> Layouts and create a new template.
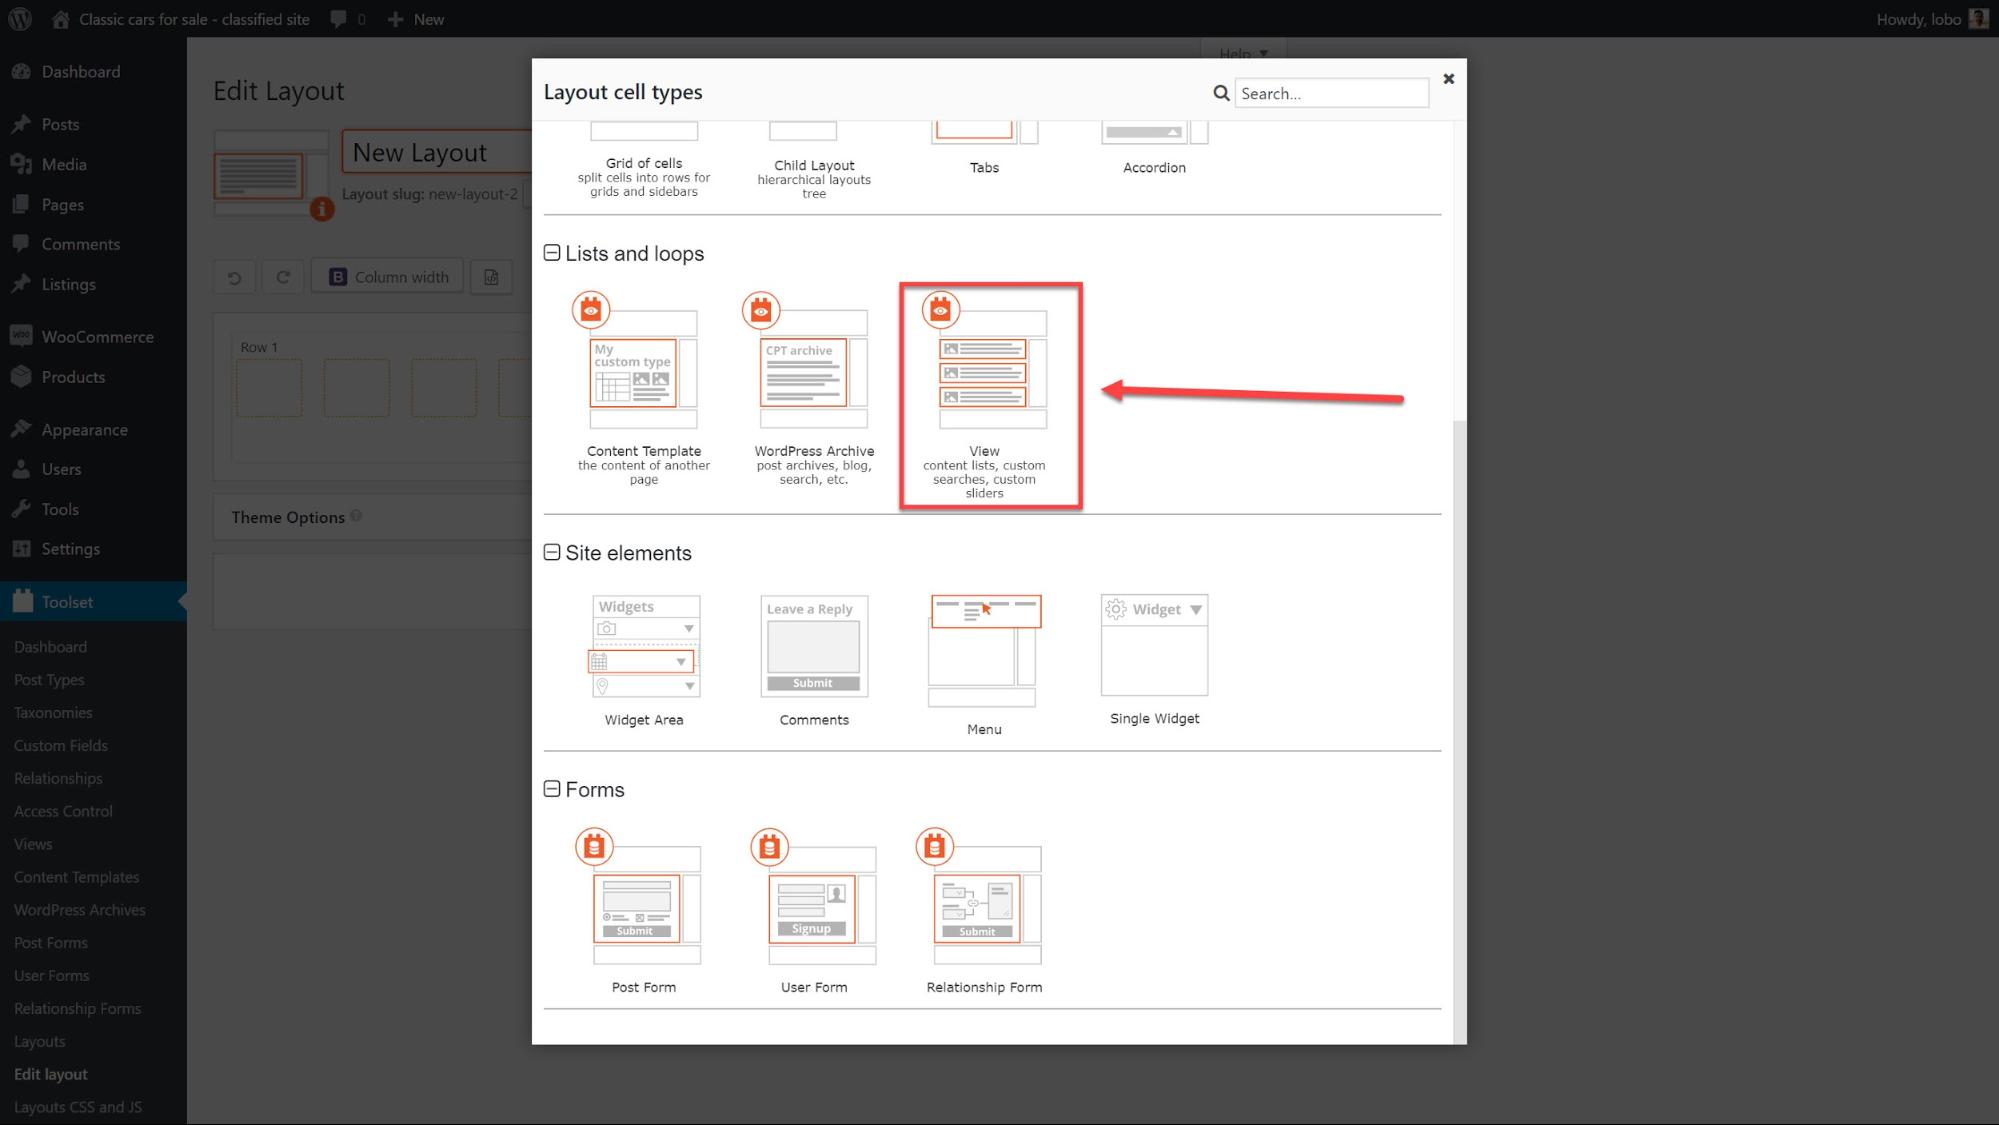
- Click to add a cell just like we did when we created our previous template and select the View cell.
- Click Insert Cell.
4. Click Display the results as a custom search and then click Create.
5. Choose the post type you want to search through in the Content Selection section.
6. Under Custom Search Settings choose how your search updates results. Here you will find several different options:

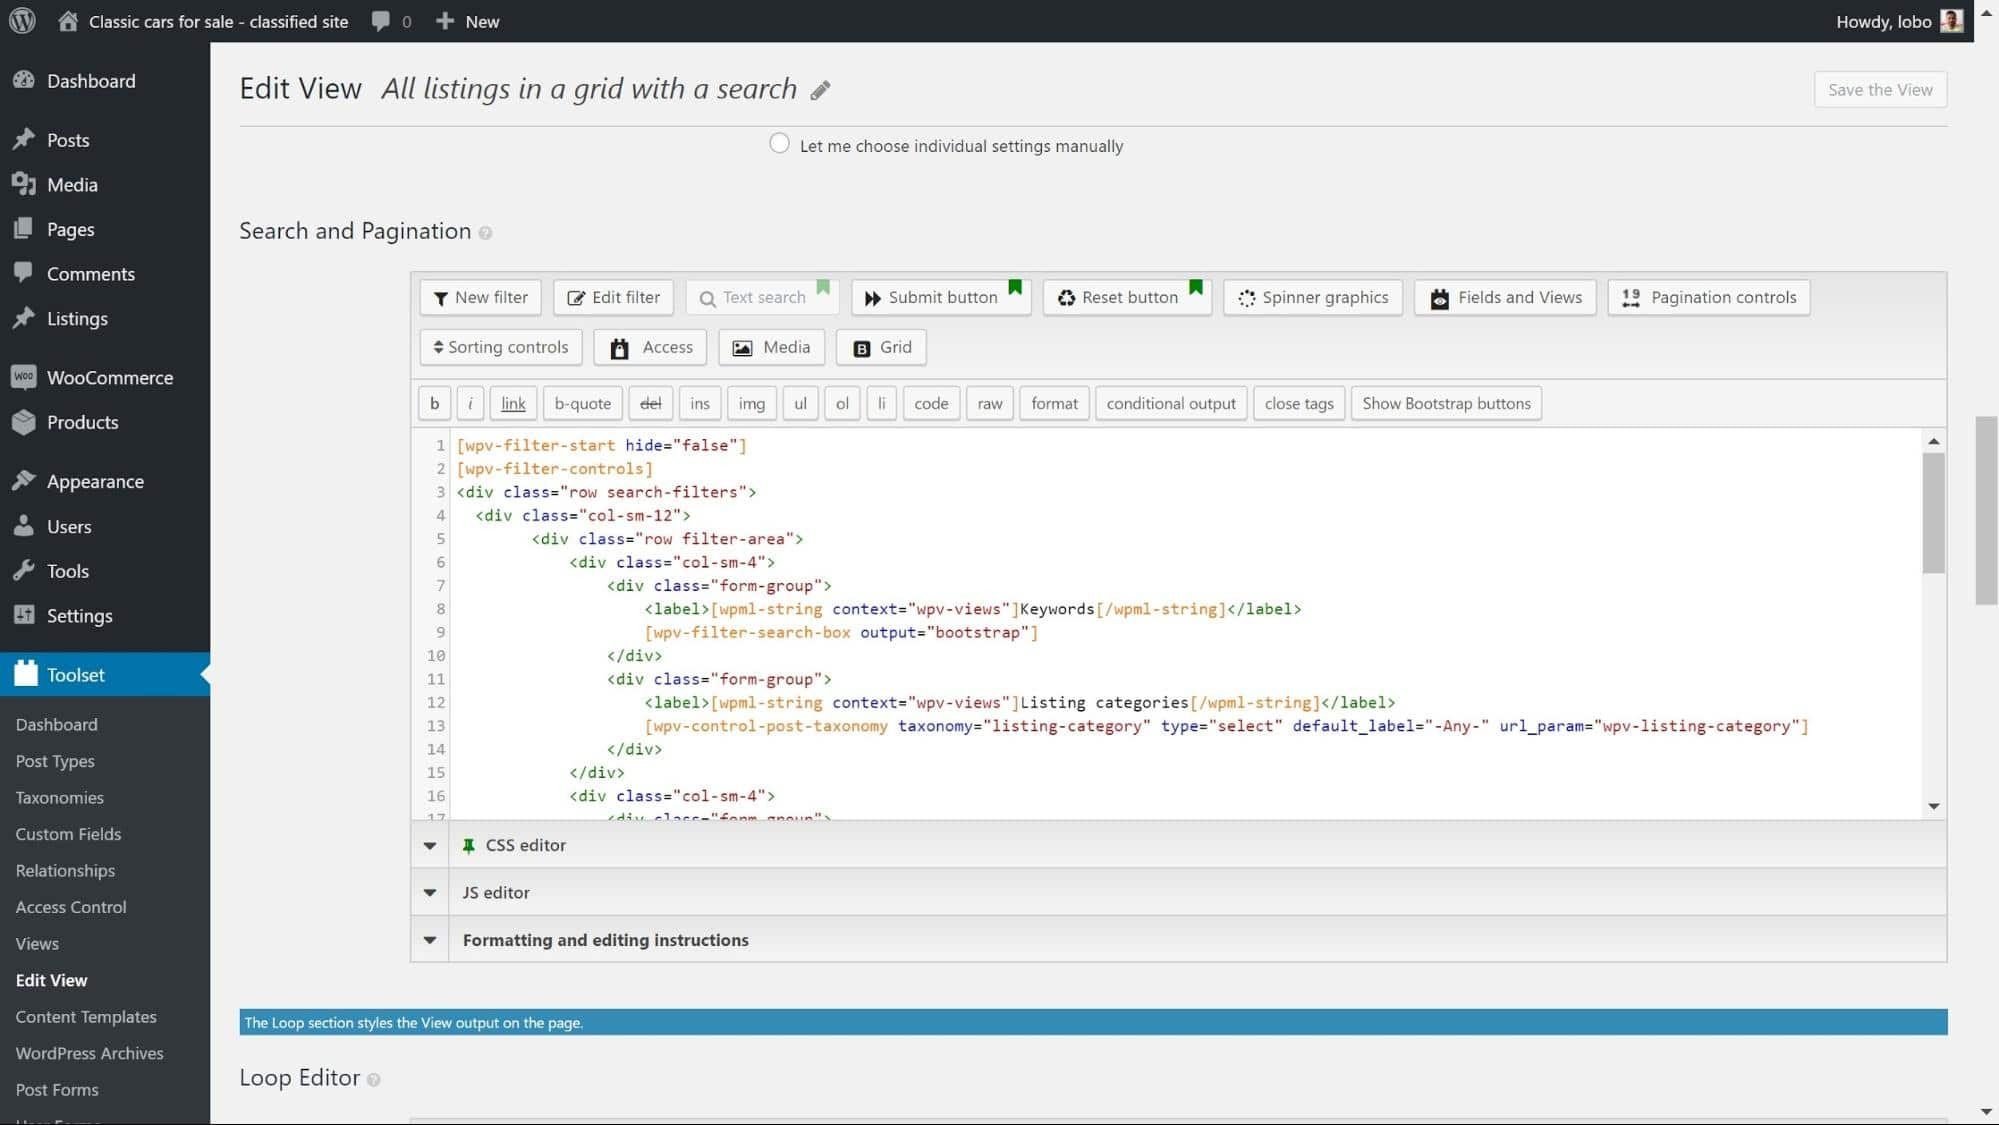
7. Under Search and Pagination, you can choose which filters you want to add to make it easy for users to narrow down their search. Click New Filter to open up the options.
8. Now you can add your filters. I used the Price custom field to add a Minimum price and Maximum price.
9. Add in your filters and add any additional text similar to how we added text to shortcodes in the template. Here is how it looks after I’ve added my filters. Note I also added in a bit of HTML and CSS for styling.
10. Click the Submit button to add a button for users to send the search.
11. Add the Reset button so users can enter a new search with filters removed.
Our search is now ready for the front-end. But before we finish we still need to design how our results look.
Step 2: Design how the results will look
On the same page where we created our search, we can also decide how our results will look.
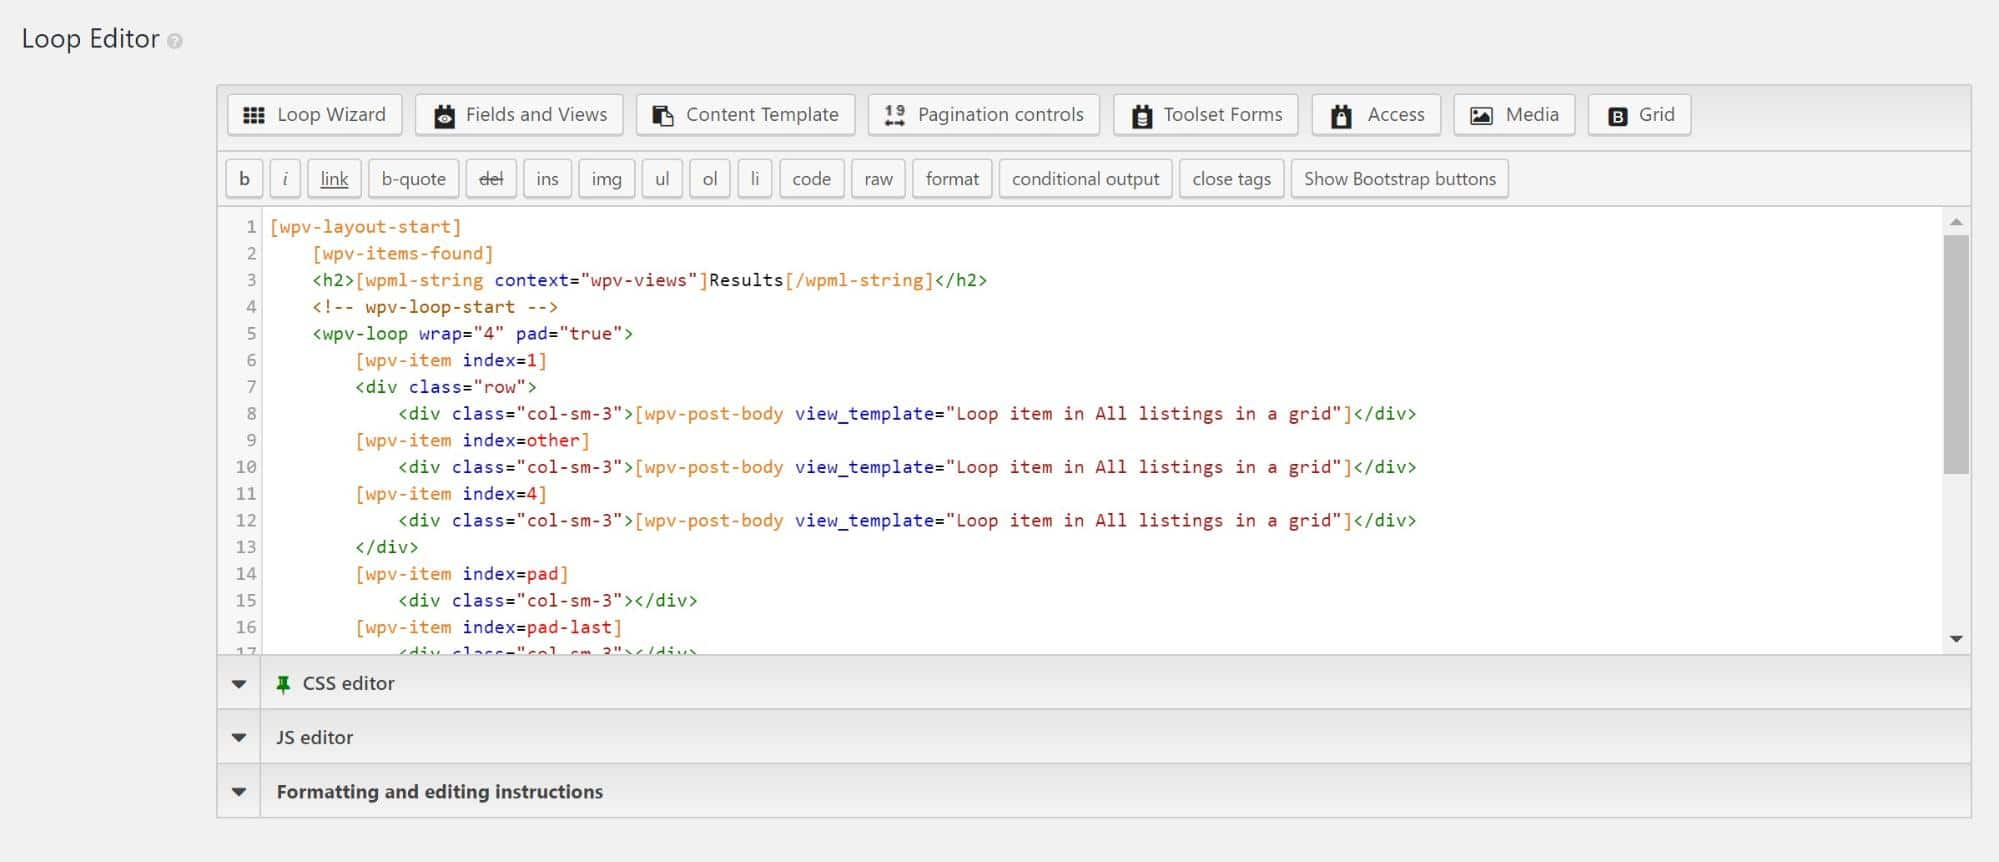
Under the Search and Pagination section, we can use the Loop Editor to design the output.
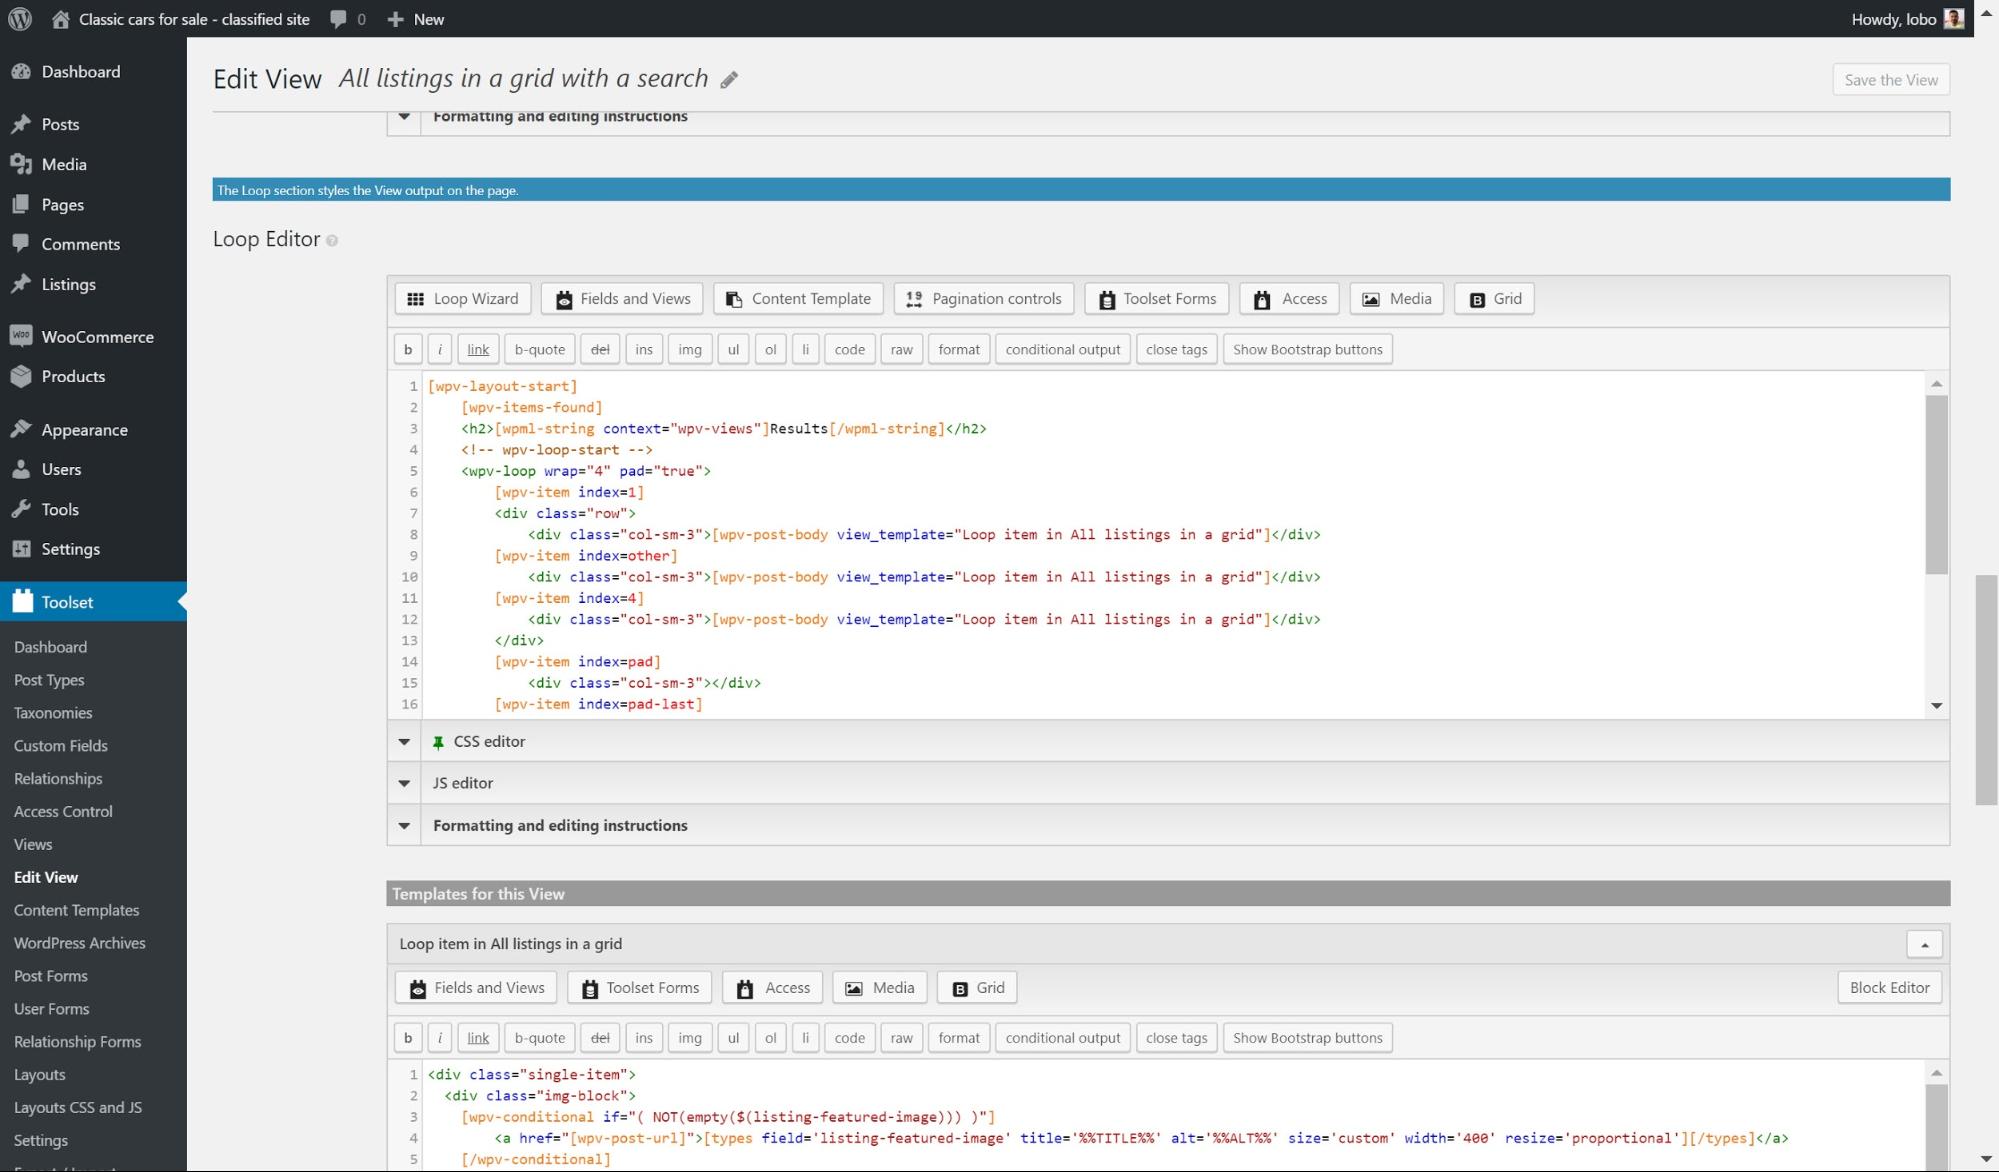
- Click Loop Wizard and choose how you want to display the loop. I have used the Bootstrap grid with four columns for mine.
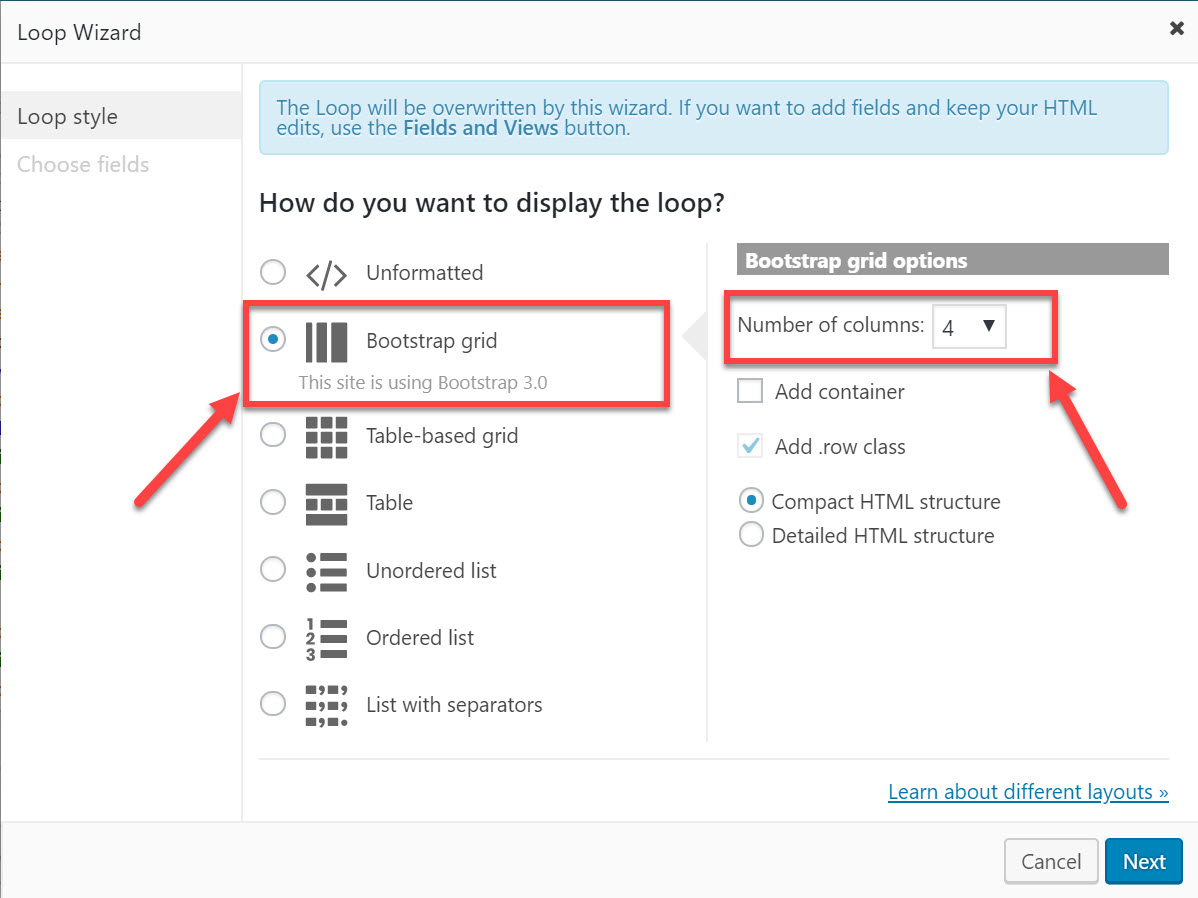
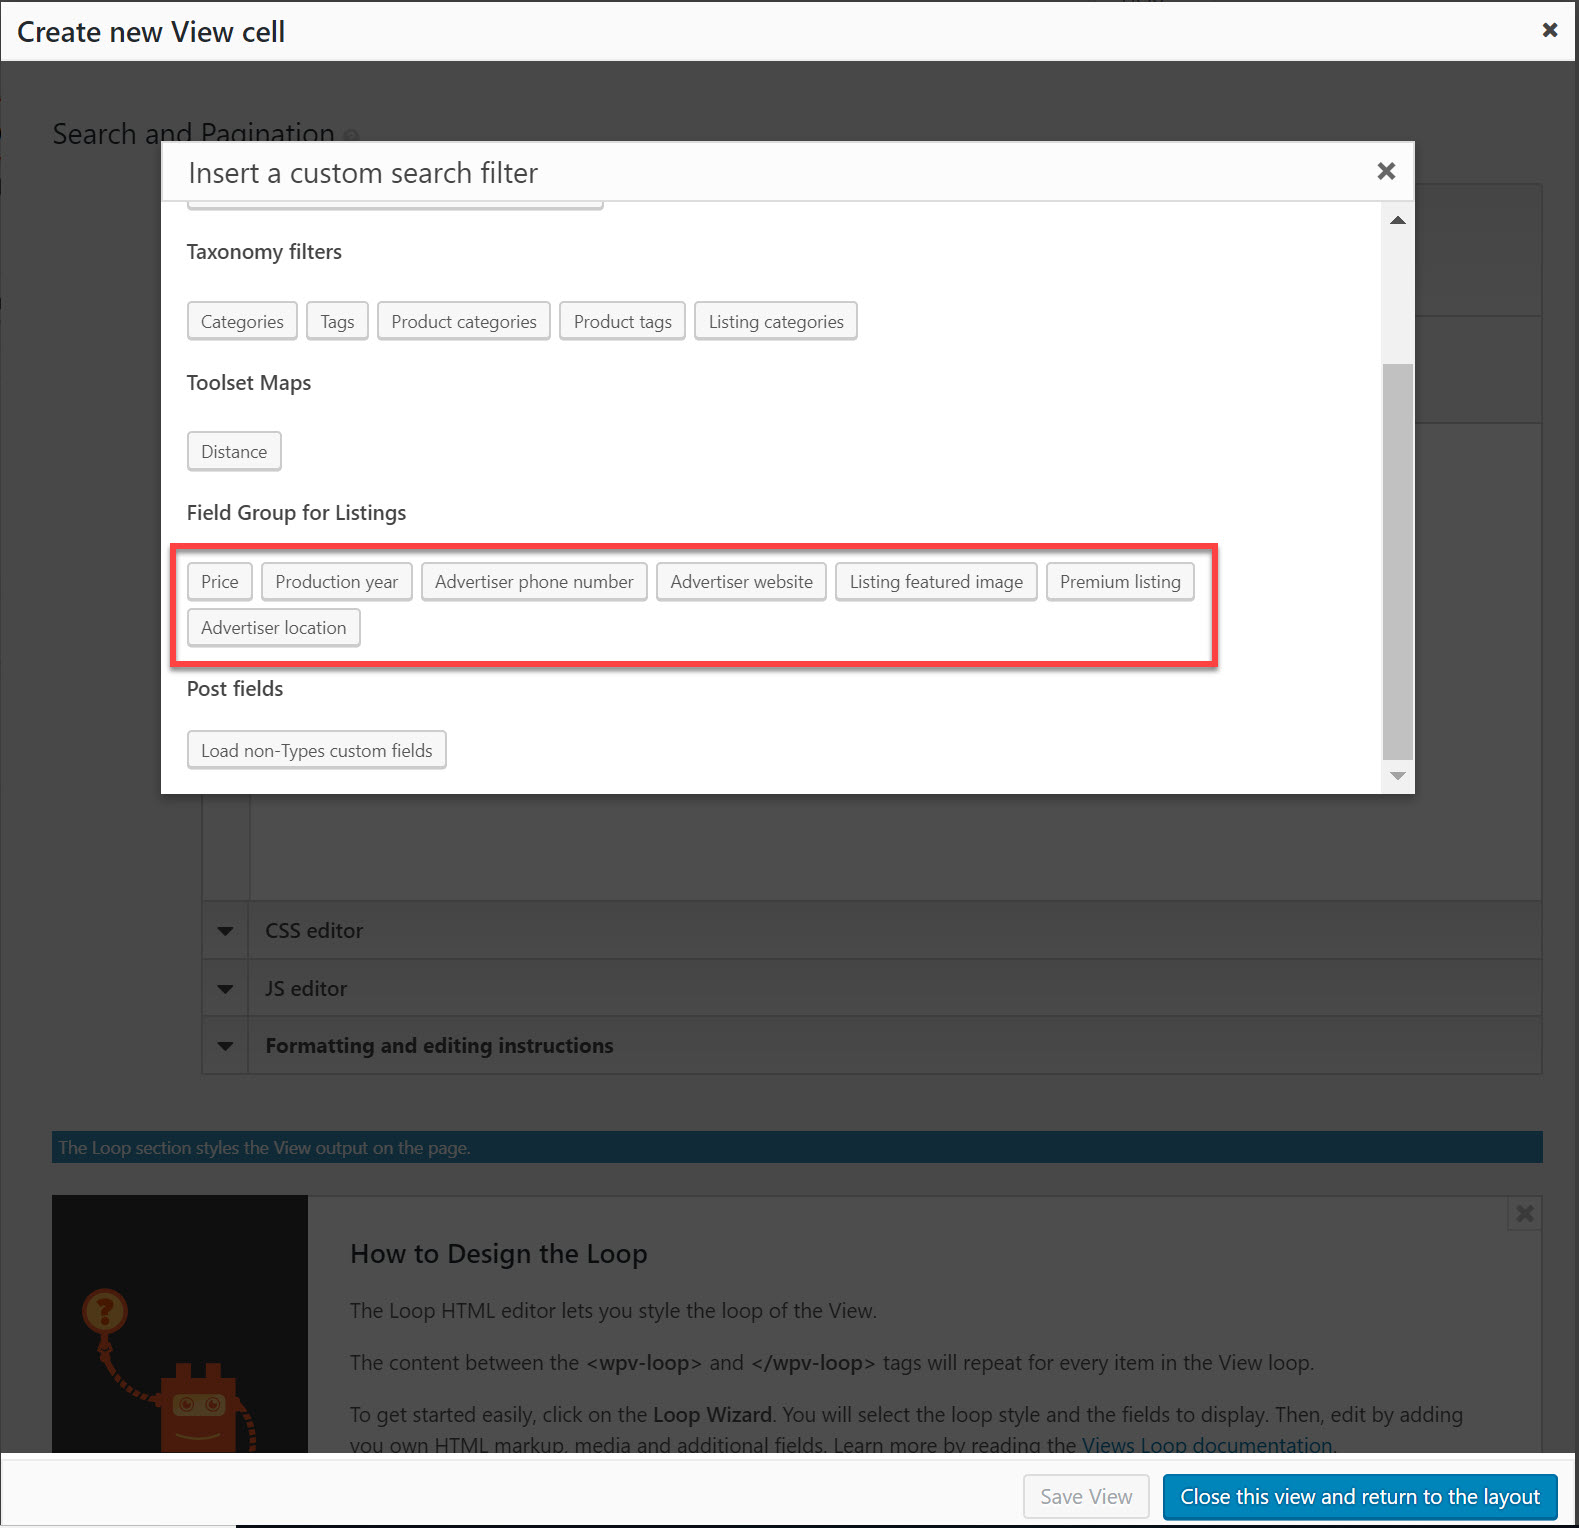
2. Next, add the filters you want to display along with the results. Here are the ones I added for my classic car directory website.

3. Click Finish and you will now return to the Loop Editor.
4. Click Save View and Save, and your search layout is now ready.
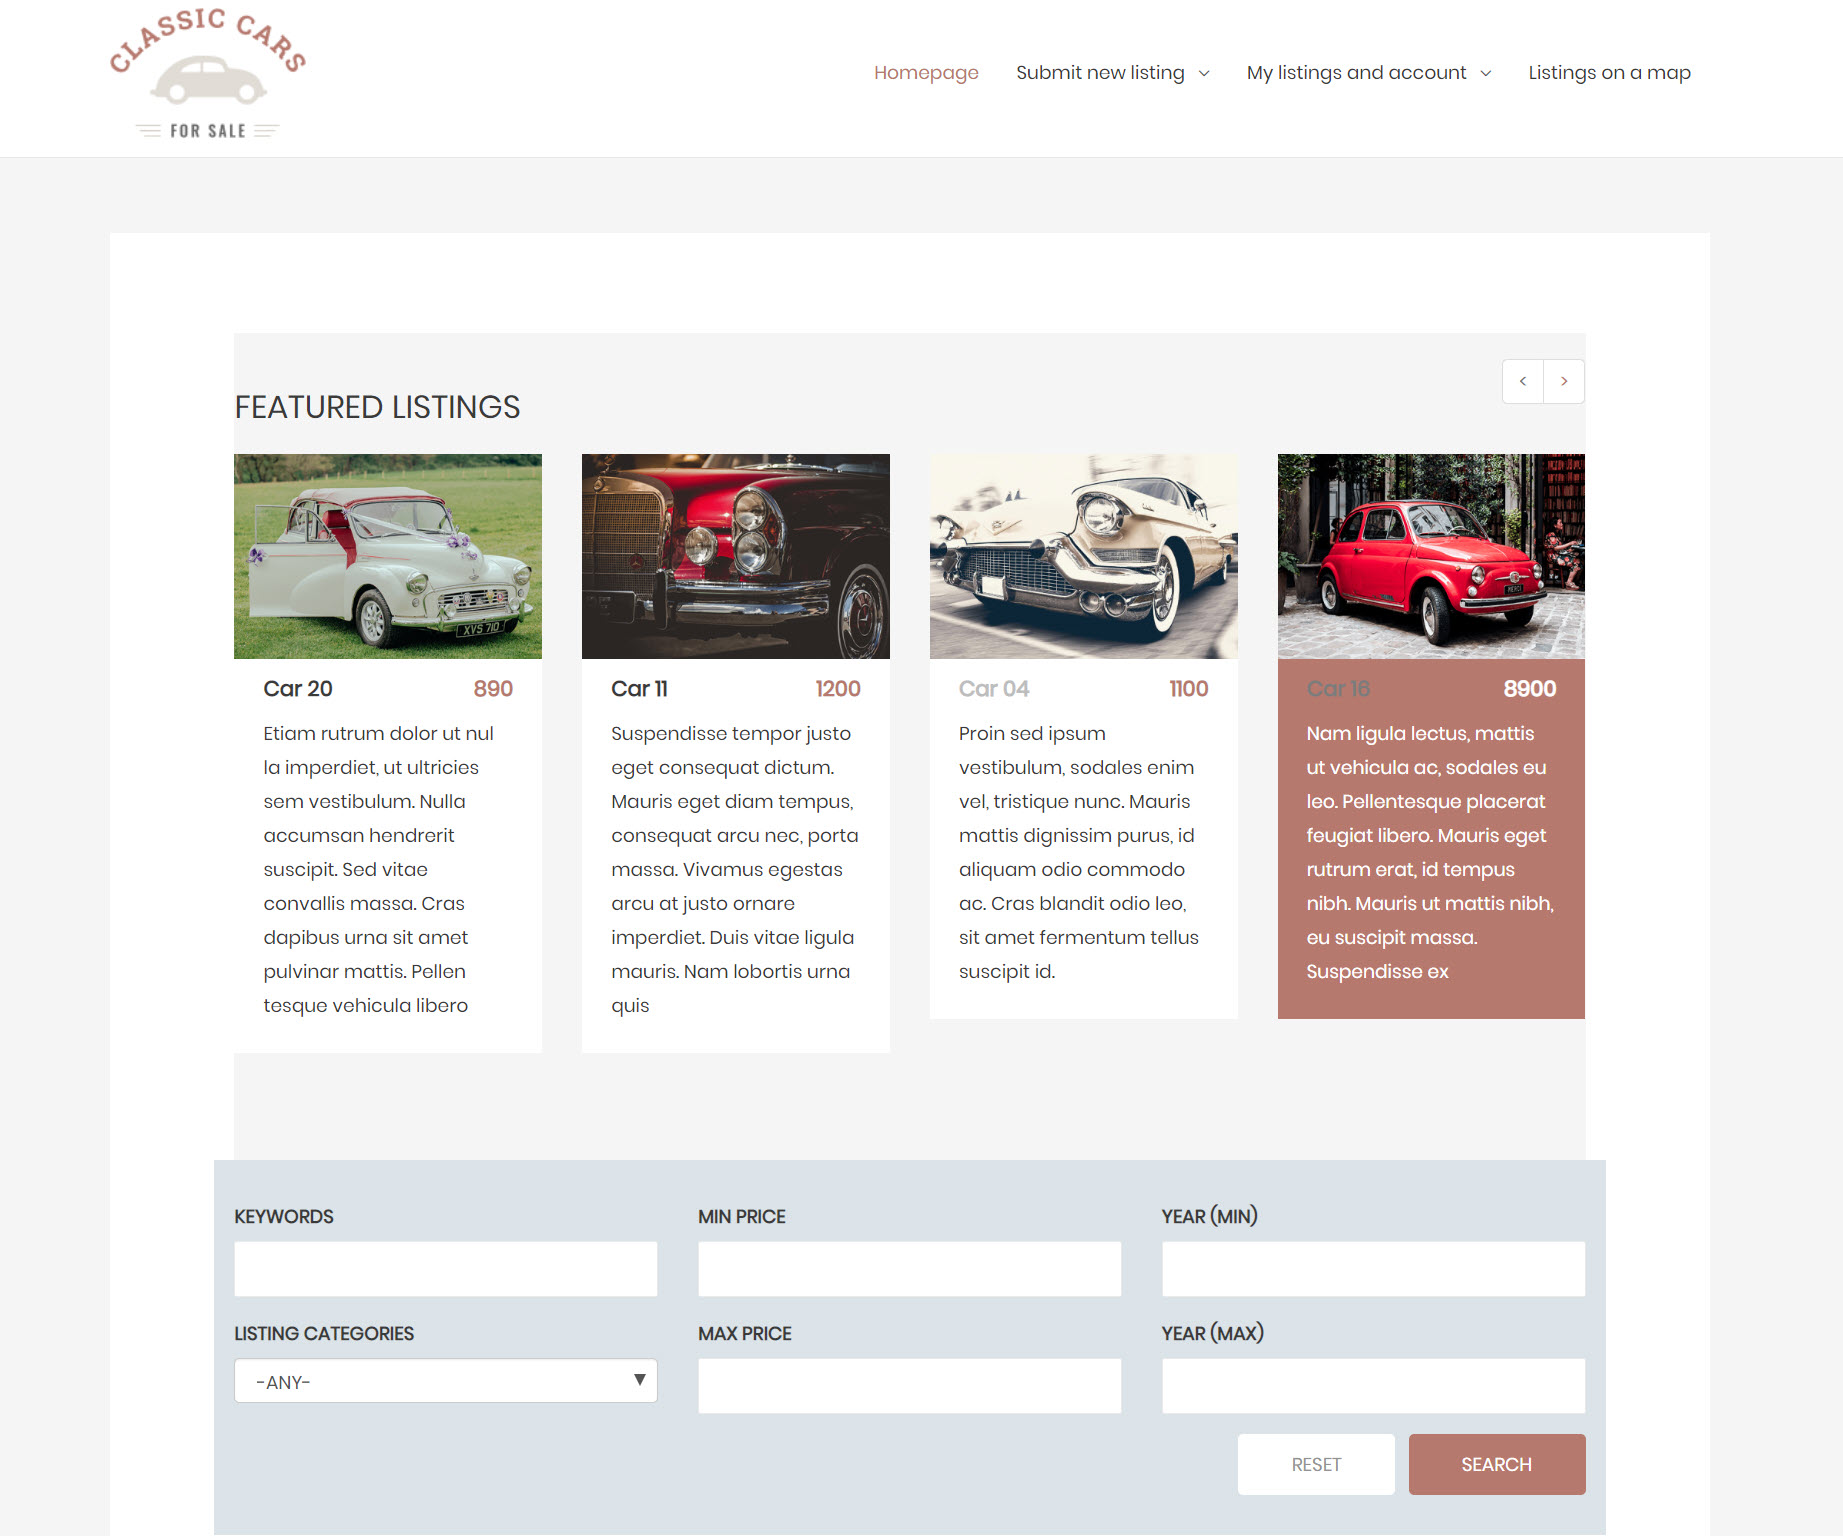
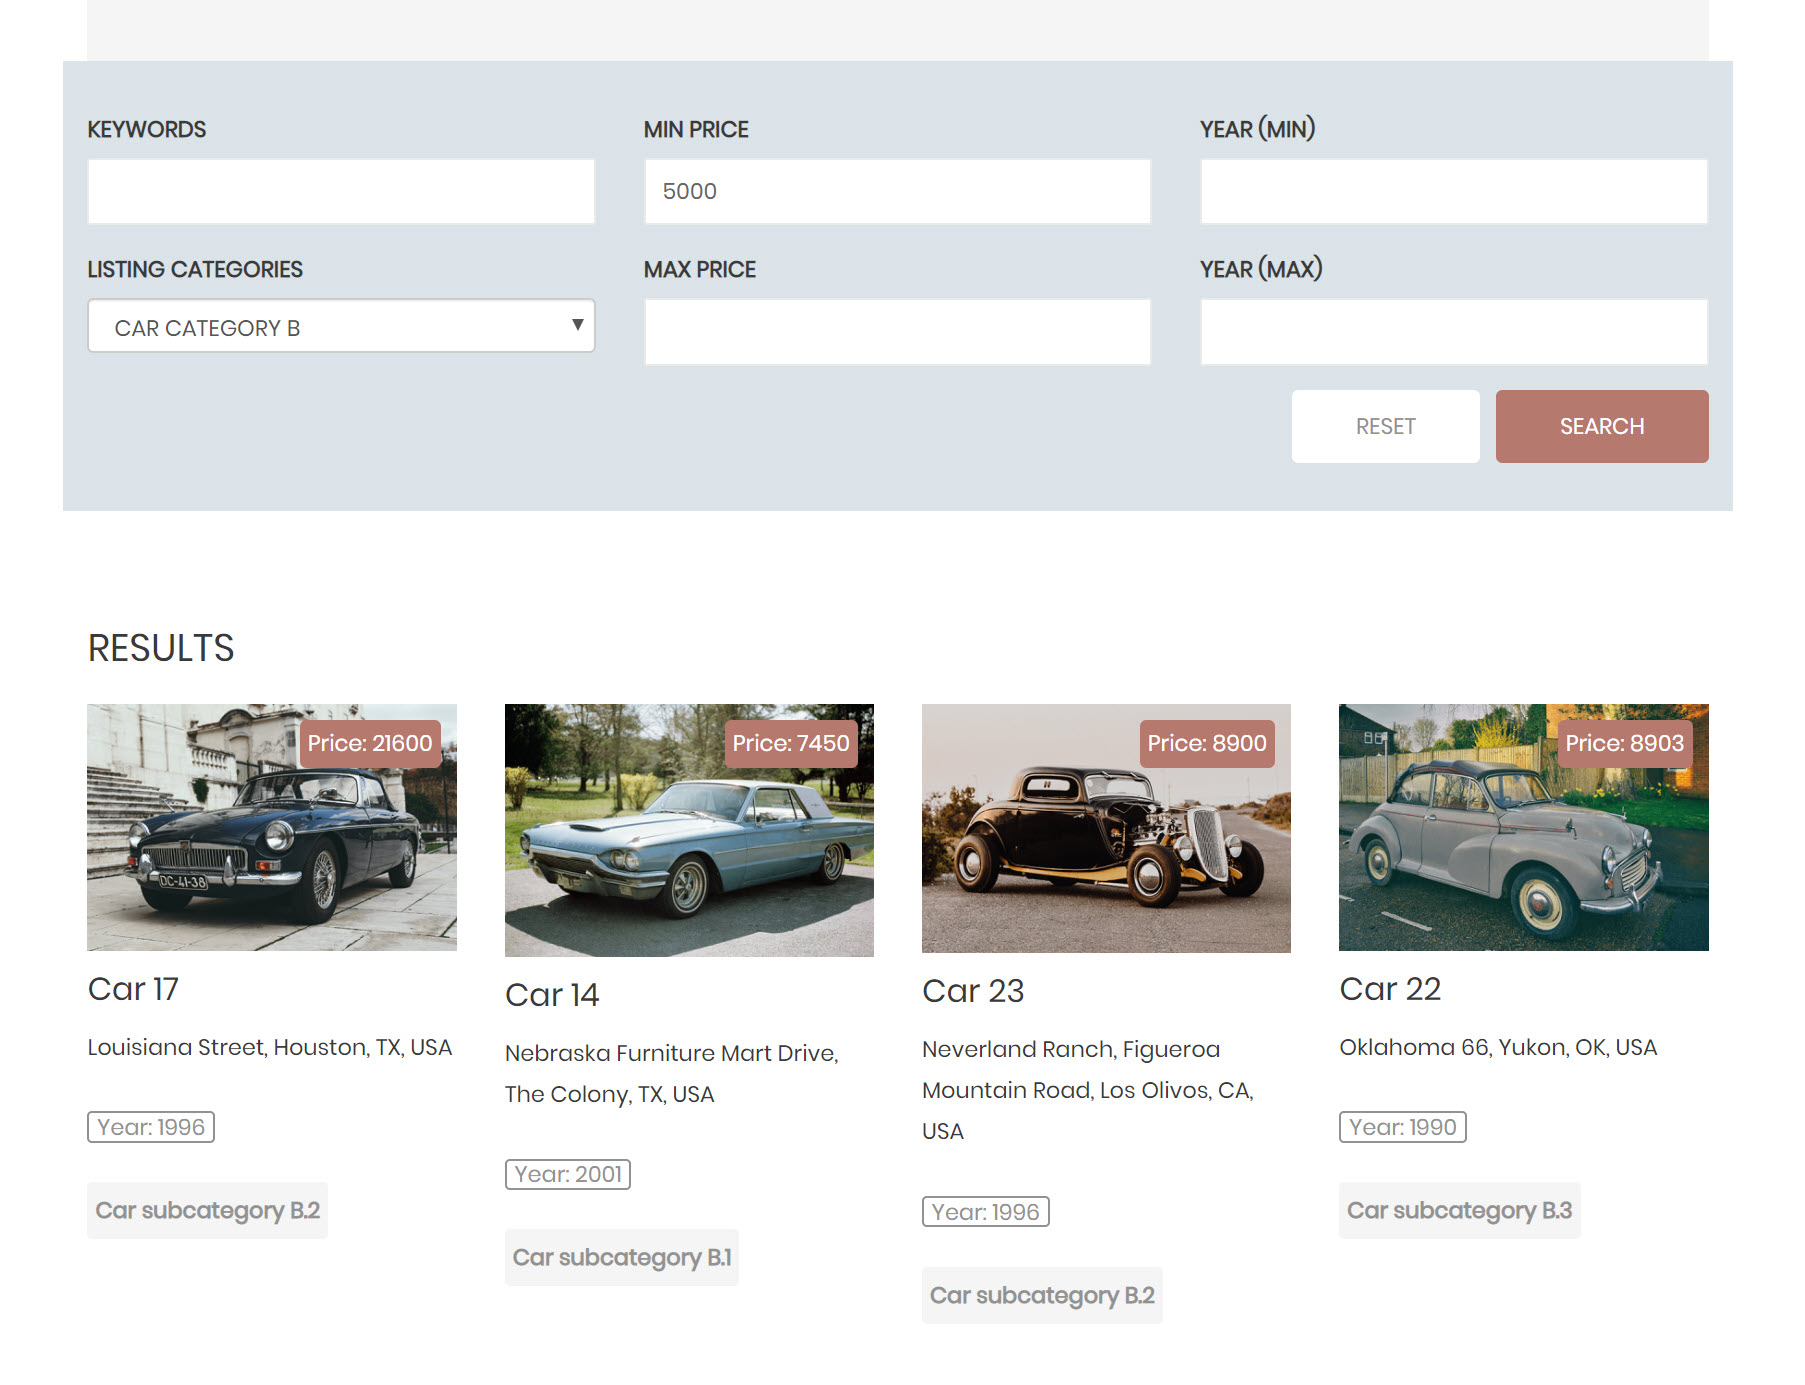
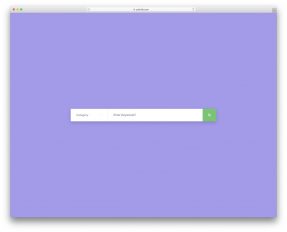
Here is how my search now looks on the front-end:
6. Create a front-end form to submit listings
Front-end forms are a great addition to building a directory website with WordPress because your users can simply fill them in when they want to submit a listing. You don’t need to design each one individually to display it.
Below is how I made one for my classic cars directory website. I created it using Toolset’s drag and drop forms editor.
- Go to Toolset -> Post Forms and click Add New.
- You will now see the forms wizard. Click Continue.
- Name your form and click Continue.
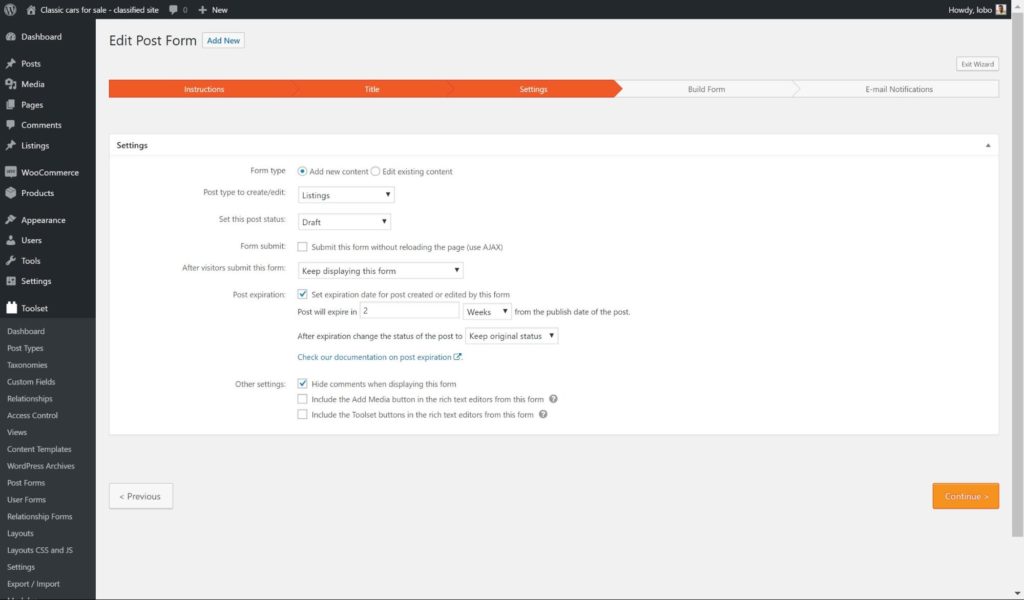
- Fill out the settings for your form including the post type it’s for, the status of the post once it’s submitted and whether or not the post expires. Click Continue.
- You will now see Toolset’s drag and drop editor for forms. Choose which fields you want to appear in your form. You can also add extra elements depending on what information you want each post to display. Click Continue.

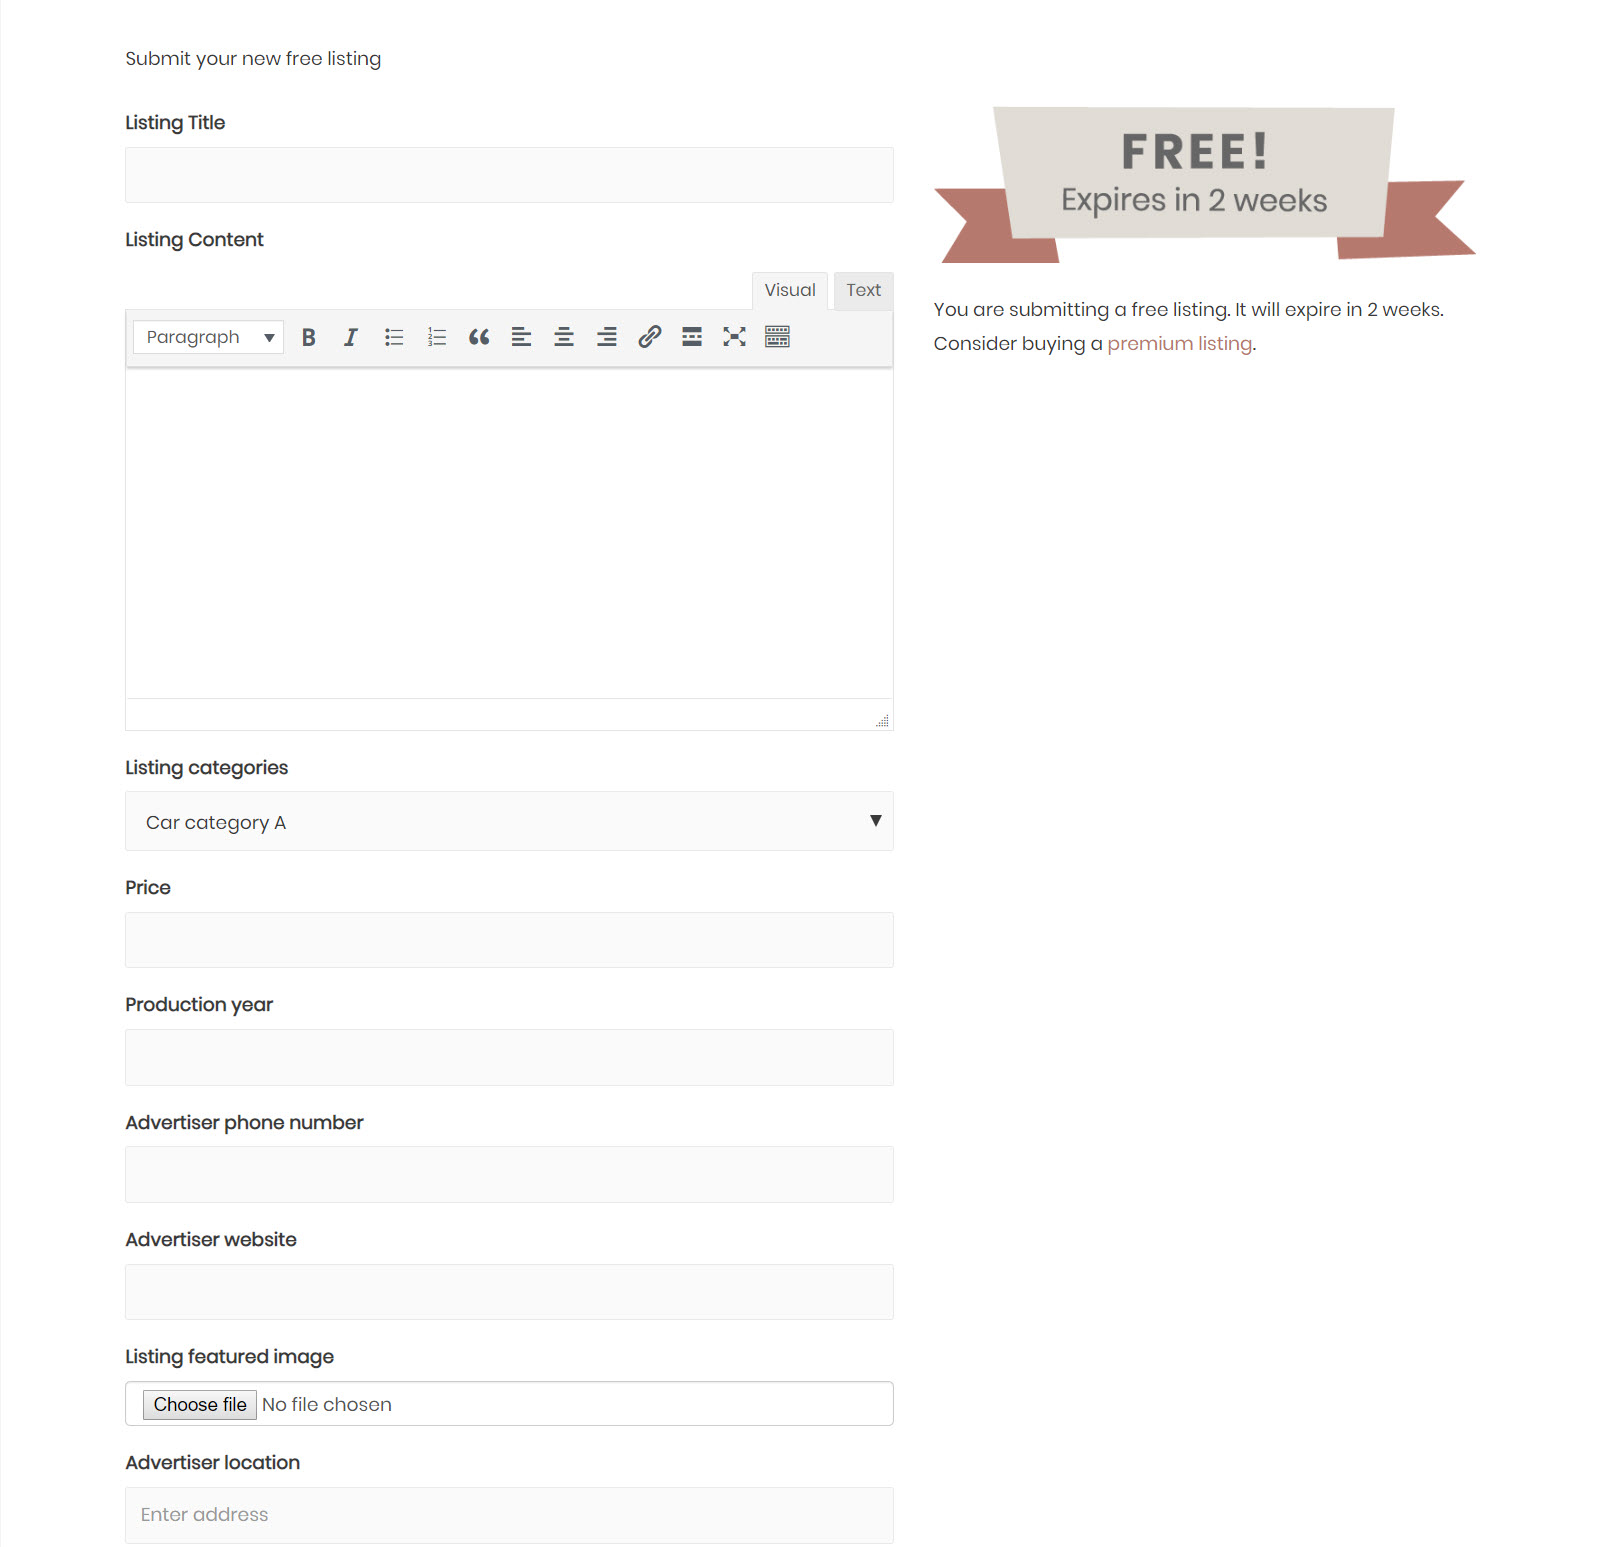
- Add any email notifications you want to send as soon as a form is submitted. For example, below I have added an email to send to users once they submit a new listing to tell them it is in review. Click Finish.
- Our form is ready but we still need to display it on the front-end. We can use the same approach when displaying our search and templates. Head to Toolset -> Layouts, create a new Layout and click to insert the cell.
- Click Post Form cell and click to Create the cell. Click Save and your form will now be displayed on the front-end.
Build your directory website with WordPress now!
Now that you know how to build the most important features for a directory website, it’s time to start creating your own!
Let us know of your experiences with creating a directory website below. And if you have any problems, then we would love to help!
Related Posts


Comments (0)