How to create a custom WordPress page template
A truly professional WordPress website will almost certainly contain custom page templates. Indeed, many of the most common websites will rely on templates. A real estate website will need a template for its houses, an e-commerce website for its products, a membership site for its members, and so on.

A template defines how pages and posts look on the front-end. The blueprint says how and where you will display all the content on each post. For example, any changes you make to your template for recipes on a cooking website will affect how all of the recipes appear on the front-end.
There are two types of custom WordPress page templates which I will go through:
- A template for regular pages
- A template for single post pages
Why you will need a custom WordPress template for regular pages
A template is easy to ensure similar pages follow the same structure. Instead of creating the layout for each page individually you can just create the template once and assign it to whatever pages you like. Those pages will then follow the template.
Let’s imagine an example. On a cooking website you might have many pages with cooking tips such as “How to make the perfect pasta”, “How to cook eggs” and so on.
I have an ebook on cooking which I want to display on all of these pages. Instead of editing each page with the same content (which would take a lot of time) I can just create a template once and assign the template to the pages. That way each page will contain a call to action to download my ebook.

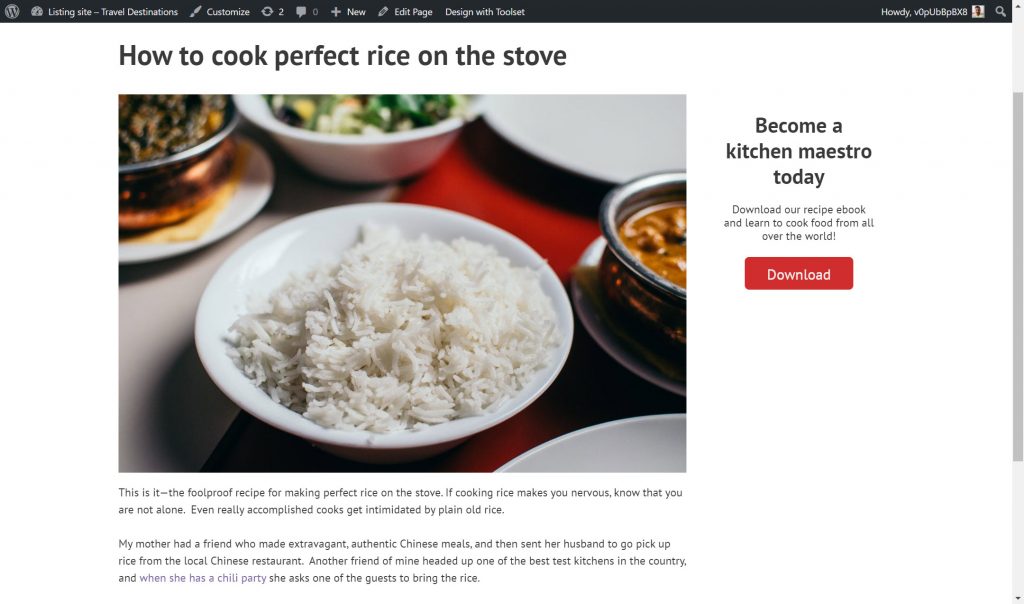
On both of the pages above you can see my call-to-action on the right hand side. That’s because I’ve assigned the same template to both pages.
The two ways you can create a custom WordPress page template
There are two ways you can create your custom WordPress page template:
- The hard way. Themes automatically provide the PHP files that define templates in WordPress. When you create a custom post type (such as recipes), you will need to either edit these PHP fields or create new ones to ensure your website displays your posts.
- The easy way. You can use a WordPress plugin such as Toolset to create your templates. Toolset creates templates in minutes and without any coding. Furthermore, with Toolset Blocks you can add blocks to the WordPress Gutenberg editor with dynamic content.
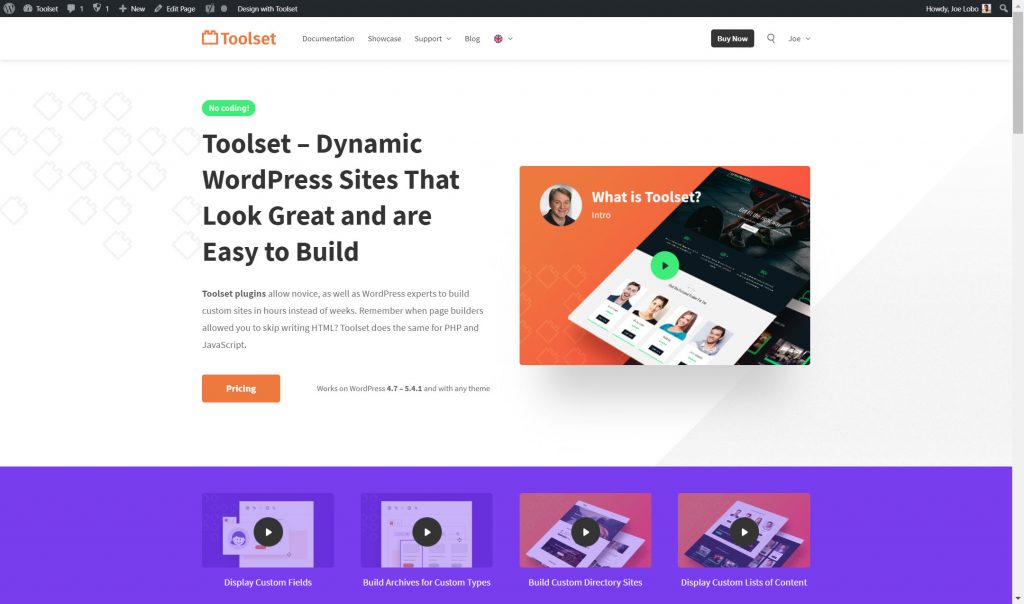
Below I’ll show you the easy way.
First I’ll create a template for regular pages which will contain a call to action on the right hand side.
Second, I’ll create a template for my recipes custom post type.
How to create a custom WordPress page template for regular pages
Step 1: Creating the content template structure
You first need to create the content template for your pages. With Toolset installed you can open up a new content template and add your blocks.
First, I arrange the template’s structure. Below you can see that I added Toolset’s grid block, allowing me to split up my template into sections. I have divided the template into two and expanded the section on the left to take up 75% of the page.

Step 2: Add content to your template
Now that I have the structure I need to insert the blocks with the content I want to display. On the left, I add the post content. All I need to do is insert Toolset’s single field block which allows me to select whatever source I like for the content.
Below I select the post content on the right-hand side as the block’s source.

I’ll add the call to action for the right-hand side of the template. All I need to do is select whichever blocks I want depending on the content. Below I’ve used the heading block and Toolset’s button block. For the button block, I also include a link to the book.
Step 3: Style the blocks
When you combine WordPress with Toolset, you can style the blocks you add to your template. If you chose to create blocks “The hard way, ” you would need to rely on your coding skills for good styling.
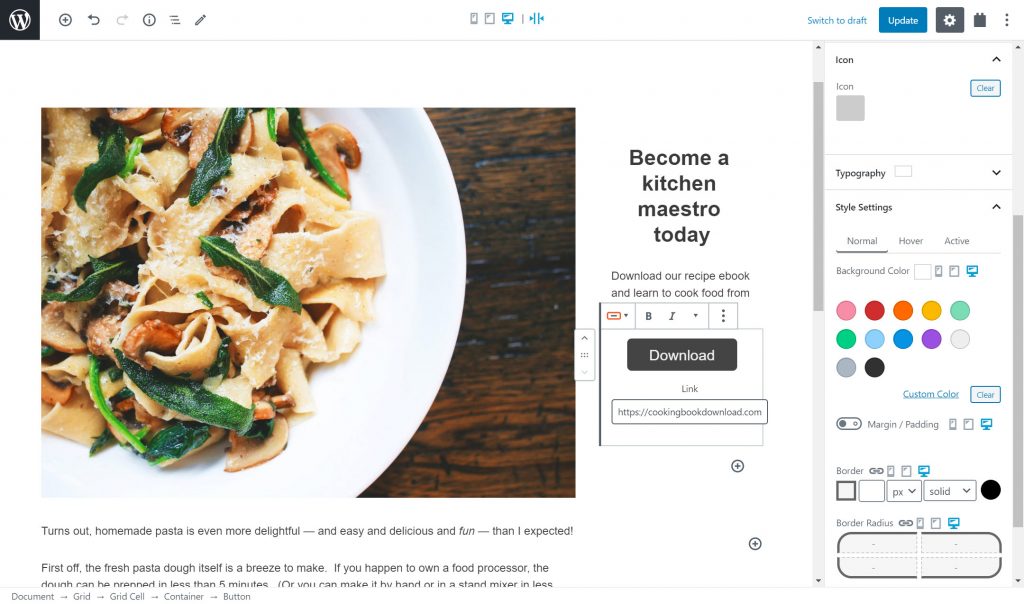
When you click on a block you will see on the right-hand side many options to style and enhance your template.
Under “Typography” you can change the following:
- Font
- Font size
- Spacing
- Style
- Text color

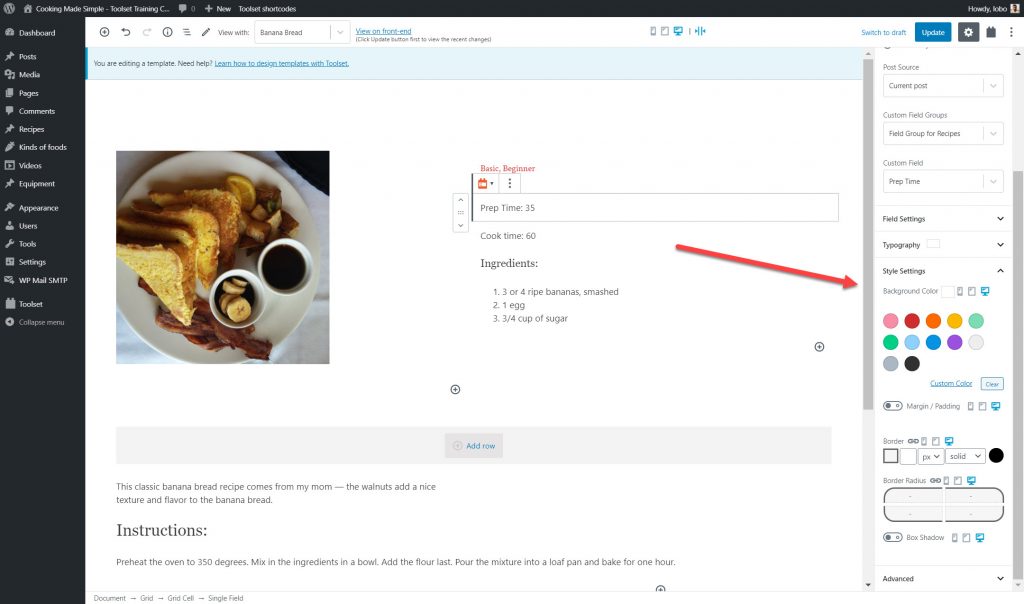
That’s not all. Under the “Style Settings” you can also change the following:
- Background color
- Margin/padding
- Border
- Box shadow
Below I added a new background color for the call to action. Note how you don’t need to code any changes, rather, you simply select the colors and any other styling you want.

Step 4: Adjust the template for different screen sizes
You are most likely building your template on a laptop or desktop but it is important to remember that your users might not be viewing the website on the same screen size. An increasing majority will be on their tablet or mobile device.
Therefore, you might need to adjust the template for each screen size. This is easy enough to do with Toolset and WordPress.
On the right-hand sidebar next to each style element, there is an option to switch between desktop, tablet and mobile.

As you can see, when I switch between the options the template adjusts itself so you can check how the template will look on each device.

Step 5: Assign the template to your pages
Now that I have a template I just need to assign it to the correct pages. Once I’ve done this each page will display the same template.
All I need to do is edit each page and select the correct content template.

On the front-end, I will now see the template on whichever page I assign it to.

Why you will need a custom WordPress page template for single posts
Besides creating templates for regular posts you will most likely also need templates for each of the posts in a custom post type.
For my cooking website I’ve created a custom post type for my recipes. Below you can see one of my recipes on the back-end. Notice all of the custom fields I’ve created for it such as the Prep Time, Cook Time and Recipe Image.

I’ve yet to assign a template to my recipes. See what happens when we take a look at the recipe without a template on the front-end.
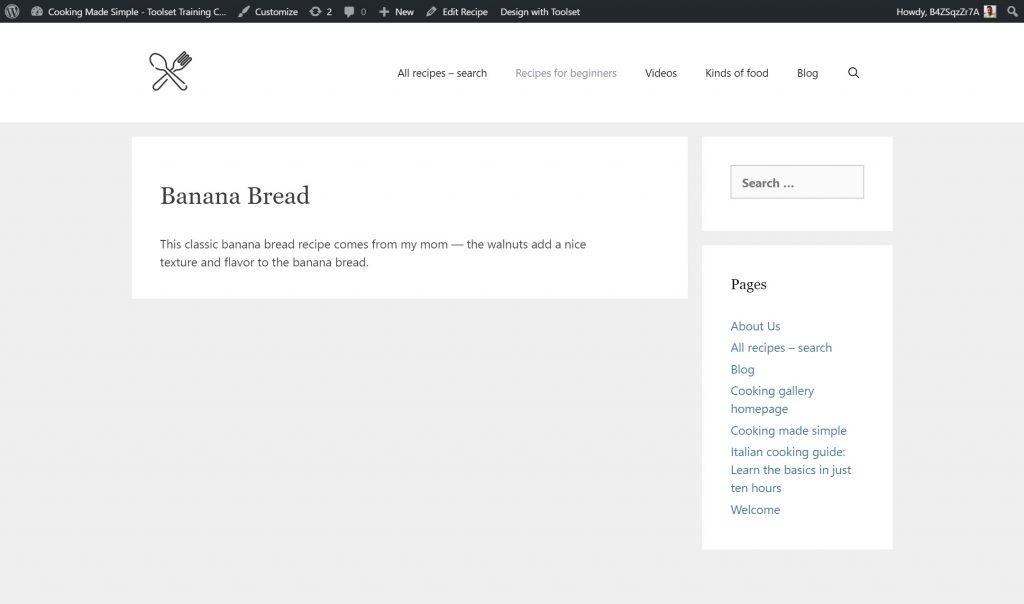
As you can see, none of the custom fields appear on the front-end. All you can see is the main post content such as post title and post body. This is why a template is so important for your single posts as it allows you to display all your content including custom fields.
Below you can see two of my recipes on the front-end. You can now see the custom fields because I’ve assigned a template to them.


Below I will show you how I created this template for my recipes.
Step 1: Creating the template
The first thing I need to do is create the template in which I will add my content. I can do this from the Toolset dashboard on the WordPress back-end.

I automatically assign the template to all the recipes I have created by selecting the template this way. Therefore, I don’t need to return to each recipe and manually assign the template.
Step 2: Adding the content to the template
Now on the content template, I can start adding and structuring the content as I did for the previous template for my regular posts.
Once again, I can add the Toolset Grid block to create the template’s structure.
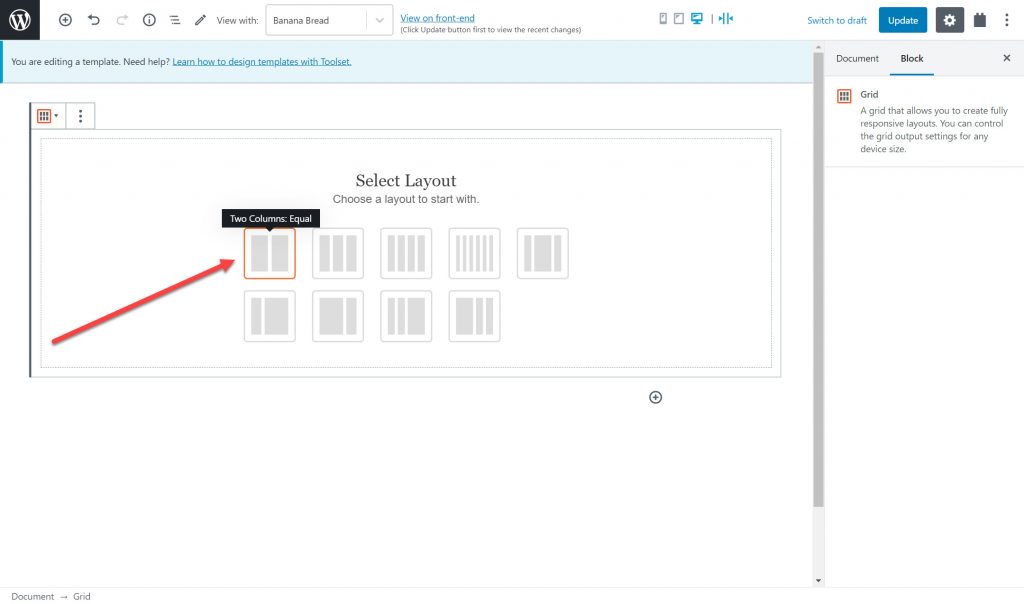
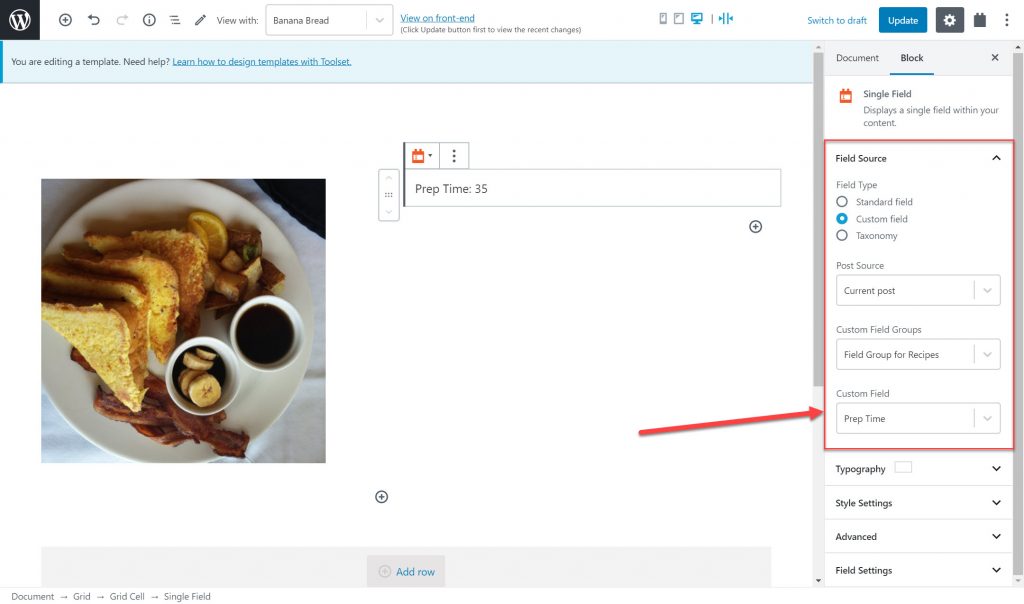
I can now start to add my blocks for my content. For example, on my recipes, I have an image on the left column. From Gutenberg’s set of blocks I can add Toolset’s image block. I need Toolset’s version of the block because it allows me to add dynamic content.

Dynamic content means you can create an element such as an image and for each post, it will draw the correct content for that particular post. For example, dynamic content means my recipe for banana cakes will display, you’ve guessed it, a banana cake. Otherwise, the content would be static and instead of a banana cake, you would see whatever image I insert when I created it in the template.
Using Toolset and WordPress, I can select the dynamic source for each block to tell it what to display.
For example, I’ve created a new block to add one of my custom fields, Prep Time. Once I add the block I can select the Prep Time field as the source for the block on the right-hand side. This block is also dynamic as the prep time will vary depending on the recipe requirements.
You can add many different types of blocks, including a repeating field block to add multiple items (such as multiple lines for a recipe), an image slider block, and a YouTube block.
Step 3: Style your blocks
Like with the first template for regular posts, I can style each block.
Step 4: Adjust the template for different screen sizes
Again, similar to the previous template I can adjust the structure for different screen sizes.
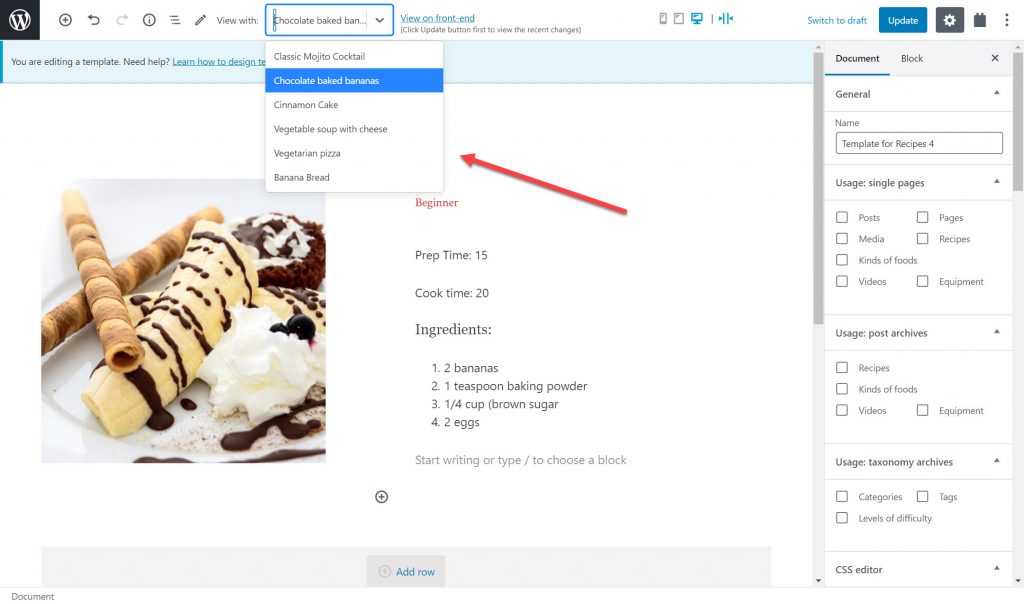
Step 5: Check how the template looks with each of your posts
Finally, you can also choose which recipe you view on your template to see if it fits them all. Use the drop-down menu at the top of the page to toggle between the posts.
Once you are ready you can check your template out on the front-end.
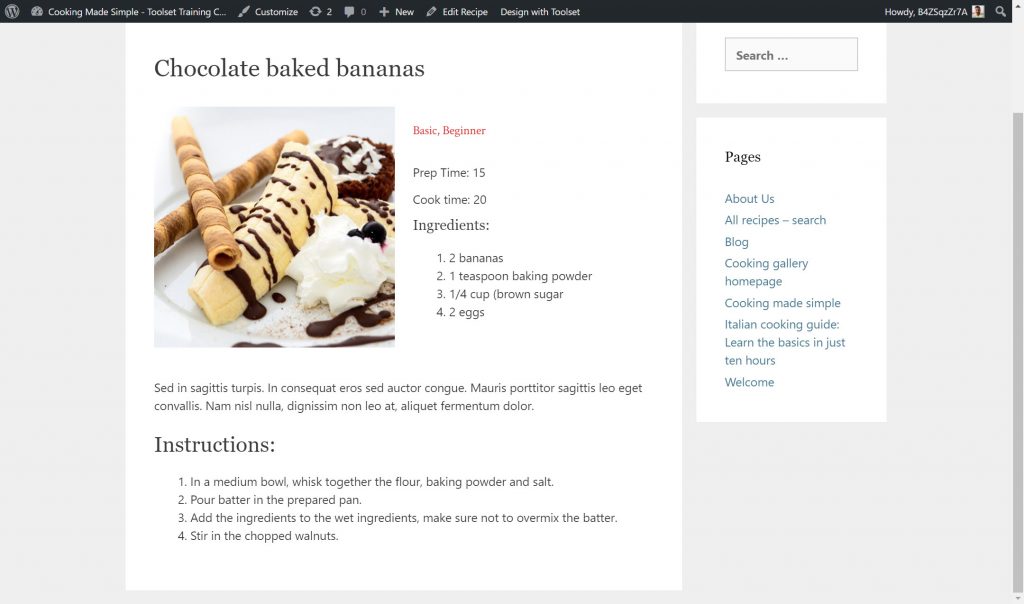
And just like that, I have a template for my recipes. When I create a brand new recipe it will immediately follow the template structure.
Start building your own custom WordPress page template today
Now it’s your turn to see how easy it is to build your WordPress page template. All you need to do is download Toolset and check out its documentation to see how quickly you can create a template for your posts without coding.
Related Posts


Comments (0)