WordPress Gutenberg tutorial on how to create a custom website using blocks
This is a WordPress Gutenberg tutorial written by web developers who have significant experience in creating WordPress websites using its new block editor.
In this guide, we will show you how to create a complex website that will include content templates, archives and a custom search. We will be using the WordPress Block Editor known as Gutenberg and Toolset Blocks to build the website.

Why Gutenberg is now a great way to build websites
Gutenberg has been out for nearly a year and is mature enough that it is now a great and reliable way to design the exact website you had planned.
Gutenberg uses blocks to build your pages. Blocks are elements that contain different types of content so you can create your layouts.
The block editor is still evolving but it is already incredibly intuitive and flexible. You do not need to be a coding expert to create content. Furthermore, when you combine it with plugins such as Toolset Blocks you can easily create complex websites that look great.
Gutenberg is also much easier to use on mobile than its predecessor. Given the increasing amount of work we do on our mobiles it is an important step in the right direction.
The best types of themes to use with Gutenberg
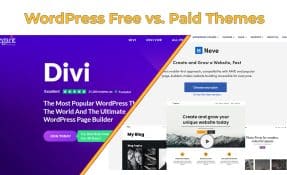
There are a bunch of premium WordPress themes that are compatible with the Gutenberg Block Editor and also support other premium plugins.
You can quickly look through the best themes by checking out our list of WordPress themes that are compatible with Gutenberg.

The best blocks plugin to use with Gutenberg
Since the launch of Gutenberg more than a year ago a number of excellent plugins have been released which complement the new WordPress editor.
For our WordPress Gutenberg tutorial, we will be using Toolset Blocks along with Gutenberg to build our WordPress website. Toolset Blocks offers a number of advantages which will make it easier for both coders and non coders to design and implement their websites quickly:
- Your workflow will be much simpler. There is now no need for you to design your pages and then implement them. You can simply build them on WordPress and instantly see how they will look.
- No need to switch between the back-end and front-end. Instead you can simply design your templates on the back-end and instantly see how they will look.
- Non-developers can build their dream websites. You no longer need to be a coding expert to create the website you wanted. With blocks you can easily add complex elements yourself without html or css.
- Spend less time reading documentation. The simple and intuitive nature of Toolset Blocks means you do not need to read heaps of documentation to understand how to build certain elements. Many of the blocks describe what you can achieve and can be used and experimented with easily.
- No further integration with any third-party plugins. With the classic WordPress editor you would have needed to install a page builder and additional compatible plugins. This could bloat your website slowing it down significantly. You are also relying on third parties updating their plugins and keeping them secure. Toolset Blocks is integrated with Gutenberg and WordPress so will not cause the same issues.
- Follow the same workflow as the WordPress core. You do not need to worry about changing how you work with the new WordPress editor.
WordPress Gutenberg tutorial on how to build a custom website using blocks
We can now get started with building our custom website. As an example, we will create a demo website that you can use to search for the best gym or personal trainer in your area.

Here is what we will cover in this WordPress Gutenberg tutorial:
- Adding, editing, moving and deleting blocks
- Display content side by side
- Navigating through your blocks
- Displaying Fields in your Block Editor Designs
- Displaying an image gallery
- Styling Toolset blocks in the editor
- Typography controls
- Creating a template
- Building your archive pages
- Creating custom lists of content
- Adding a custom search
Let’s get started!
Adding, editing, moving and deleting blocks
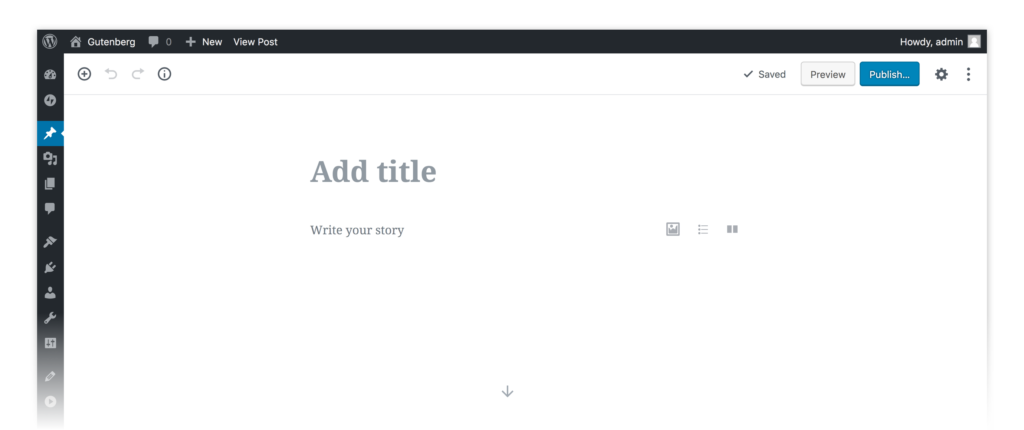
First things first, let’s go through the basics of how to create and remove your blocks. Blocks are a completely new way of building websites but it should only take a few minutes to get used to them.
- On a page or post click the + button.
- Search for and click the block you want to use in order to insert it.

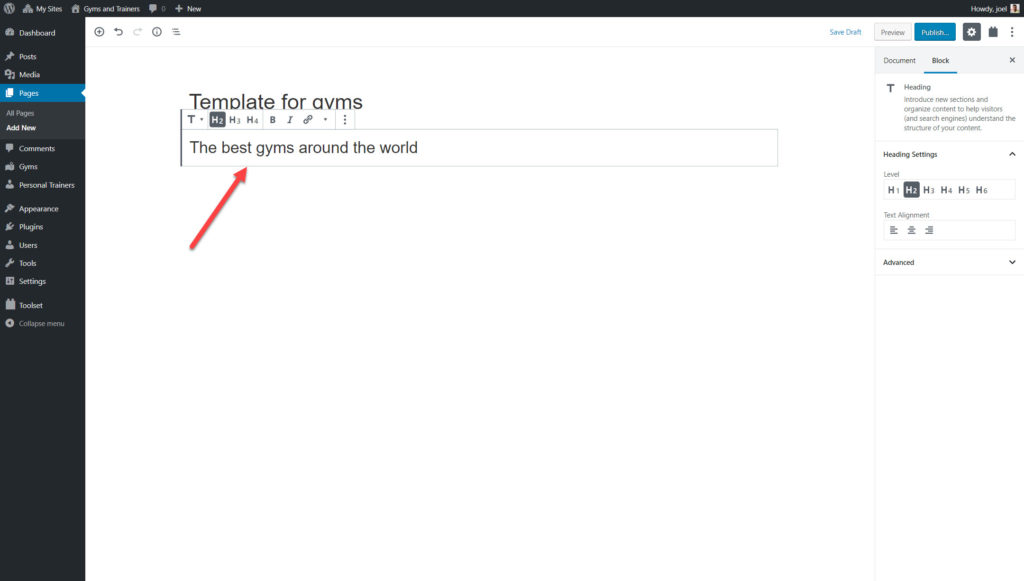
3. Enter your content information for the block. For example, here we have added the “Heading” block and will insert a title for it.
4. On the left of each block, you will see a set of controls which you can use to move your blocks around.
5. Use the right sidebar to change the options for the block you have selected. For example, you can change the font color, image size or text alignment.
6. If you click on the three-dot option you can see additional options such as the Remove block
How to display your content side-by-side
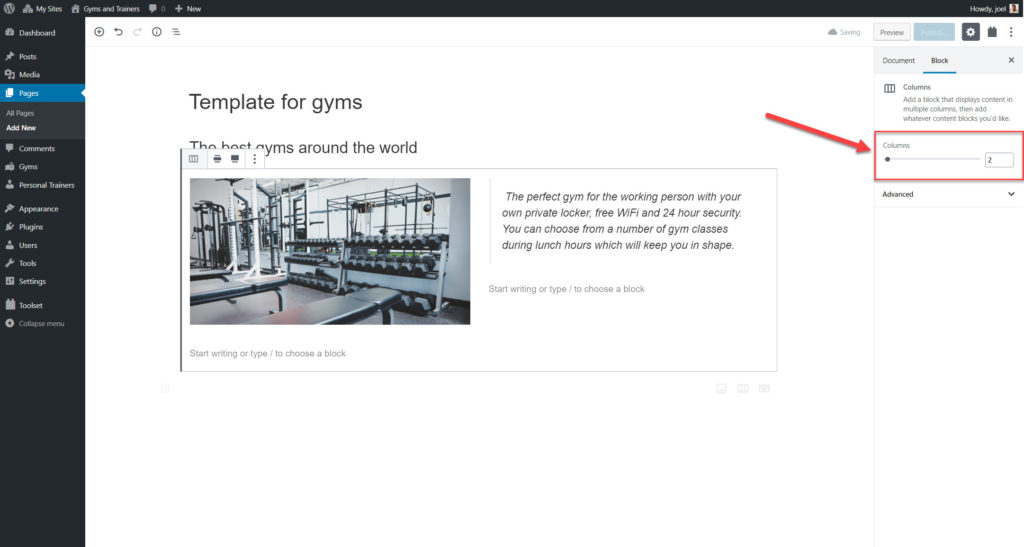
You can display your content next to each other on your page easily by using the columns block.
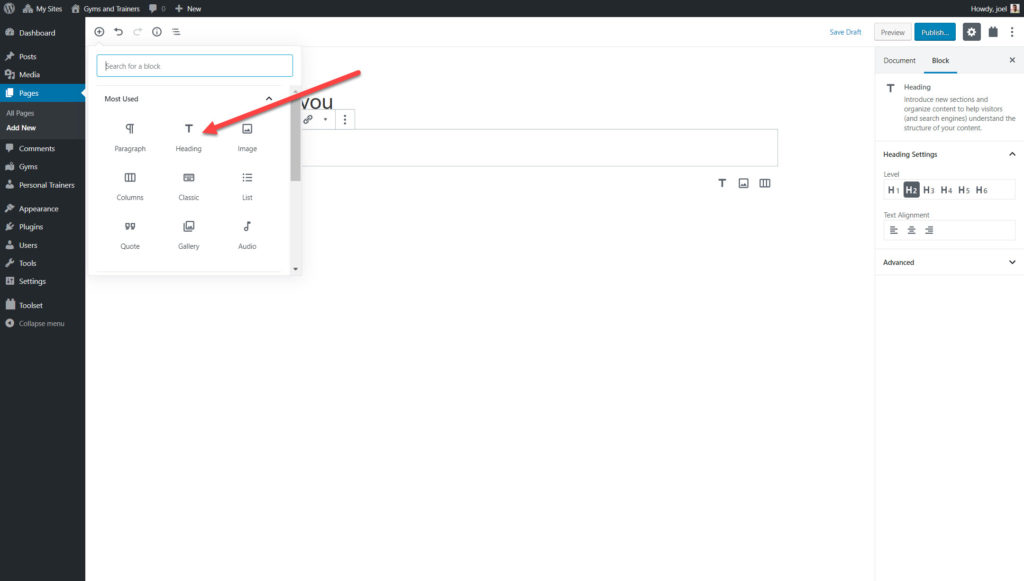
- Select the + button.
- Search for the Columns block and insert it.

3. You can now see two columns to which you can add blocks as normal.
4. Increase the number of columns by selecting the column block and toggling the number on the right-hand bar.
Navigating through your blocks
As you build your site some of your designs and templates will have a lot of blocks. One of the easiest ways to select the one you want to edit is by using the Block Navigation button at the top of the editor and selecting the block you want to work with.

Displaying fields in your block editor designs
You can display information from post fields (the title, body etc.) or from custom fields you might have created using Toolset Blocks.
There are three ways for you to display your fields which we will outline below as part of the WordPress Gutenberg Tutorial:
-
Set block content to come from field values
Each block in the Toolset Blocks library allows you to set its content from fields. For example, you can set any heading text to come from a post field or from a Toolset custom field.
Let’s see below how it works by adding heading text from a post field to the Toolset Heading block for our personal trainers.
- Create a new Content Template and choose which custom post type you want to display.
- Select the + button.
- Add the Toolset Heading block.
4. Turn on the Dynamic Heading Text.

5. Select the post field you want to display. Below I have selected the Post Title.

You will now be able to see the correct title for each of the posts related to a certain custom post type.
2. Display fields as individual blocks
You can display any post field or individual custom field created using Toolset as a block. For example, below we add the main post content to our template for our gyms.
- Select the Single Field block.
- On the right side bar under Field Type, select the Standard field.
- Under Post Field select the Post Content (body) option.
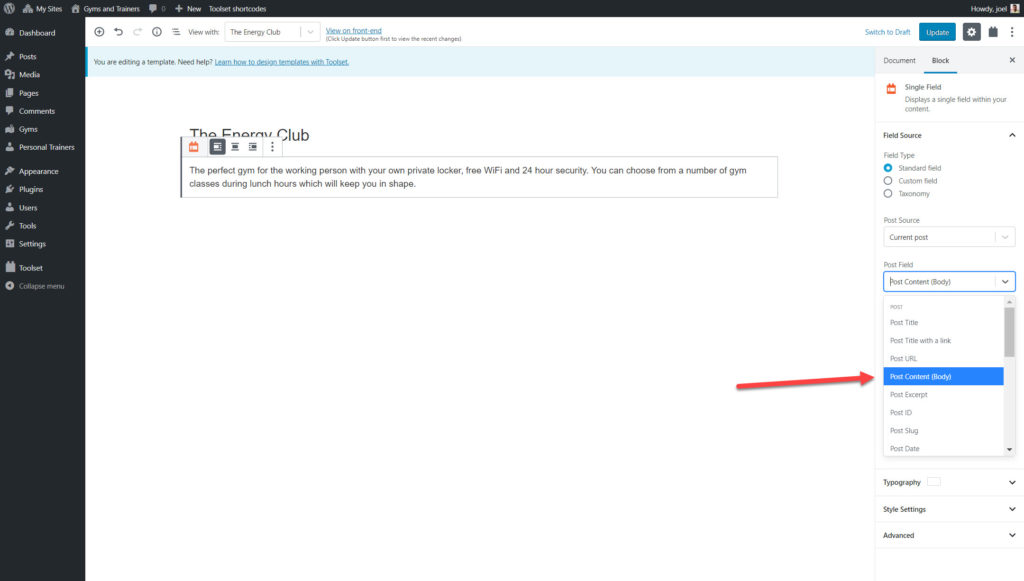
The description for each of the gyms will now appear in their respective posts.
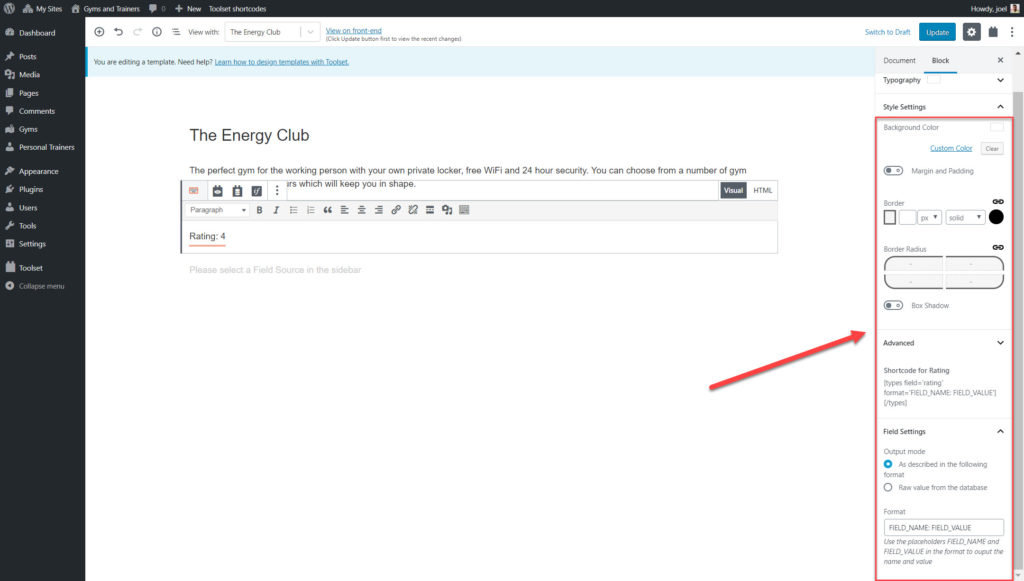
3. Combine fields with text in one block
You might need to add a mix of fields and texts to your designs. As an example, you might need to add labels next to your custom fields.
- Select the Fields and text block.

2. Type in the label you want to add. For example, I have added “Rating” because I want to display the results for the Rating custom field which shows the score for each gym out of 5.
3. Select from the icons what type of content you want to add. You can add a field, a form or a conditional output. In our case, we want to add a field.
4. Select the content you want to add (in my case it is the Rating field) and click to Insert Shortcode.

Display an image gallery
You can also add multiple images to your posts using blocks.
- Select the Repeating field/Gallery block.

2. Select the custom field group you want to display.
3. Choose the custom field you want to display.
Styling your blocks in the editor
When you are creating the website you had in mind you will need to style your blocks. For example, you might want to change the font, the colors, the background or the margins of your blocks.
There are two ways you can style your blocks:
1. Styling items using the interface
1. Select the block that you want to style. For example, I have selected the Ratings block that I added earlier.
2. Expand the Style Settings section in the sidebar.
3. Here you can adjust your background color, padding, border and much more.
Of course, each block will offer different styling options. For example, the image block will contain a number of additional customization features such as the ability to adjust the position of the image, the blur or how much it rotates.
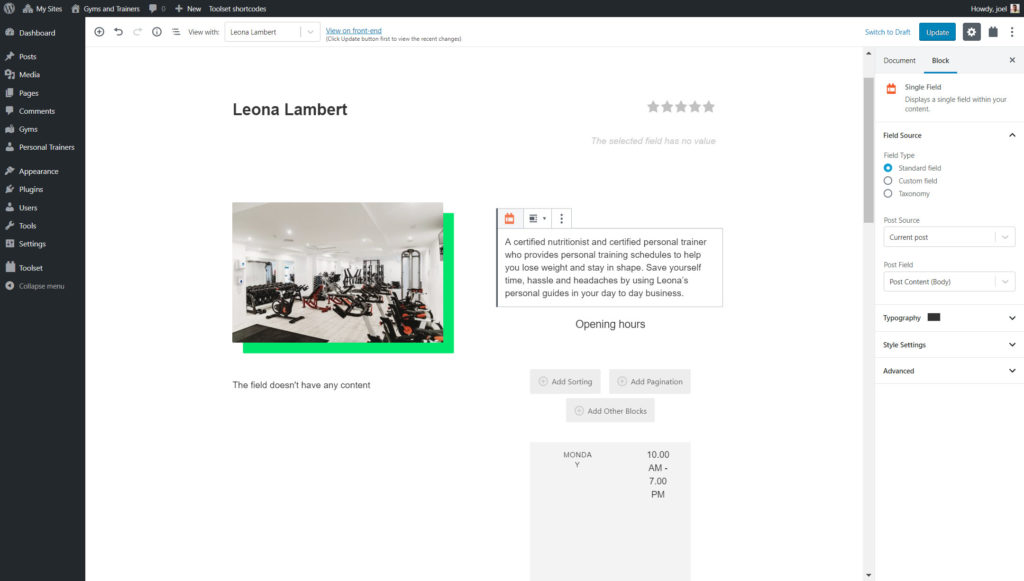
2. Using the Container block
The Container Block is a block you can only find exclusively with Toolset Blocks. Use the Container Block to group certain blocks together and certain stylings to each of them that will be displayed for each of the posts.
For example, I have added a Container Block to display all of the relevant information for a personal trainer together in one uniform section including the image, title, rating and much more. I can now style the Container Block so that each of my Personal Trainer posts displays the same stylings.
Once again, I can do this by using the sidebar on the right-hand-side.

Typography controls
With Toolset Blocks, you can easily style and format your text using its Typography section.
Here is a list of what you can adjust:
- Font type – choose from a huge selection of fonts
- Font size, line height, and letter spacing
- Font style
- Text transform – capitalize, uppercase, lowercase
- Text color
- Text shadow

How to create templates to display custom posts
One of the most important features which you will need to create for a custom website is the template. When you create a template it means all of the posts for the same custom post type will have the same layout and design.
For example, we can design a template for each of the gyms we want to display as part of our “Gyms” custom post type.
- Go to Toolset->Dashboard and click the Create Content Template option for the post type you want to design a template for.

2. Just like we have done before you can start to add fields to your template. Below I have added a number of different blocks including the Heading, Image and Single Field block which all contain fields.
3. Once you save and publish your template each of your posts for that custom post type will display the same layout and styling.

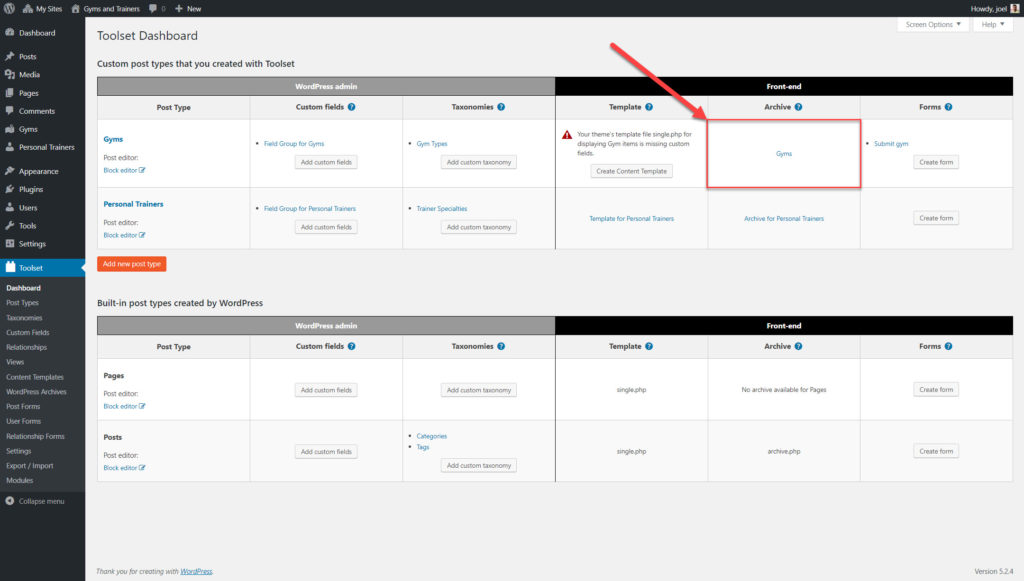
Building your archive pages
Archives are the list of content for each custom post type that WordPress generates for you. You can use Toolset Blocks and Gutenberg to customize how each of your archive pages looks.
Below as part of the WordPress Gutenberg tutorial I have created an archive for my “Gyms” custom post type.
- Go to Toolset->Dashboard and click the Create Archive option next to the post type you want to create an archive for.
2. In the Block Editor you can now add the different elements you want to display for each of your posts. For example, you can display all of your standard and custom fields (such as the Ratings, Address and Post Titles I created for my “Gyms” custom post types) using Toolset Blocks.
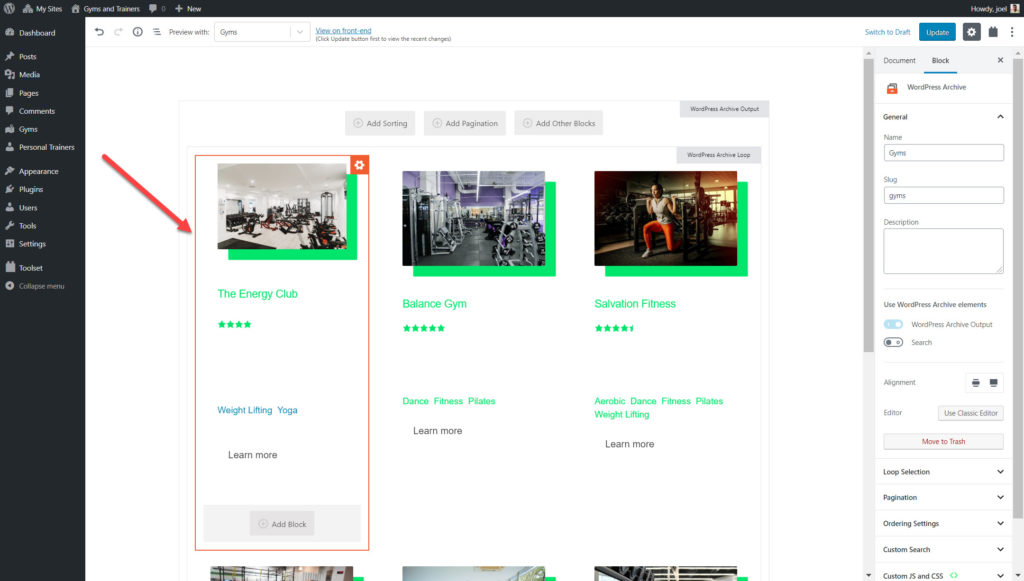
3. To change the number of columns click on the Block Navigation option and select the WordPress archive loop.
4. Under Loop Style you can adjust the number of columns.

5. You can also make a number of changes to the default settings for archives such as the pagination, ordering and much more under the WordPress Archive block.

6. You can also add custom texts and other blocks before or after the main archive loop which will display your posts. Simply click the + icon before or after the loop to add your blocks or text.

Display custom lists of content
You can use Toolset Blocks and Gutenberg to display any of your posts as a list in any order you like. You can also design the list any way you like, such as in a grid, simple HTML, a table or any other way. In Toolset this type of list is called a View.
This list can then be added to any page. For example, below I have added a list of featured gyms to the homepage.
1. Click the + button on the page you want to add your View to.
2. Add the Views block and name it.
3. Select content you want your View to display. For example, I want to display my gyms.

4. Add the blocks you want to display as part of your View.
5. You can edit the ordering, which content is displayed and more when you click Block Navigation, select your View and use the sidebar.

6. Under View Loop you can change a number of settings for the whole View including the number of columns.

Add a custom search
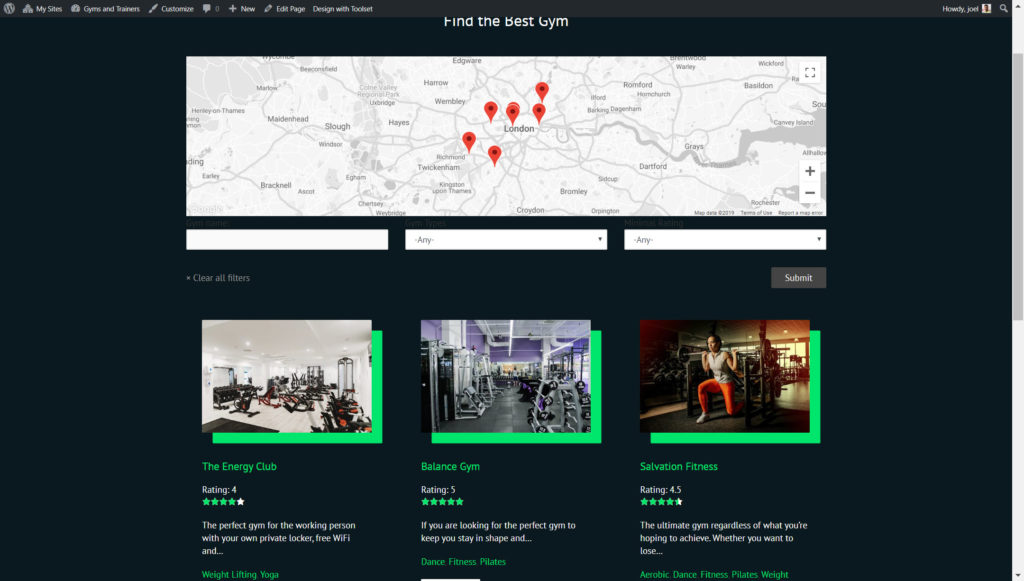
You can add to your View your own search, allowing your users to narrow down the content they are interested in on the front-end. For example, you can create a search for your users to find the best gym which is nearest to them.
- Insert the View block onto your page.
- Enable the Search option in the View creation wizard.

3. You can then add Search Fields, Search Buttons and much more in the Views editing area.

4. You can use the right sidebar to tweak the options for this search field. This includes the main field settings and label and style options.
Here is how our custom search for the best gym looks on the front-end.
Start building your custom website today!
Now that you know the basics after reading this WordPress Gutenberg tutorial you can get started with designing and building your own custom website. You can download WordPress and Toolset Blocks today to see how easy it is for you to create your own website.
If you have any thoughts or questions please let us know in the comments below!
Related Posts


Comments (0)