Table of Contents
- Installation
- Custom Menu
- Custom Background
- Default Layout Configuration
- Specific Layout Per Post/Page
- Set up Homepage Featured Slider
- Custom CSS
- How to Disable Page Comments
- Recommended Image Sizes
- How to set up Blog Page
- Translation
- Social Icons
- Change color scheme
- Footer copyright information
- Other
1. Installation
1.1 Through Dashboard (Easy)
- Log in to the WordPress Dashboard.
- Go to Appearance->Themes.
- Click on Install Themes at the top.
- Click on Upload tab
- Upload travelify.zip file via web interface
Note! Automated installation via WordPress.org coming soon.
1.2 Manual Installation using FTP (Advanced)
- Go to Travelify page at https://colorlib.com/wp/themes/travelify/ .
- Click on Download button to download theme on your desktop.
- Unzip travelify.zip to your Desktop.
- Access your host web server using your favorite FTP client (such as Cyberduck or FileZilla etc).
- Navigate to /wp-content/themes/ and upload entire travelify folder.
- Now open WP admin dashboard and go to Appearance->Themes and activate Travelify theme from there.
2. Custom Menu
 Travelify supports WordPress Custom Menus. Here is how to use them:
- In the WordPress dashboard, go to Appearance->Menus.
- Give your Custom Menu a name and build it up using little widgets on the left.
- You can add pages, categories or custom URL’s.
- You can drag and drop menu items to arrange them.
- Now simply select the theme location(Primary Menu) in the upper left corner and choose your newly created custom menu. Afterwards, click Save.
For more information see Custom Menus Help.
3. Custom Background
Travelify theme supports WordPress Custom Backgrounds feature.
- In WordPress dashboard go to Appearance->Background.
- You can either set the image or color as background.
- You can see the background preview on the same setting page.
- Click Save Changes when you are satisfied with what you see.
- You can always reset theme default background via WP Customize options.
4.Default Layout Configuration
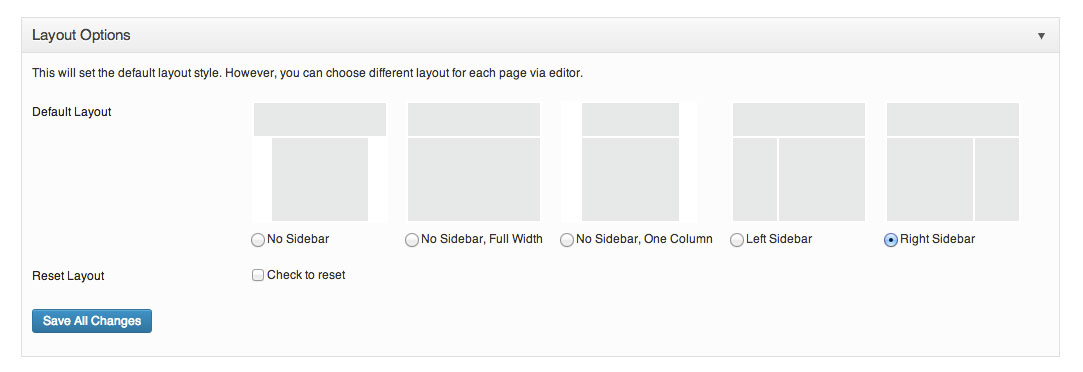 There are different layouts for Travelify theme and you can set any layout to be your default layout. This theme has several layout options: No Sidebar, No Sidebar/Full Width, No Sidebar/One Column, Left Sidebar, Right Sidebar. By default theme uses Right Sidebar. To change default Theme Layout follow these instructions:
- Go to Appearance->Theme Options->Main Options->Layout Options.
- Choose on of the 5 default layouts.
- Click on Save all Changes.
5. Specific Layout Per Post/Page
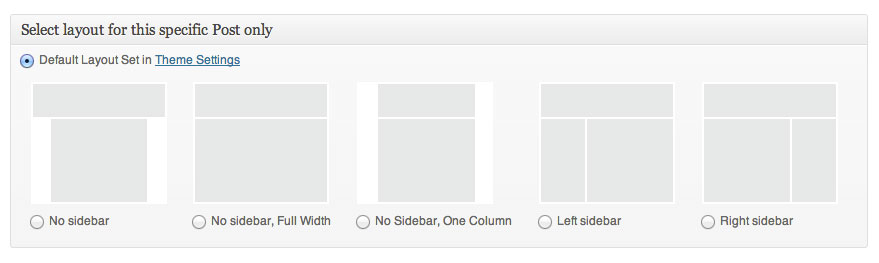 Travelify theme allows you to choose the specific layout for every post and page display. This will override default theme layout you set on step 5.
- Open any Post or Page.
- You will see a box named “Select layout for this specific Post only” at the bottom of the post editor page.
- This feature might be disabled but you can always enable it via Screen Options.
- If your select Default Layout set in Theme Settings , the layout set in the Theme Options Layout Configuration will be layout for this post as well.
- Select layout you want to use for this post or page and hit Update to save changes.
6. Set up Homepage Featured Slider

- Create Post or Page and add featured image to it.
- Go to Theme Options->Featured Slider
- Choose how many slides you want to display on front page.
- Add all the Post ID that you want to use in the featured slider. Post ID can be found at All Posts table in last column
- Choose transition style and other settings at “Slider Options”
- Featured Slider will show featured images, Title and excerpt of the respected added post IDs.
- The recommended image size is 1018px x 460px.
7. Custom CSS
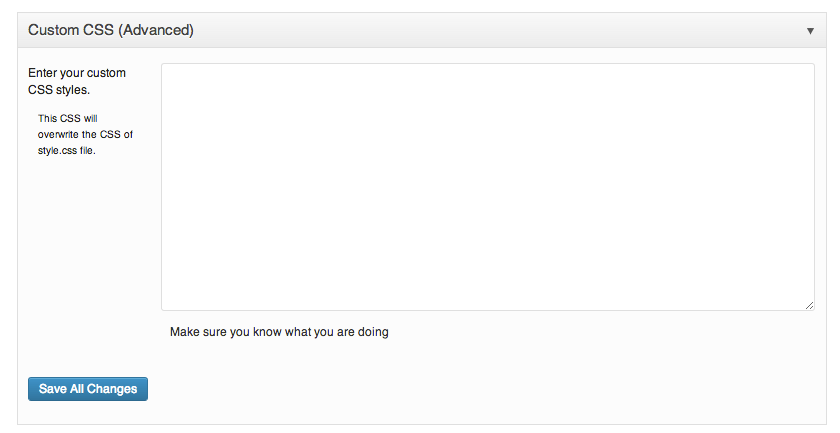 Theme allows to use Custom CSS. This feature will overwrite the theme’s default style.css.
- In the WordPress dashboard go to Appearance->Theme Options->Main Options->Custom CSS(Advanced).
- Add your own CSS and save it using Save All Changes button.
8. How to Disable Page Comments

- Open particular page on which you want to turn off comments via WP dashboard.
- Look for the Discussion box below the post editor box.
- It might be disabled but you can enable it via Screen Options.
- Uncheck Allow Comments in the Discussion box and hit Update.
9. Recommended Image Sizes
9.1 Featured image size
- Width: 1018px
- Height: 460px
9.2 Blog Image Large featured images
- Width: 670px
- Height: 300px
9.3 Blog Image Medium featured images
- Width: 230px
- Height: 230px
10.How to set up Blog Page
 You can show your Blog page in three different ways:
- Large image with excerpt content
- Medium image with excerpt content
- Full content display.
You can have a look for examples on Travelify Blog demo Steps to setup blog page:
- Create a new page, give it a name (for example “Blog” but you can use any name) and select Blog page template from Template dropdown.
- Choose between three options: Blog Full Content Display, Blog Image Large, Blog Image Medium.
- Click Publish.
- Now all your posts will be shown as per your template selection.
If you want to use this newly created Blog using Blog Template to be used on front page you need to do these extra steps:
- Go to WordPress Dashboard – Settings – Reading
- Select “A static page (select below)”
- Choose your previously created blog page for “Front page”
- Now save changes and you will see your chosen Blog Template for Blog in homepage
Note: images for each of the post shown in Blog Layout are featured image for that particular post.
11. Translation
Travelify theme is translation ready which means that you can add a new language with ease. No coding skills are required, just plain text input based on existing English queries. More information on WordPress theme translation you can read here.
12. Social Icons
Social icons in the header like you can see in Travelify Demo can be enabled via WordPress dashboard – Apperance – Theme Options – Social. Add full URL to your profile to make icons visible in your website’s header. Only icons that have valid URLs added will be displayed.![]()
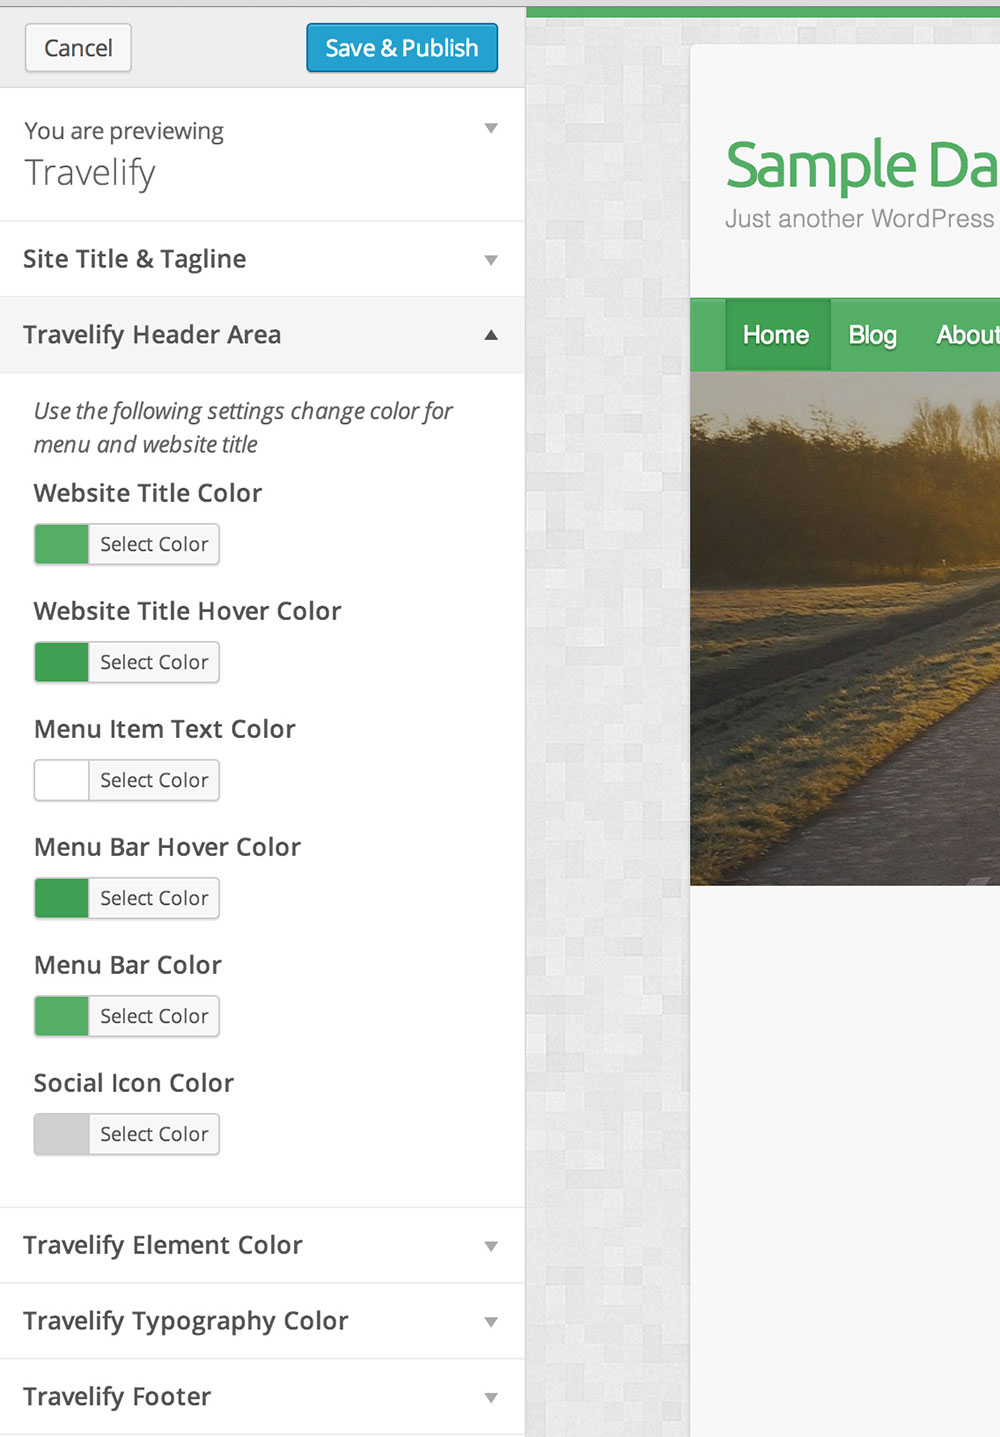
13. Change color scheme
Since Travelify 2.0 it is available in 16 million color variations. There are 15 color pickers included to change color of various design elements such as navigation, social icons, buttons, text color and other. These settings and color pickers are based on Theme Customization API and can be accessed via WordPress dashboard – Appearance – Customize.
14.Footer copyright information
Footer default copyright information is hard coded and can’t be changed. It will change date and title automatically, so you shouldn’t worry about that.
However, there is another option to customize footer information. Since Travelify 2.0 we have created a custom field to add custom copyright or any other information in footer. This field can be found via WordPress dashboard – Appearance – Customize – Travelify Footer.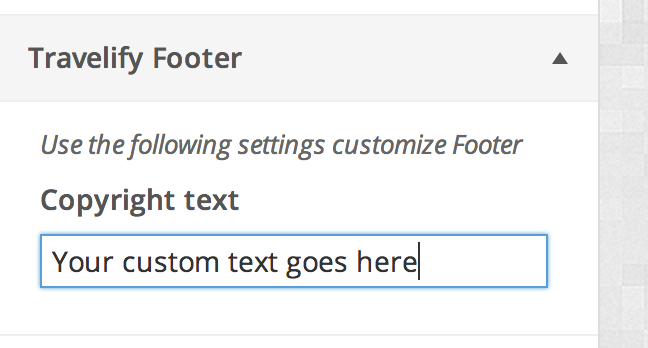
This field can handle HTML markup, so you can even add images, icons, formated text or whatever you can come up with.
15.Other
For other theme instructions and support related questions please check our support forum.